Fireplace Storage Benches
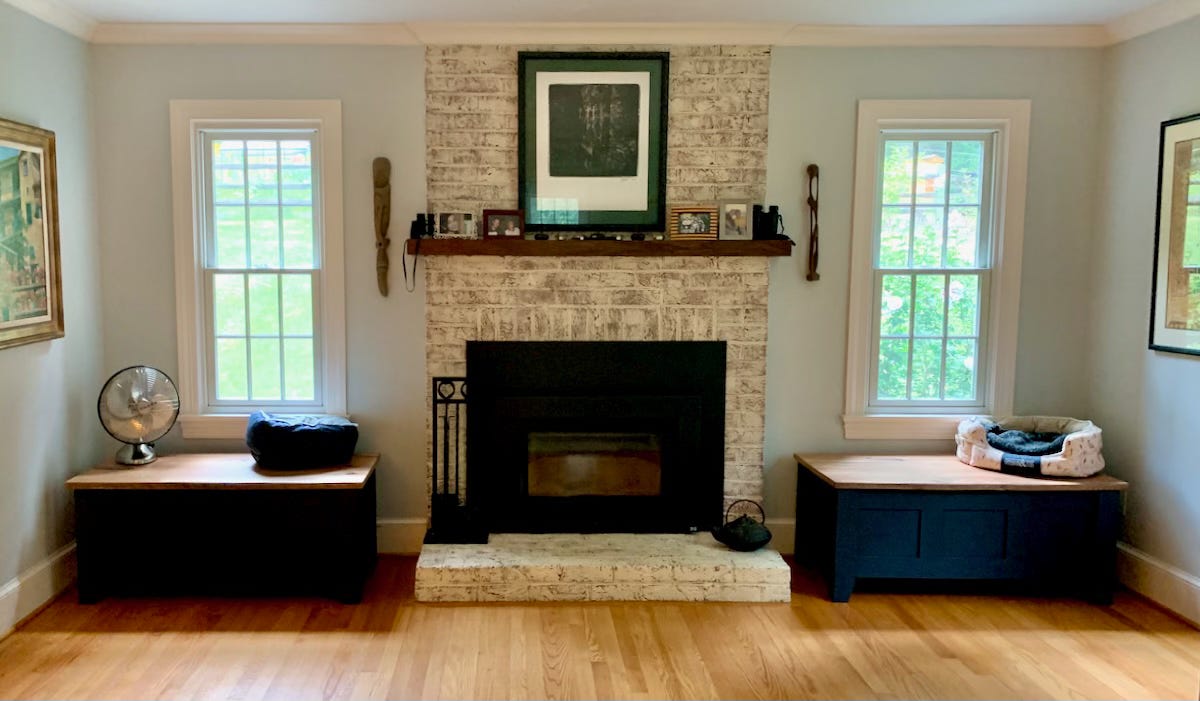
I needed a place to store firewood and a place to sit, so I solved both problems with a pair of Shaker-style storage benches.
There are several rooms in our house I would like to completely redo — the kitchen, of course, what with its grossly outdated formica countertops and knotty pine cabinetry; our hallway bathroom, which looks like it was ripped from a 1963 Life magazine advertisement; our basement, which one day could be a great family room, but for now is a dark and partially finished storage area for all manner of life’s detritus.
And yet, for some reason, none of those rooms has actually garnered much of my attention. Instead, I’ve mostly focused on our living room. It was the first room I painted. Over the past couple of years, I’ve added crown molding; installed a wood-burning fireplace insert (love it!); painted the red brick fireplace; and installed a new walnut mantle.
But, I still wasn’t satisfied. Far from it. I didn’t have a good place to store firewood. The spaces under the windows bracketing the fireplace were poorly used and looked messy. Seating in the room is a problem. The TV was awkwardly placed on a too-small table.
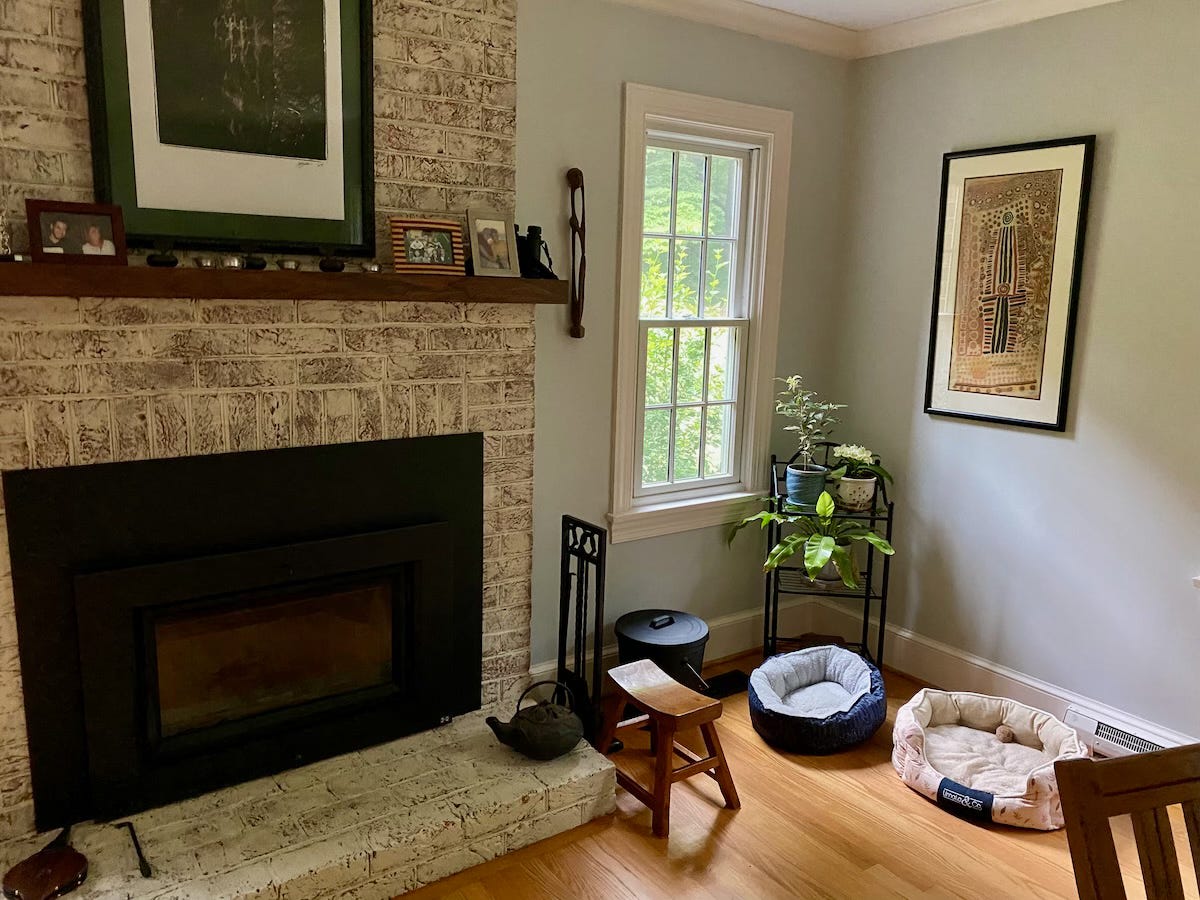
So, I decided to take action. What the room needed next, I decided, was a pair of storage benches that would sit under each window. They could hold firewood and also be good places to sit and soak in some southern-facing sun.
I also wanted to take advantage of what I had learned on past projects — the mudroom and cherry table, for example — and put those lessons — rails, stiles, floating panels, mortise-and-tenon joinery, tapered legs, etc. — into action with this next project.
I began by taking some measurements. A few things I needed to take into consideration were the dimensions of the space, obviously, but also the locations of the in-floor HVAC registers, in-wall power outlets, baseboards, the windows’ locations, and the overall gestalt of the living room.

I took some photos and imported them into Apple’s FreeForm app where I could annotate with measurements.
Thinking Through Design
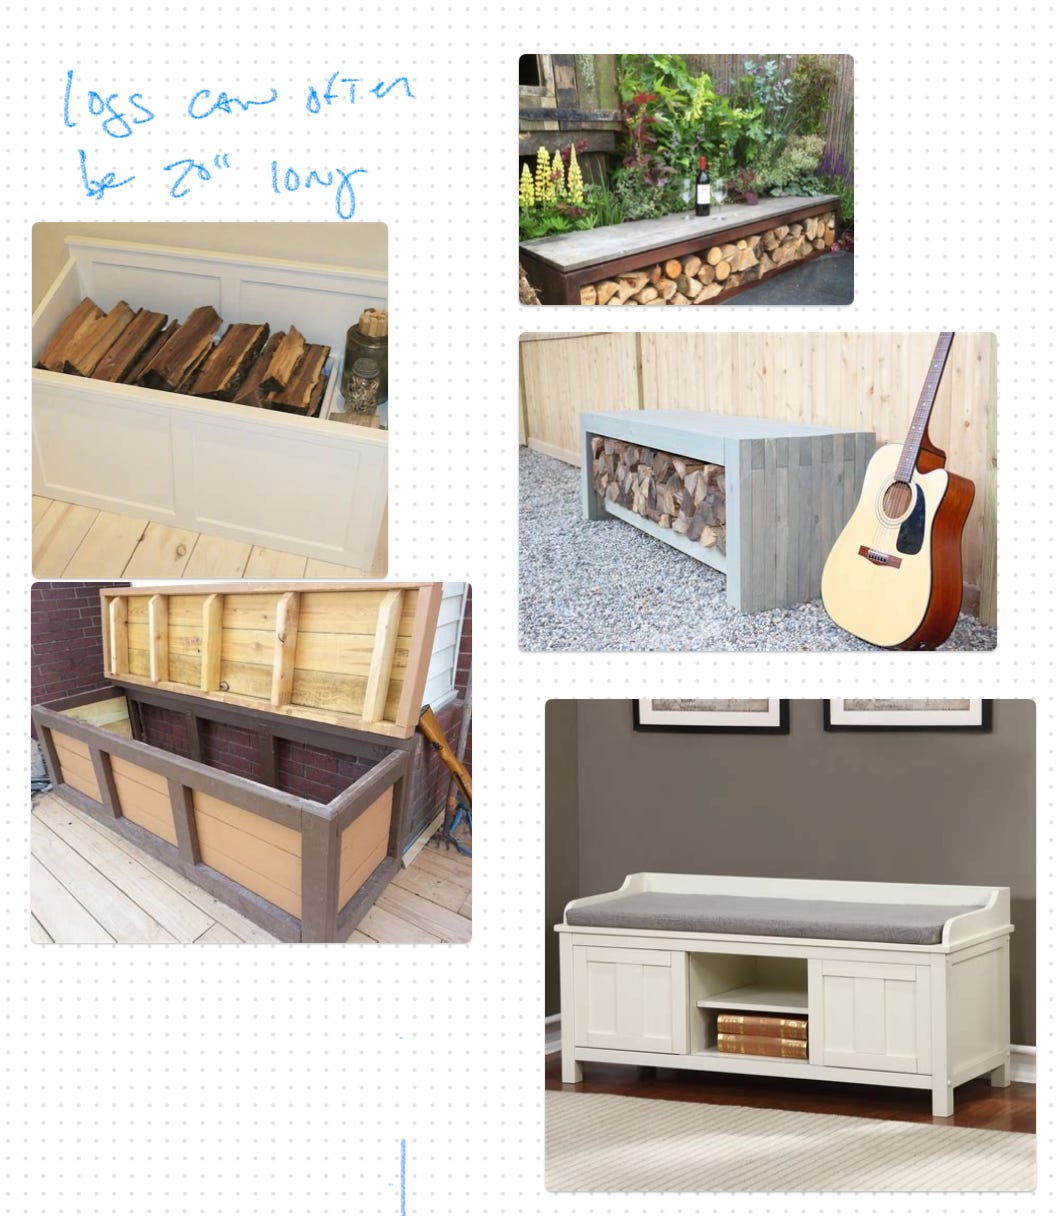
I had a general idea of what I wanted, but as always, the devil is in the details. In an attempt to refine my ideas, I did a little Google image searching for inspiration. I took the images I found and added them into the FreeForm file. It was a helpful way to gather concepts and begin to focus on what I did and didn’t want.
Each bench here has elements I like, and some I don’t. I didn’t want the firewood to be exposed — too tempting for pets to get into it and create problems, and too easy for dust and dirt to spread around the room. I also knew that, due to the HVAC registers in the floor, I needed to lift the benches off the ground a few inches to allow for airflow. I also wanted the benches to be “pieces of furniture” and not just utilitarian boxes.
With this in mind, I sketched out what I thought I wanted to make:
My mother and my biological father were both incredibly talented artists, so it’s with great embarrassment that I share the above drawing. Clearly I inherited none of their remarkable drawing talent. Nevertheless, my childlike scribbles helped me land on a Shaker-style bench with four legs to keep the bench off the ground, and a flip-top-hardwood lid.
I turned the sketch into detailed schematics on graph paper with a ruler and pencil. That helped me get pretty good, if not precise, measurements.
Even with those drawings, though, I wasn’t ready to get started. Sure, I knew what I wanted to build and what it would look like and how big it would be, but I hadn’t figured out how to build what I had drawn.
From Paper to Wood
Some aspects of the bench were obvious to me. For example, I knew I wanted the top to be made from hardwood with a natural-looking stain. I also wanted to use only wood joinery — no nails or screws.
Going with wood joinery meant using mortises and tenons along with floating panels. To do that, each of the four legs would act as stiles. They’d have deep mortises for the rails plus shallow grooves to receive the panels. The rails would also have shallow grooves for the panels, as would the “interior” stiles that would sit between the three front and rear panels.
I also spent some time thinking about the legs, which would be roughly four inches square. Rather than buy lumber in that dimension, which would be expensive, I decided I could simply face-glue 1x4 lumber — the same lumber I planned to use for the rails and stiles — to get the desired thickness, especially since I planned to paint the bench base anyway.
After considerable time thinking it out, I finally went to the home center and bought a bunch of 8-foot 1x4 boards. The plywood I needed for the panels and the base I already had on hand.
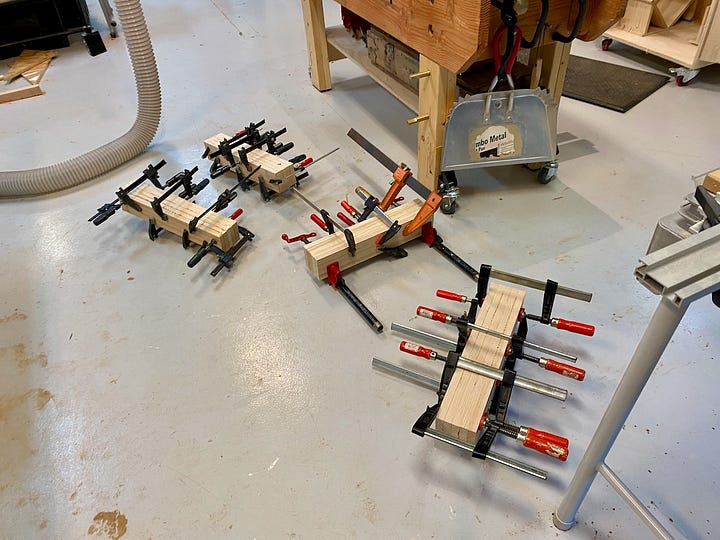
Back in the shop, making the legs was my first step. I selected the straightest boards I could find, cut them to approximate length, and glued together four groups of five boards. Once the glue dried, I ran the legs through the planer to smooth and square them. Then I cut them to length. Using the miter saw, I added a short taper to the bottom of each leg. Then I rounded over the edges and sanded everything smooth.

Next, I marked out where on the legs the rails would sit so that I could determine the location of the mortises. I wanted the rails to be set back from the legs by about half an inch. The tenons were a quarter of an inch inset from the rails, so that put the mortises three quarters of an inch back from the face of the legs. I marked everything out with great precision — no mistakes this time! — and then took the legs to the drill press where I had a mortising jig set up.
Each leg required four mortises — an upper and lower on two sides — so that’s 16 mortises on each of the two benches, or 32 in total.
I started drilling the mortises like I did on the cherry table, but alas, things did not go as swimmingly. After cutting three or four mortises, the drill bit snapped off, leaving me stuck and less than thrilled.
It’s usually a good idea to take a break when something goes wrong, otherwise I risk compounding the problem and then getting all Hulk! Smash! Argh! So, I turned out the lights and went to bed.
During my away-from-shop time, I thought about my options for cutting the rest of my mortises. One option, of course, was to use a chisel and mallet. Another was to use a router.
The router offered a faster, more precise option, but would require me to construct a custom jig in order to ensure my cuts were properly aligned. The mallet and chisel approach promised to be more difficult, but maybe less cumbersome? So I started with that. I set my chisel on the marks and began banging away. Little by little, I sliced the wood’s fibers and created my mortises, starting with digging out the broken drill bit. And little by little, I decided this wasn’t the approach I was going to stick with.
Oh, maybe if I were more patient or more skilled or more hipster, I would have stuck with the chisel and mallet. But, because it was so slow-going and the cuts simply weren’t as nice as I’d like, I decided to try the router.
The thing is, I was a bit scared. It wouldn’t take but the most incidental slip of the router for me to completely FUBAR the job. Nevertheless, I persisted. I gathered some scrap plywood and built a jig that would perfectly align the router with the marks on my leg. It was at this point that I realized the router wasn’t just a good idea, but actually, the best idea.


Until this point, I had been focused only on cutting the mortises for the rails, completely forgetting that I also needed slots for my panels to slip into. With the jig I was building, I could actually cut both at the same time. Why this hadn’t occurred to me before, I can’t say.
I set each leg into the jig and started routing away. My quarter-inch bit dug through the wood and made nearly perfect cuts. “Nearly perfect” because several times I made mistakes in how far I cut or in not properly securing the jig. In those cases, I was able to fix my mistakes with some glue and scrap wood. Once assembled and painted, nobody would ever be the wiser.
Once all of my mortises and slots were cut into the legs, it was time to cut the rails.
Working the Rails
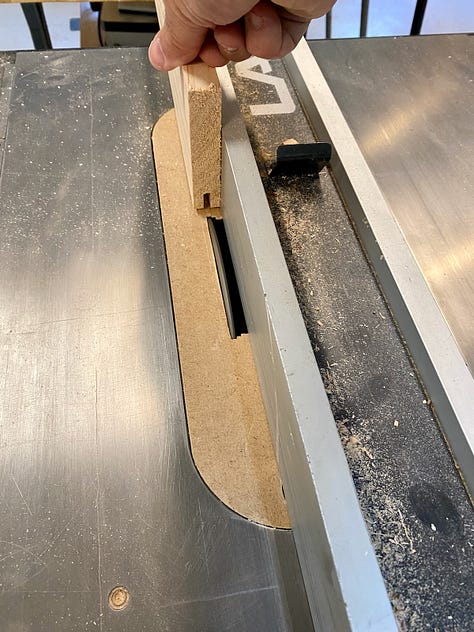
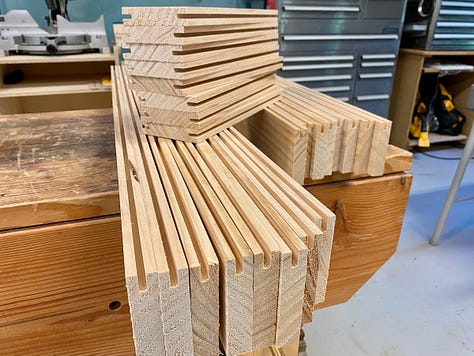
I cut my rails and stiles to length and then ran each over a quarter-inch-wide blade in the table saw to create the slots for the panels to sit in.
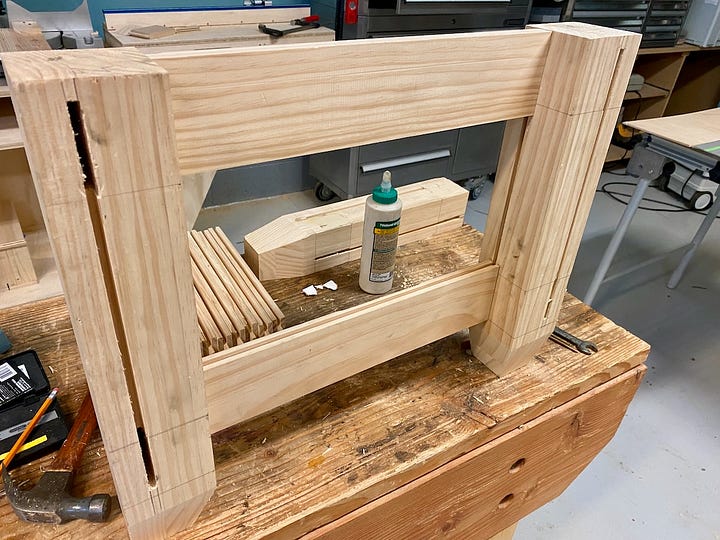
Next, using my table saw’s dado stack, I cut away the rails’ and stiles’ shoulders to make the tenons. After a few adjustments and refining cuts, the tenons fit into the legs quite beautifully.

Next, it was time to cut the panels.
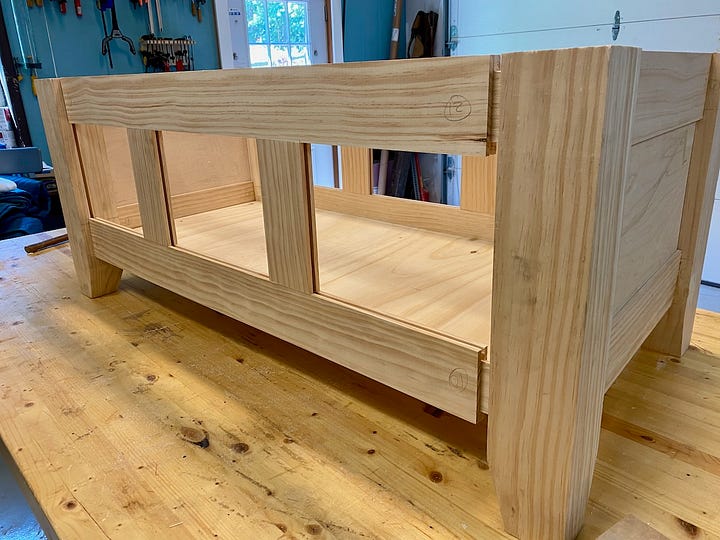
Each panel would be made of a quarter-inch-thick piece of plywood. I measured the spaces where they’d go, factored in the depth of the slots, and then cut each panel. During a dry fit, I had to make a few more adjustment cuts, but eventually everything came together quite perfectly. I was feeling pretty good about myself.
I wasn’t done yet, however. The boxes still needed bottoms. Since I planned on stacking heavy firewood in each box, I knew I needed a sturdy bottom. For that, I used three-quarter-inch plywood, which itself would sit in slots in the bottom rails, which I cut next.
What I still needed to figure out, though, is how the bottoms would fit around the legs, which extended into the box by a couple of inches in each dimension. I figured I had three options:
Cut deep slots, almost like mortises, into the legs for the rectangular plywood to slide into. This had a certain elegance, but I felt that the depth of the slots would weaken the legs too much. I also thought making the cuts — and not letting the cuts show on the outside of the legs — would simply be too difficult.
Cut shallow slots, like those in the rails, for the base to sit in. In this case, I’d still have to notch the plywood base, but at least the base would be supported in all corners as well as the sides. Cutting those slots still seemed difficult, and chances are I’d screw them up and they’d be visible from the outside.
Leave the legs alone and just notch out the plywood. This didn’t seem as elegant or sophisticated, or offer as much strength, but it would be pretty easy to do and would certainly look good from the outside.
What to do? What to do? Option three seemed like a cop-out and option one seemed like too great a risk. So, I decided to go with option two — a nice balance of strength and do-ability.
But I still needed to figure out how to cut grooves into the sides of the legs. I decided I could do this on the router table, though it wouldn’t be easy. I created stop blocks to keep me from cutting too far across the legs. And for half of the cuts, I actually had to draw the piece backwards across the router — not the safest approach, I might add — in order for the cuts to land in the right spot. Nevertheless, with great care and nerves, I managed to do it. The few small mistakes I made could easily be hidden with wood filler and paint.


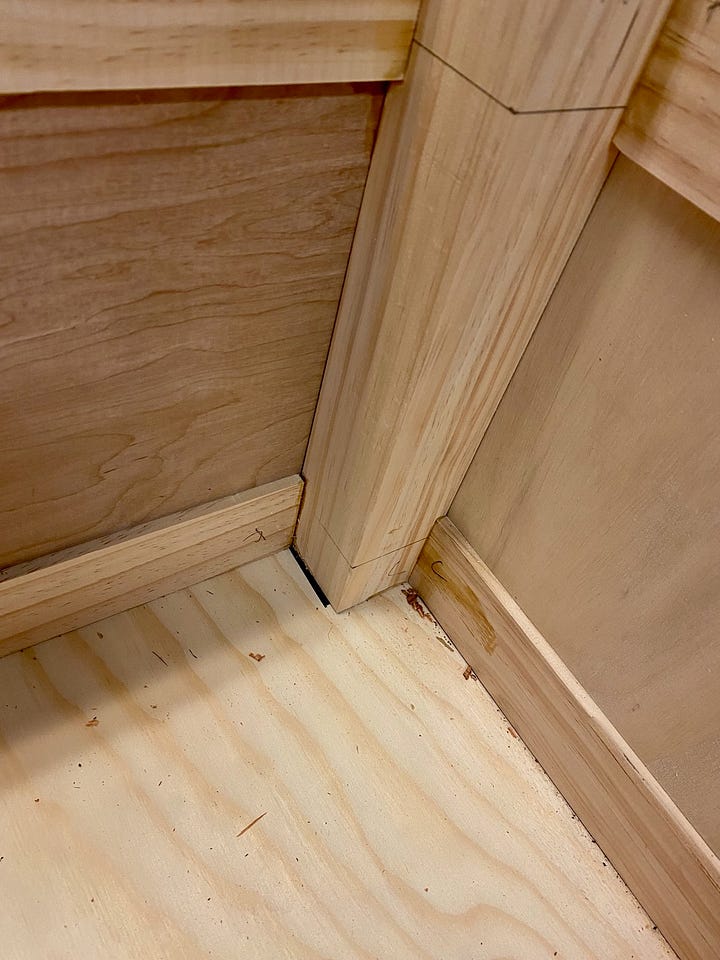
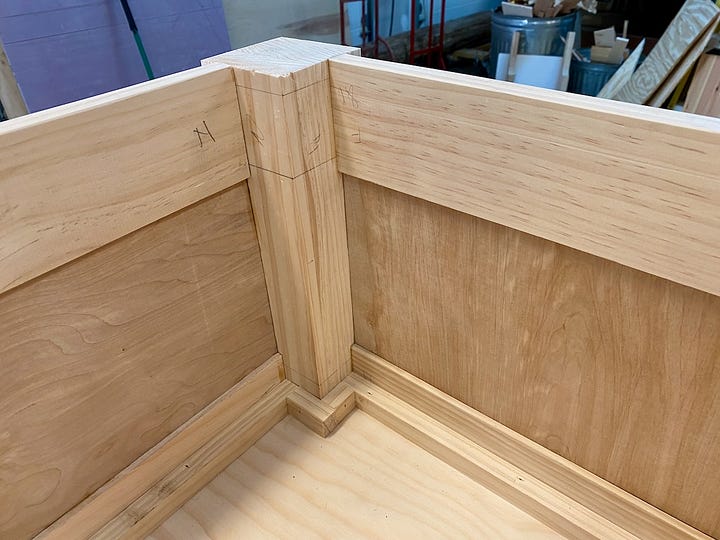
When it was time to cut the base, I measured the inside of the box and cut my plywood to fit. I then notched each corner so it could run around the legs while still sitting in the grooves I cut. Then I dry-fit the pieces and immediately realized my mistake: I forgot to add to the dimensions of the base the depth of the notches in the rails! Each base was a little too short. Argh!
After Hulk! Smash! subsided, I decided to use my mis-cut pieces anyway and just add trim on the inside of each box to hide my error. After all, with plywood prices being what they are, cutting new bases was going to be moderately costly.
Finally with all of the base pieces being cut and ready, I busted out my glue bottle and began assembly. Following the copious marks I had made — piece A1 goes with piece A2, etc. — I fit things together. Rather than try to assemble everything at once, I started by just assembling the end units. Once those dried, I was able to relatively easily assemble the rest of the boxes. This approach allowed me to deal with fewer pieces all at once. To help keep the joints tight, I used tie-down straps as clamps and left the bases to dry overnight.

Once the glue was dry, it was time to paint. For the past few years, my dad had been extolling the virtues of “milk paint,” which I knew nothing about. After doing a bit of research, came to learn that “milk paint” is made from — wait for it — milk. Seriously. And actually, it’s really nice to work with. The General Finishes paint I used is water-based, low VOC, and dries quickly. It also has some lovely colors and a beautiful flat finish.
After several coats of dark blue, the bases were ready. Now it was time for the tops.
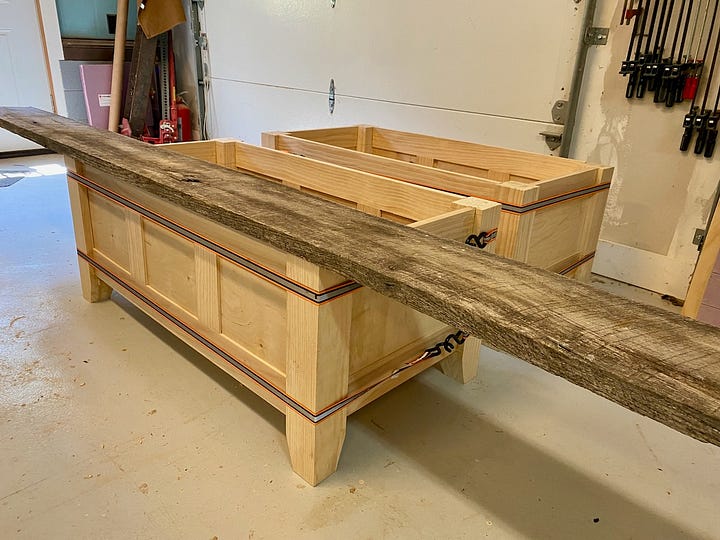

I set the painted boxes aside and turned my attention to the bench tops. I decided to raid my stash of reclaimed lumber and pulled out several planks of what I think was red oak that had been hidden away under tarps on our property. I really liked the idea of using weathered wood from our property as furniture for our house.
I planed each plank to a consistent thickness and then used my track saw to make nearly perfect jointed edges. With a hand plane, I refined the edges until they were butt up against each other without any gaps.


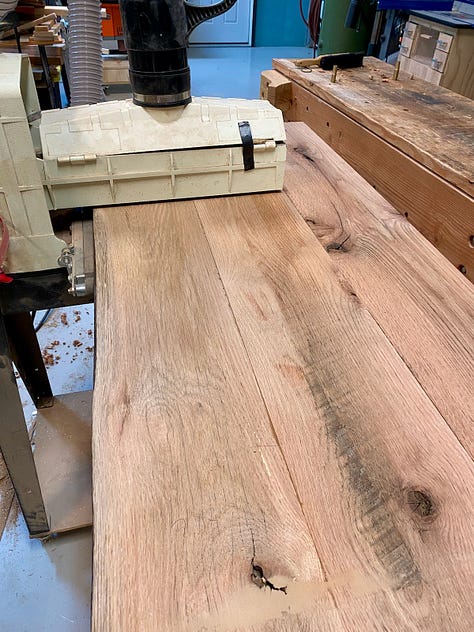
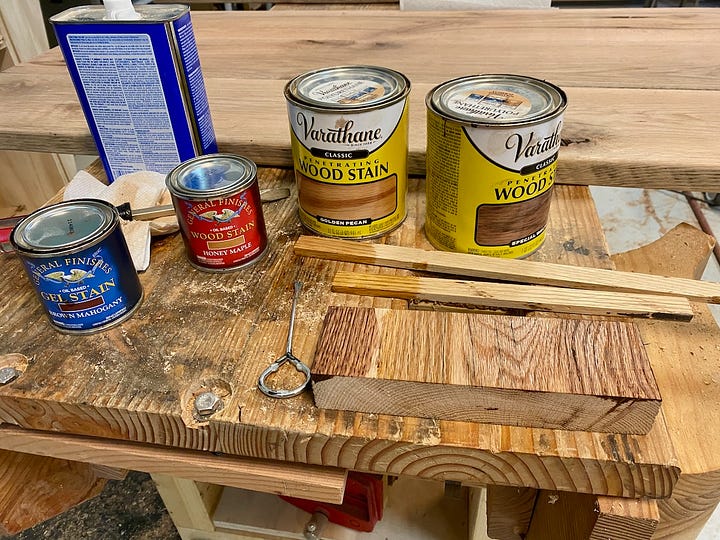

After gluing the pieces together, I ran them through my newly acquired used drum sander and then squared off the ends, rounded over the edges, and palm-sanded everything smooth. I tested a few stains on some scrap wood and settled on “Golden Pecan.” Once the stain dried, I applied a couple of coats of General Finishes flat water-based topcoat, which gives the wood a really beautiful, natural look.
Now I was in the home stretch. All that remained was attaching the tops to the boxes. I could, of course, simply attach the tops with hinges and that’d be that. However, plain hinges wouldn’t provide any support to the tops when they were open, making it so the tops could slam down and crush fingers.
To address this, I needed torsion hinges, which are designed to support weight when open. I found just the right ones, almost. Although the hinges are rated for 60 inch-pounds, that doesn’t mean it can hold up a top that weighs 60 pounds. It all depends on the depth of the top. So, you have to use a formula, which is (Lid Depth x Lid Weight in Pounds) / 2. My tops were something like 40 pounds each, but the depth was something like 24 inches. Multiply those numbers to get 960 and divide by 2 and you have: 480 inch-pounds. If each hinge could carry 60 inch-pounds, that meant I needed eight hinges per box! And these hinges aren’t cheap.
Rather than spend a small fortune on more than a dozen hinges, I decided to mix and match. I’d put two torsion hinges on each lid and also add two lid stay supports, each of which could hold up to 125 inch-pounds. With a pair of each, I’d be in good stead.

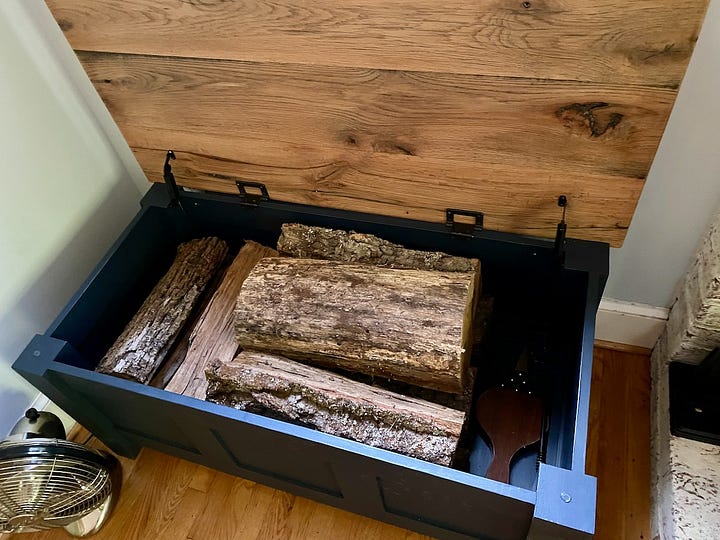
With the hinges and stays installed, the storage benches were done. I slid them into place, loaded firewood into their bellies, and closed the lids. Fini.


