Nice Legs: Building a Custom Cherry Table
Tapers, tenons, mortises, and making it all fit together to create a custom table base for a colleague's existing tabletop
As word of my woodworking hobby spreads, I occasionally receive requests for custom projects. I’m not going to lie: I love that. In my opinion, referrals, more than imitations, is the sincerest form of flattery.
And flattered I was when some of my earlier projects led to a work colleague asking if I would be willing to take on a project for him and his wife. Some years back, they had received a lovely hardwood tabletop with the promise of a base to match. After a few years, though, the base hadn’t yet materialized. So my colleague asked if I’d make one, which I was happy to do.
The tabletop had been made with a combination of oak and cherry planks. It was about an inch thick and roughly 30 inches wide and 50 inches long. My colleague and his wife wanted a simple base to match. We looked at some examples on furniture sites and I sketched out a Shaker-style base consisting of four tapered legs connected by aprons, which they approved. We decided to make it entirely of cherry.
I calculated how much wood I’d need and headed over to my favorite lumber yard. There I picked out three large eight-inch wide planks of cherry, two about two inches thick and nine feet long and one about 1-¼ inches thick and nine feet long.
Thinking It Out
The slowest part of any of my projects is the time between deciding to make something and the moment I start cutting. There are several reasons for this. One is that I’m scared. I’m completely petrified that I’m going to screw up and waste some beautiful wood, which would not only be expensive and embarrassing, but also feels like I’d be committing a sin — like I’ve been gifted this precious material that the Earth spent decades creating and I’ve just wrecked it.
The second reason, which I suppose is an extension of the first, is that I’m constantly puzzling out how to make what I have in mind so that I do it right. And not just what I need to do, but what the steps are exactly — and in what order — to get from raw wood to finished product.
And so the cherry lumber sat in my shop for a month or so before I finally picked it up and started working it. In that time, I worked out most of the details and felt confident — misplaced, as usual — that I could proceed without making any mistakes.
I based my plan on my own dining room table, which my wife and I bought years ago. It’s seen better days and will one day be replaced by something I make, but as source material, it was a perfect prototype for what I wanted to build. Each of the four legs were tapered on the inside, from about four inches to about two inches. The apron that stretched between the legs extended down about three inches. And though our table uses bolts to fasten the legs to the aprons, I planned to make my colleague’s table with mortise-and-tenon joinery, which I considered to be superior to nuts and bolts.
Since my legs were designed to be four inches thick, I knew I would need to double-up the two-inch-thick pieces to get to the desired thickness. Once I worked out the lengths of the legs and the lengths of the aprons, I was ready to start cutting.
Making Sawdust
As usual, the first step in the project was to clean up the raw lumber into flat, square pieces. I cut the thick boards into 40-inch lengths and then put them through the planer to flatten the faces. After a few passes, the pieces were nice and flat. Since they were about eight inches wide, I then ripped them lengthwise to create all eight of the four-inch-wide, two-inch-thick leg pieces that I would face-glue together to get four four-by-four square legs.
I also cleaned up the thinner board from which I’d cut my apron pieces. It, too, was about eight inches across, so I ripped it in half and then rough cut it to get four apron pieces — two for each end and two for each side.
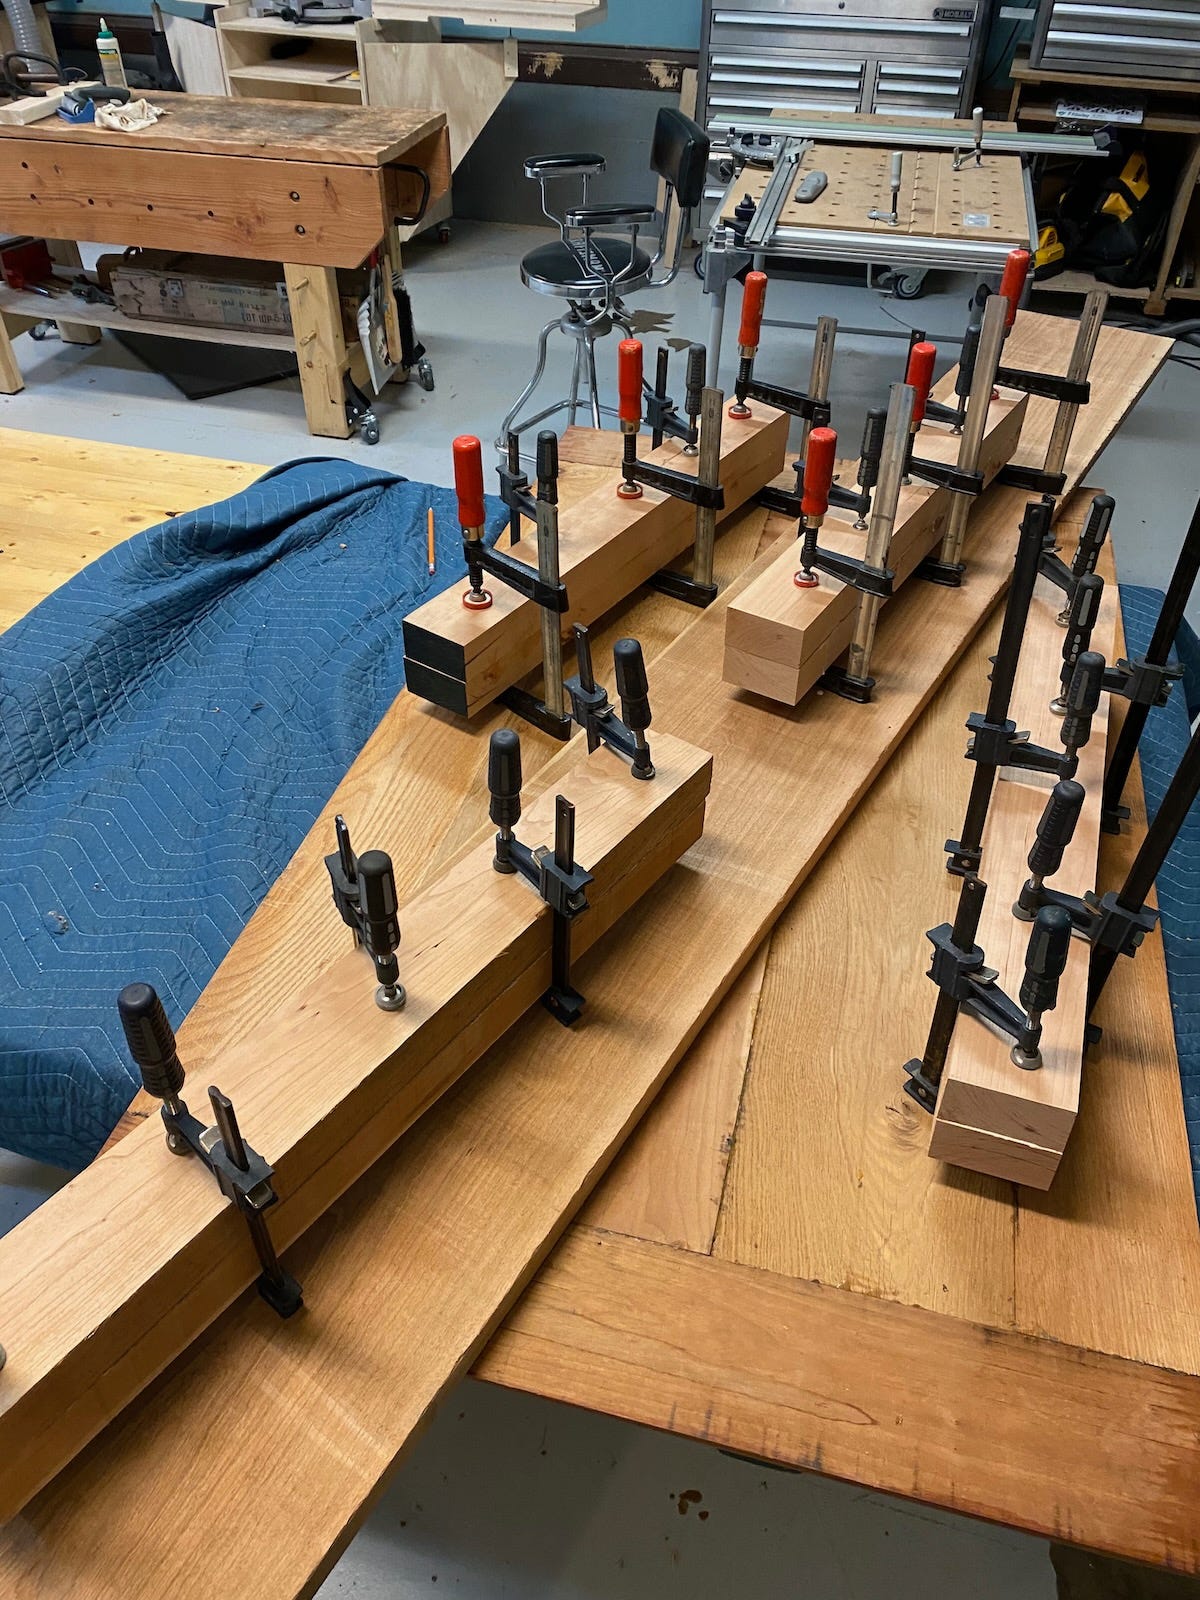
Returning to the leg pieces, I slathered glue on one face of all eight boards and then mated and clamped four pairs together. After letting the glue dry for a day, I removed the clamps. The cross-wise dimensions of the legs weren’t perfectly square (and the glue joints were messy anyway), so I ran the pieces back through the planer. With each pass, I rotated each leg so that they would become perfectly square… about 3-¾-inches in each dimension. Then I cut them to their final lengths.
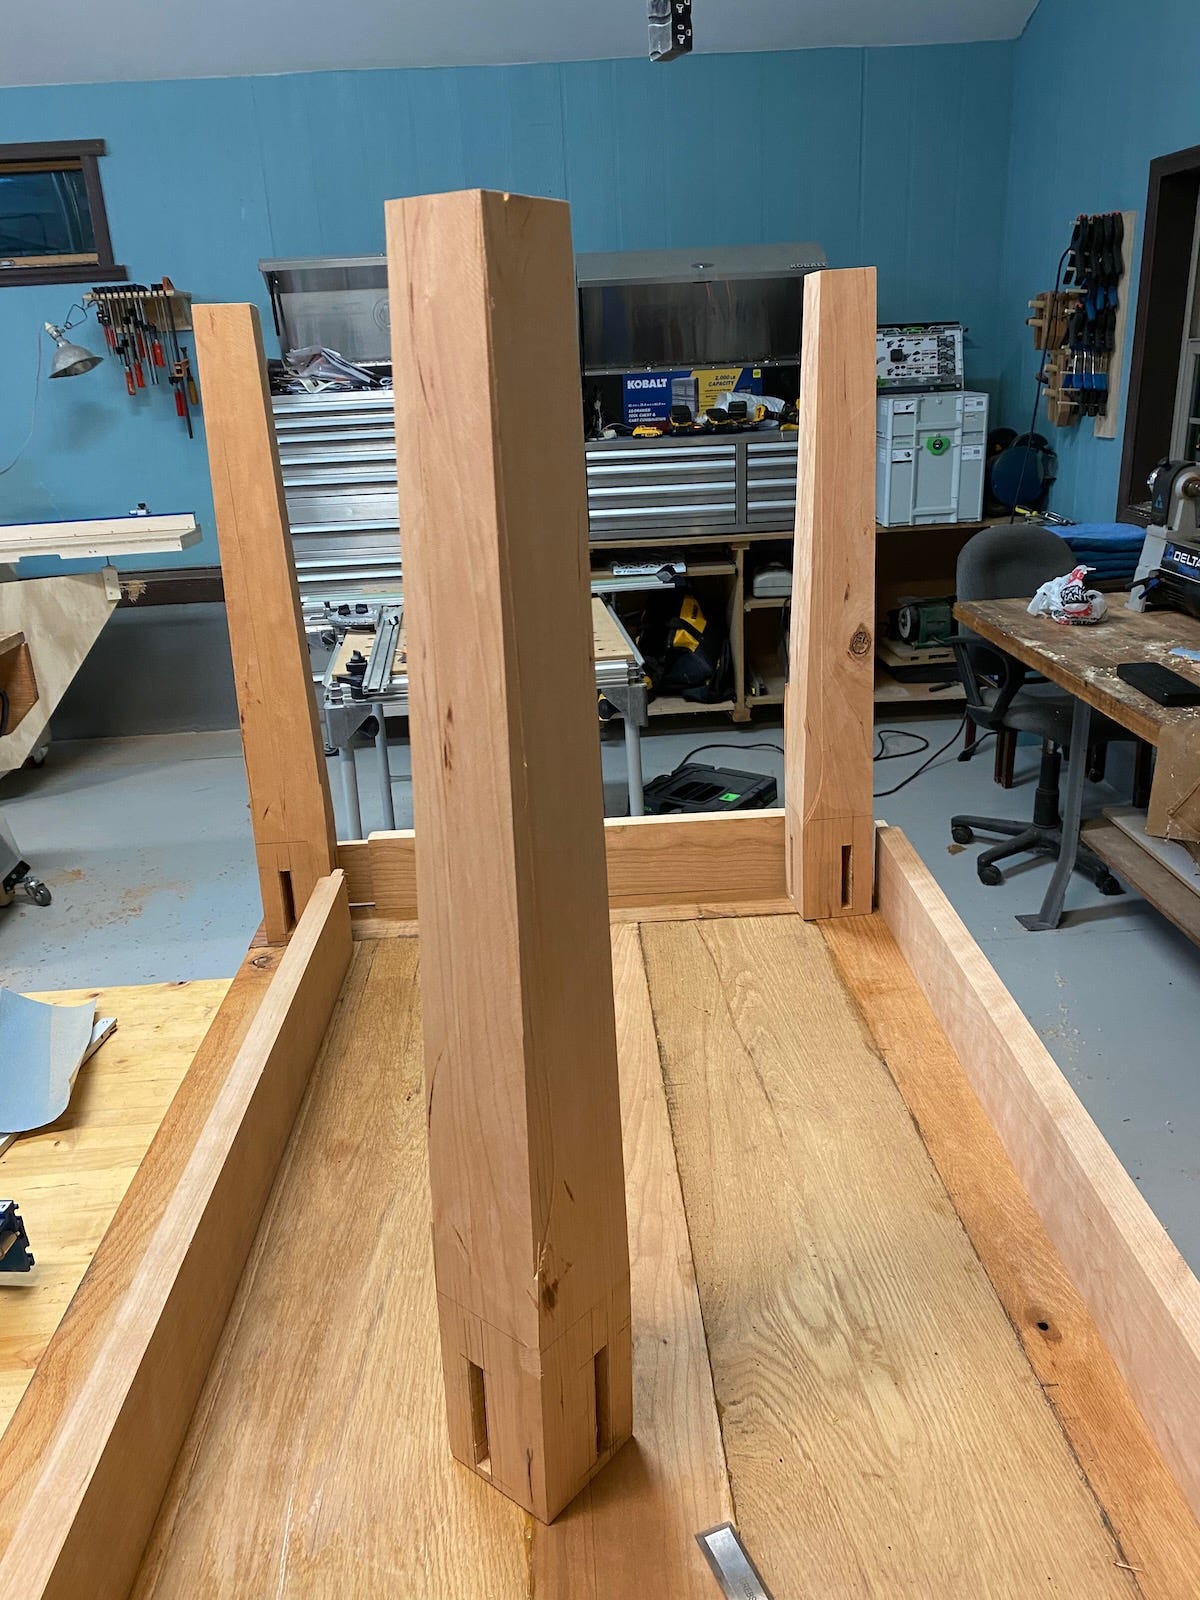
Once that was complete, I prepared to rip them at an angle for the tapers. I made my measurements and drew lines on the legs to indicate where my cuts would go. I decided to start the tapers about 6 inches from the top of each leg. Aside from pure aesthetics, I also wanted (needed?) to preserve a flat surface for where the aprons would meet the legs.
I planned for each taper to cut about ¾ of an inch into the leg at the bottom so that the legs would be about four inches square at the top and two inches square at the bottom.
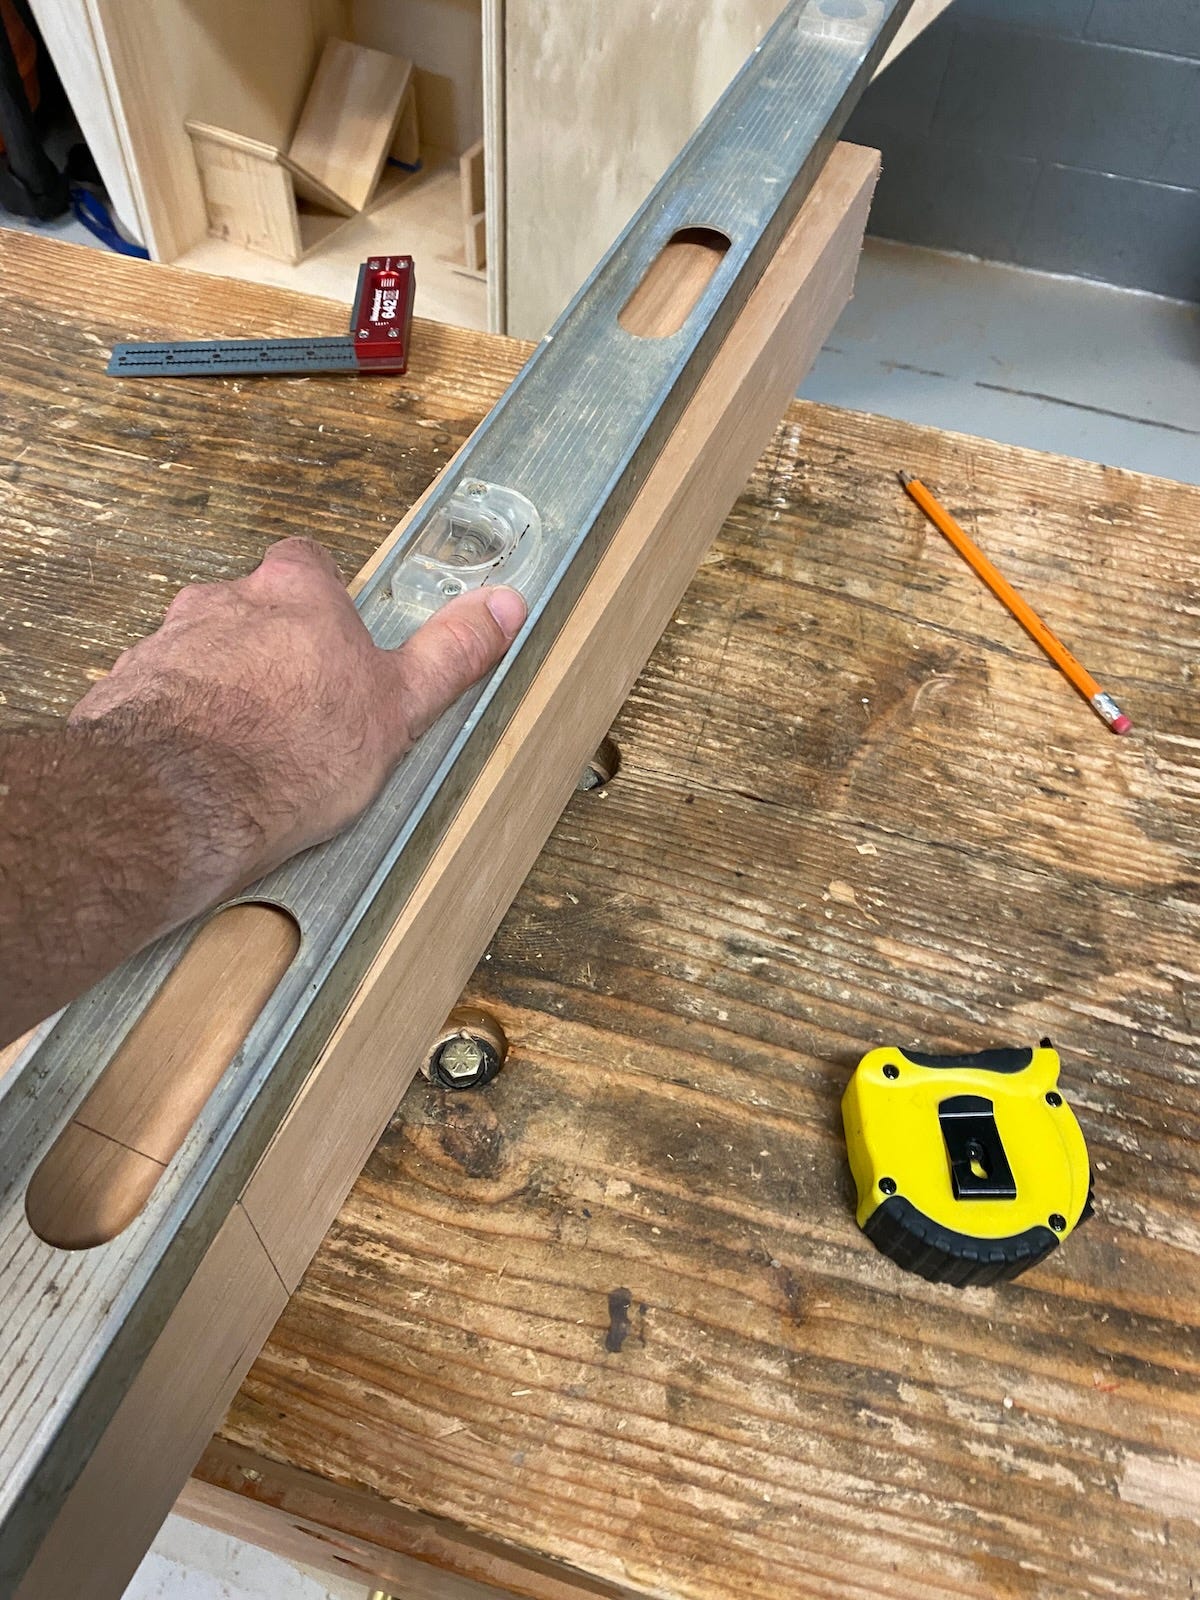
With the tapers drawn on the legs, I then moved to the table saw. Although I had never cut tapers before, I watched a few YouTube videos and had a tapering jig a friend had given me. I set the jig and the table saw fence so that the cut would follow my prescribed line. But before I ran my previous cherry legs through the blade, I first tried it on a piece of scrap plywood. I inspected the result and compared it to the line on my leg. It matched perfectly, so I felt confident that all would be well.
As the saw whirred and the dust collection system hummed, I suddenly I was about to make a mistake: Before cutting my tapers, I first needed to cut my mortises. Were I to cut my tapers first, my legs would sit at an angle when I tried to cut my mortises, which could result in mortises that were angled into the wood instead of driving straight down.
Making Mortises
Having narrowly avoided a potential problem, I set about attaching a mortising accessory to my drill press.
A mortising bit on a drill press (or on a dedicated mortising machine) is essentially a small drill bit set inside a four-sided chisel. When the attachment is driven into the wood, the drill bit hogs out most of the material while the incredibly sharp chisel slices down and creates a perfectly clean square-edged hole.
When executed properly, it’s an effective and fairly easy way to create well-crafted mortises. The key to making this work is to have everything perfectly aligned — easier said than done.
The width of the mortise must precisely match the width of the tenon — that is, the piece of wood that will be inserted into the mortise. Generally the thickness of the tenon is one-third the thickness of the piece of wood from which the tenon extends. My aprons were about ¾ of an inch thick, meaning my tenons would be about ¼ inches thick. Since mortises and tenons need to match, that meant my mortises would also be ¼ of an inch wide.
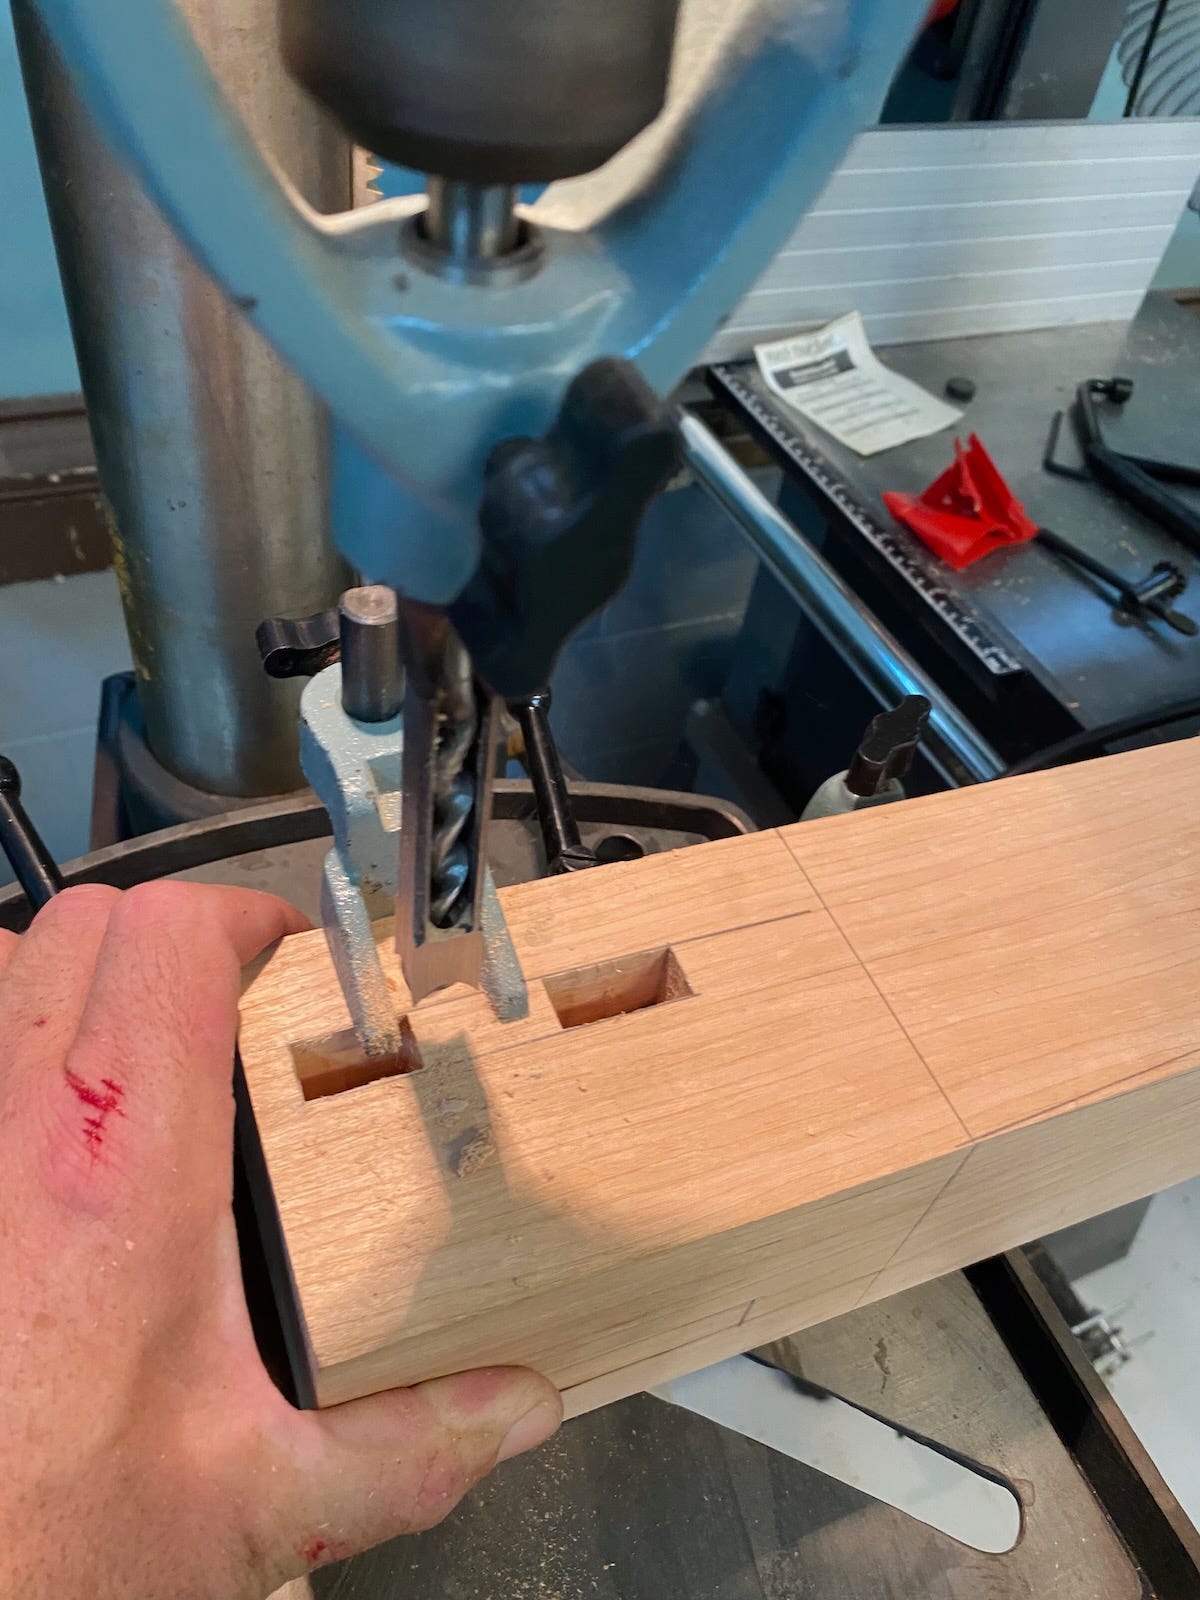
The depth of the mortises should be about one-half to one-third the thickness of the leg, which was just shy of four inches. I figured 1-¼ inches would work well, then.
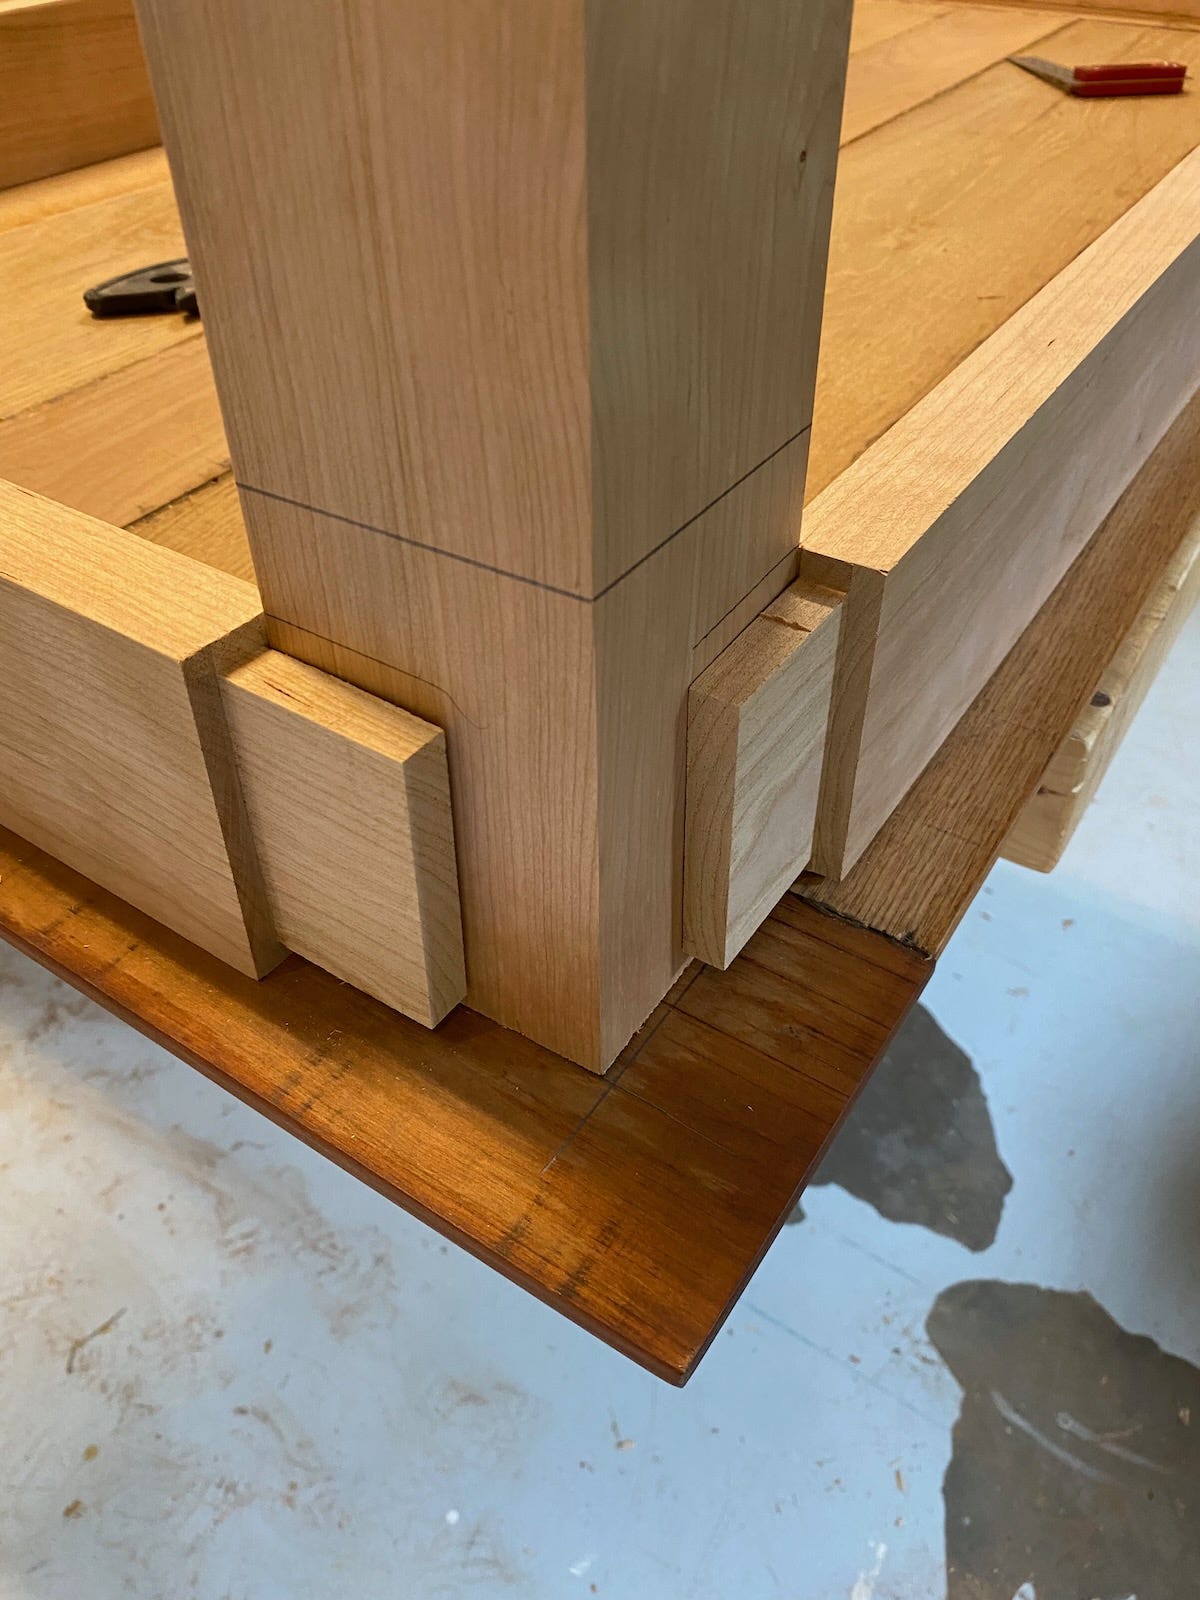
I had the thickness and depth of my mortise, but I also needed to determine the position of it. I wanted the aprons to be set back slightly from the fronts of the legs and for them to be flush along the top. Since the tenons would be cut a quarter of an inch in from all edges of the apron, that meant that the mortises needed to be set ¼ of an inch from the top of the leg and stop ¼ of an inch from where the apron bottom would be. Furthermore, if I wanted the aprons set back just about half an inch from the fronts (and I did!), the mortises should sit about ¾ of an inch from the leg fronts. That would give the ½-inch reveal and then the quarter inch between the apron fronts and the mortises.
Got it? No? Ok, let me put it this way: I needed to figure out precisely where to drill holes into my legs so that everything would fit together just right and look good. It’s a lot of measuring and double-checking. For extra care, I drew the mortise edges on the wood with my pencil just so I knew exactly where to cut.
Once I felt like I had it worked out, I took my legs to the drill press and started cutting. Very carefully, I raised and lowered the mortising bit until I had cut two mortises in each of the four legs. They looked good. I felt good. Now it was time to cut the tenons on the aprons.
Tiny Shoulders
To make the tenons, I needed to cut away about a ¼-inch of wood from the two faces and two edges of for about 1-¼ inches at each end of each apron.
A visual might help. Imagine a bolt. It has a threaded shaft that extends from a larger head. If you were to drop the bolt into a hole, the bolt’s head would keep the bolt from falling through. That shaft is essentially what a tenon is — a projection that is smaller than the rest of the piece. The areas where the tenon meets the rest of the piece are known as the shoulders.
To make these cuts, I swapped out my table saw blade for a dado stack. As I’ve explained before, a dado stack is a series of blades sandwiched together that can cut away large sections of wood and do so leaving behind a flat surface. Dado stacks are often used to cut square channels, like what a shelf might slide into.
In this case, I wanted the dadoes to simply cut away enough wood to leave behind nice square tenons.
I marked where I wanted the tenons to end, set the height of my dado stack and using a cross-cut sled on the table saw, I cut away. After each cut, I rotated the apron. In fairly short order, all of the aprons had perfectly milled tenons.
I dry-fitted the tenons into the mortises, used sandpaper to make a few refinements, and was pleased when everything seemed to come together tight and just right.
Taper Time
With the mortises and tenons cut, I returned to cutting the tapers on the legs. I returned my normal blade to the table saw and started getting things lined up.
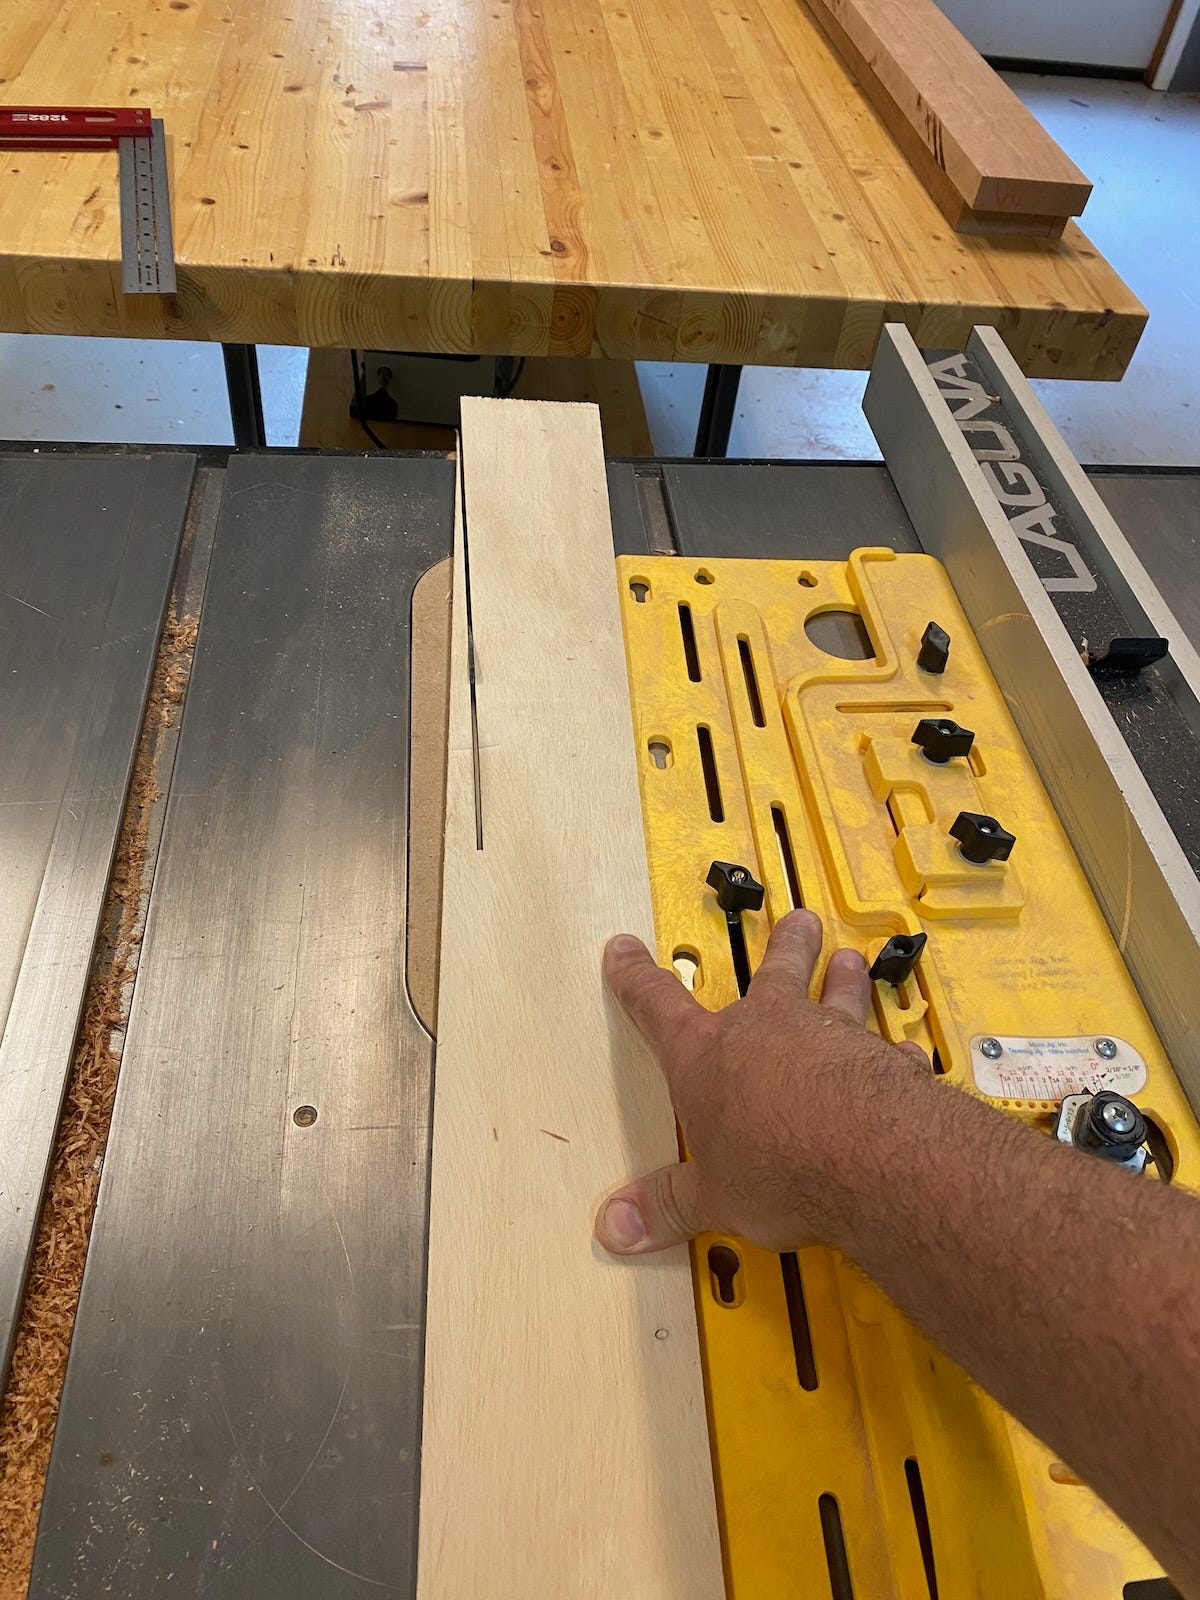
I knew I couldn’t (or at least, shouldn’t) try to cut through four inches of cherry in one pass — it would be too much for the blade to cut through at once and would likely leave behind hard-to-remove burn marks. So I set the blade low and made my first pass. Then I raised the blade and cut again. I did this four or five times and eventually cut most of the way through the wood. But, it turned out my piece was taller than the blade could reach. Uh oh, I thought. There was still a ¼-inch of wood the saw blade wasn’t tall enough to reach.
If I flipped the leg over, I could finish the cut through the leg, but the problem was that the direction of the taper would be flipped to how my jig was set up — and the jig could not be flipped over. Scratching my head trying to figure out what to do, I started thinking I’d need to use a hand saw to finish the job. While that could work, especially in talented hands, I was worried that in my paws I’d draw the blade off line and screw up the leg. Then it dawned on me that I could use a piece of scrap material to make an “opposite” jig. I’d cut the scrap on the same angle as the leg. Once I had the scrap cut, I could set the jig aside, flip the scrap over and then use that to guide my piece through the saw to remove the last bit of wood.
I did exactly that and it worked like a charm. I did this for the other three legs as well. Then it was time to cut the second taper on the leg’s adjacent face. I removed the scrap wood and set the jig back on the table saw. I arranged the leg for the second cut and felt a sudden surge of anxiety. For a moment I thought the first taper would make it near impossible to cut the second taper correctly, due to the angle that had been introduced to the wood. But, that turned out not to be a problem. The first taper sat face-down on the saw and, in fact, helpfully reduced the thickness of the leg so that the second taper could be cut only with the primary jig without needing to flip the leg.
Final Bits, Assembly, and Finish
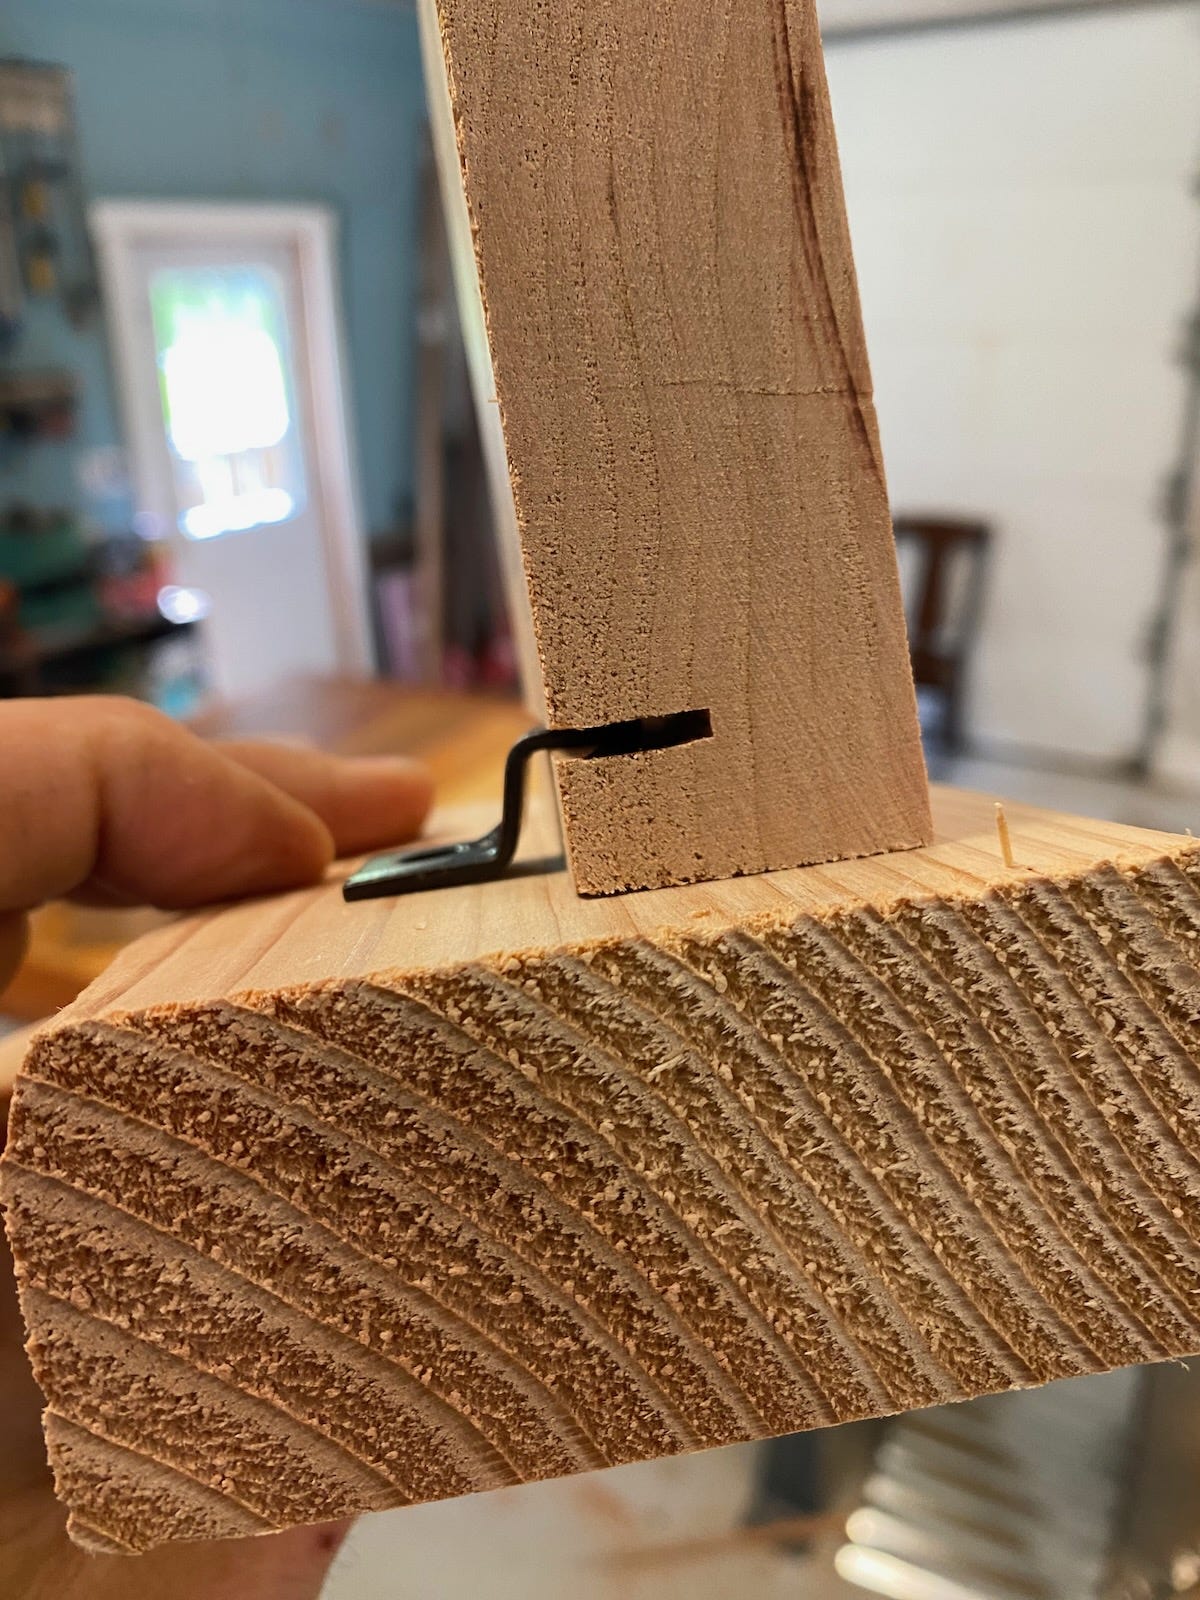
After the mortises, tenons, and tapers were all cut, it was smooth sailing to the finish line, though much remained to be done. I ran all of the pieces through a quarter-round bit on the router table to give the corners some relief. I also ran each apron across the table saw to cut a small groove on their insides. This groove would be home to six clips that would hold the table top to the base (and give the wooden top the ability to expand and contract without splitting). I chamfered the bottoms of the legs to keep them from splintering when the legs get dragged across the floor.
Extensive sanding smoothed out any imperfections and allowed the cherry to exhibit its shimmering brilliance. Then it was time for the glue-up. I brushed glue into each mortise and on each side of each tenon. Then I pushed the pieces together and used clamps and ratcheting straps to pull everything tight. I wiped away the glue that squeezed out, adjusted the piece to ensure a flush top and square corners, and then left it to dry.
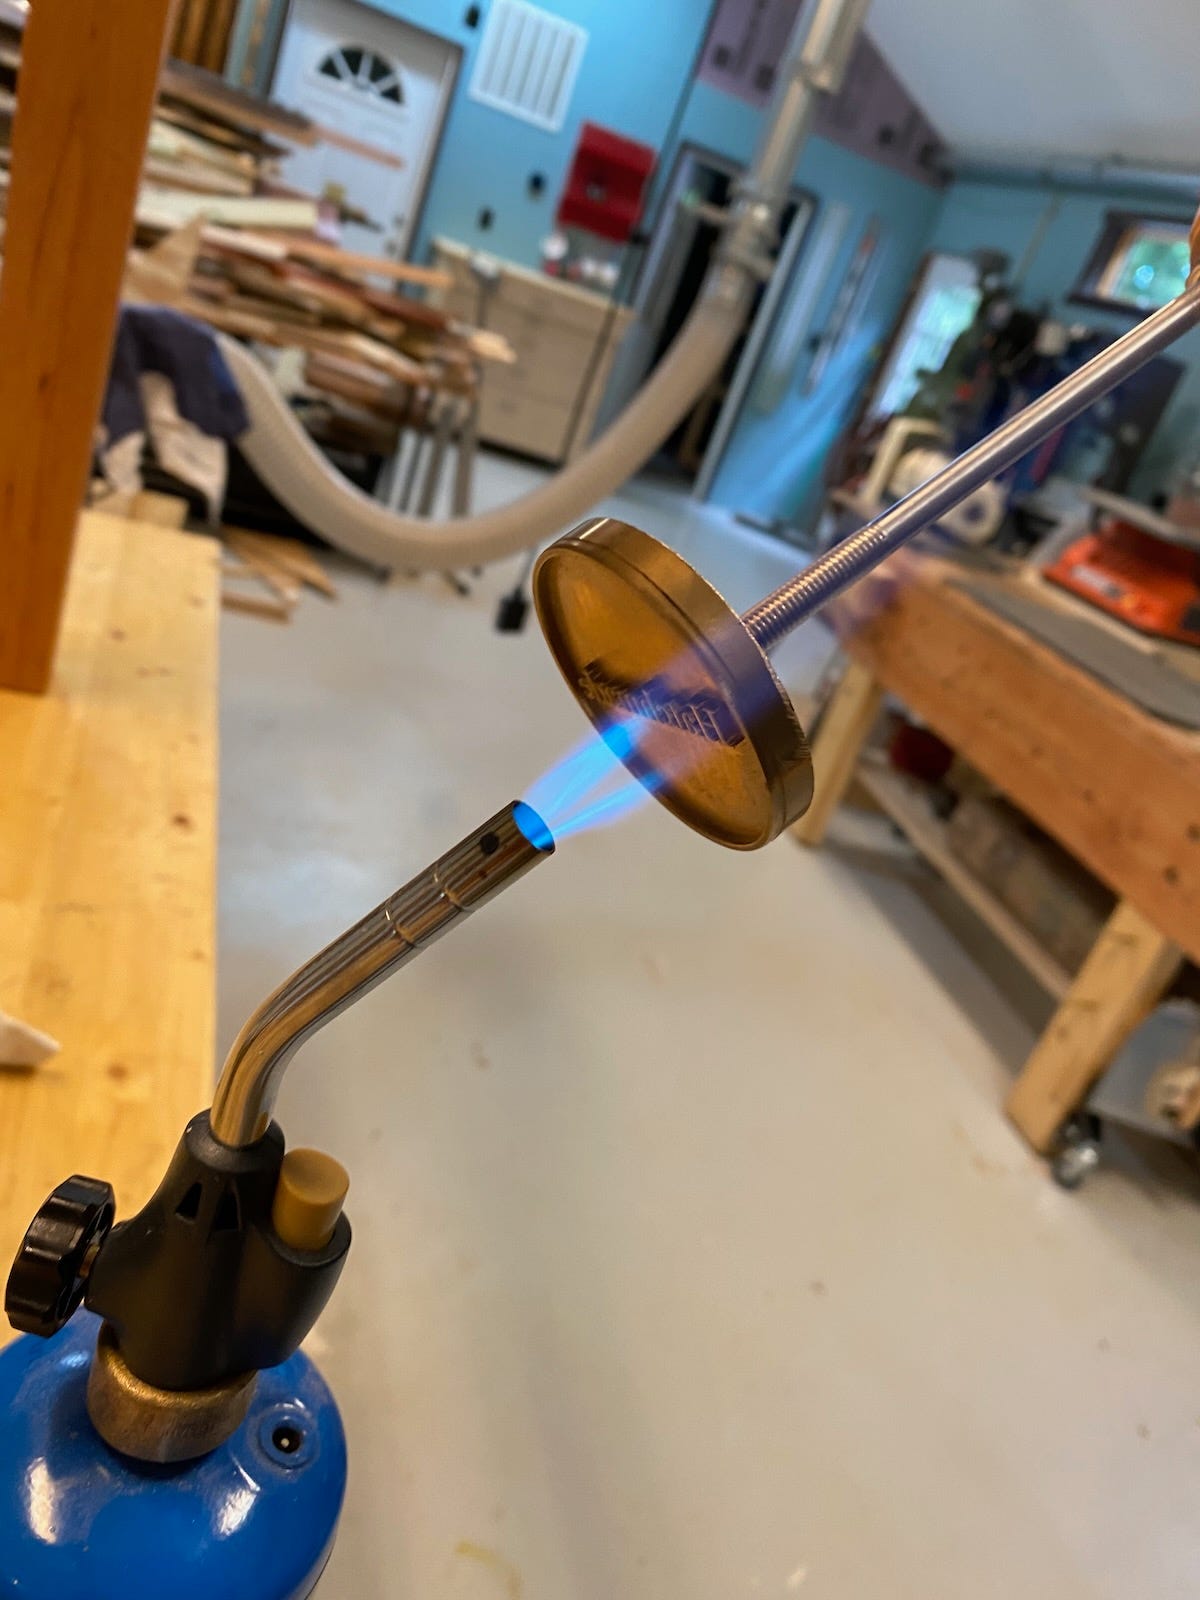
The next day I released the clamps and straps. I used a chisel to clean out any remaining glue squeeze-out and gave the piece another sanding once-over. Then I applied several coats of boiled linseed oil — the same finish that was used for the top — to the entire piece. Once that was dry, I grabbed my branding iron, heated it up, and left my mark on the inside of the one of the aprons.
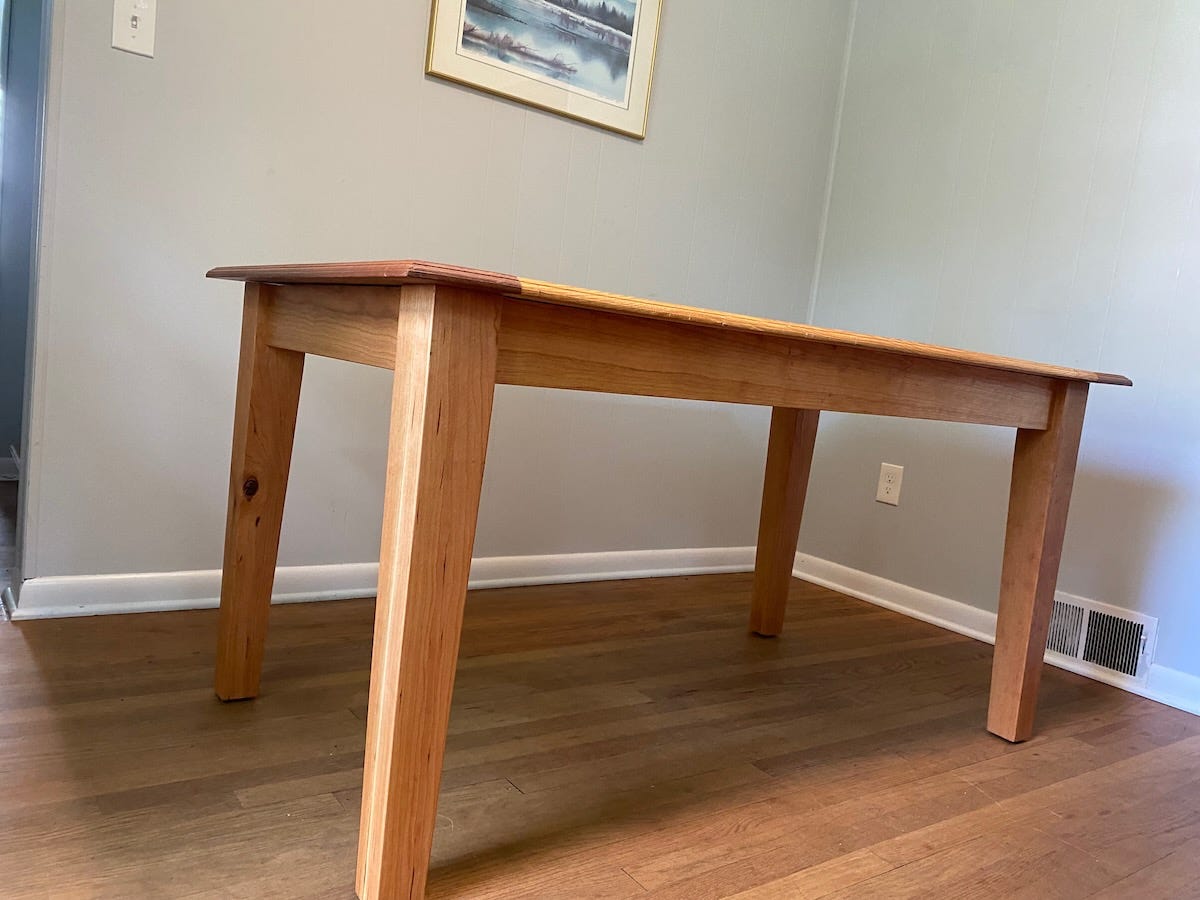
With the piece complete, it was time for delivery. I loaded it and the top into my truck and hauled it to my colleague’s place. We unloaded the two pieces and brought them into his dining room. I was initially nervous that with the legs permanently attached to the apron (i.e., no way to remove the legs, as there is with my mechanically-fastened table), the table might not fit, but that proved to be an unnecessary concern. (As I should have known based on previous measurements. But also, you never know for sure.) We set the top on the floor and plopped the base onto it. Then we aligned it just so and attached the top to it using the clips.
Once everything was tied together, my colleague and I flipped the whole thing over and set it in place. It looked lovely. But alas, we couldn’t sit at the table. He still needed chairs.


And your own brand!! Love love love!!