Building the Anarchist's Workbench
I'm following Christopher Schwarz's plans for a workbench that should long outlive me. Let's see how I do.
One of my goals for a long while has been to get this newsletter/blog/self-absorbed ego trip contemporaneous with my current projects. That is, I’m usually writing about work I did weeks or even months ago rather than work I’m engaged in right now.
To make this goal a reality, I need to a) update this thing more frequently (at least in the short run) and b) skip over some (small) projects I’ve completed but haven’t written about. Maybe I’ll get to them later.
For now, though, I’m skipping ahead to the thing I’m obsessed with at the moment: building the “Anarchist’s Workbench.”
I was introduced to the “Anarchist’s Workbench” and its author, Christopher Schwarz, by a friend of mine. This friend is like the person in your life who’s always introducing you to new music he thinks you should hear. Only in my case, my friend introduces me to ideas that end up taking root in my head, or expensive things that he thinks I’d like, like Lie-Nielsen tools. Unfortunately for my bank account, he’s usually right.
Christopher Schwarz, as it turns out, is what you might get if you combined Norm Abrams, Jesus, Tony Hawk, Lewis Black, and one of the nut jobs from the History Channel show “Alone.” Or to put it more simply, Schwarz is a master woodworker who resents corporate America and has started his own publishing company called “Lost Art Press.”
The point is, Christopher Schwarz is kind of a woodworking God and he wrote a book called “The Anarchist’s Workbench.” (Free download at that link.) The book is a history of workbenches that culminates in plans for what he thinks is a workbench that, in his words, cannot be improved upon.
“That’s not to say this bench is the ultimate,” he writes, “It’s not the end-all. Or even the ‘bed-busting sex’ of workbenches. It’s too simple to attract a lot of adjectives. What I can say is it’s a design I’ve refined during many years. And millions of woodworkers refined it before me. I cannot think of any way to improve it.”
Hey, if it’s good enough for Sawdust Christ, it’s good enough for me. My existing workbench, which, ironically, I built following a different set of plans from Chris Schwarz, is meant to be disassembled and doesn’t use vises. It’s fine, but it’s also one of the first things I built. I could have done a better job. This new workbench will never be taken apart (probably) and can have several kick-ass vices. I want vises. And I have gotten much better at this whole woodworking thing. I want to step up my game.
All that is to say, I’ve become consumed with building this bench and I figured it’d be fun to take you on this journey with me. Since the PDF gets into the details, and you can watch other peoples’ YouTube videos of the whole build, I’ll try to keep from falling too deep into the weeds.
From the Top
The workbench is made almost entirely out of southern yellow pine, a species of soft wood that significantly hardens over time due to the resins in the wood. It’s not lumber that’s easily found at my local big box stores (they usually have what’s known as SPF, or “spruce, pine, fir,” which could be any of a variety of species — often white pine) and even if it was, the chances of their lumber being straight and true is pretty low.
Purists might demand a workbench made from a species like hard maple. And yeah, that’d be great and beautiful. Also obscenely expensive — probably four or five times the cost of southern yellow pine (SYP), at least.
So I special-ordered a stack of SYP lumber from a local lumber yard, which delivered the wood early one morning shortly before Christmas.
I brought the lumber inside my shop and let it acclimate to the environment (temperature and humidity) for a few days before beginning the process of cutting it down into the dimensions I’d need. I ripped nine boards of eight-foot two-by-twelves in half and then planed them down to 1-¼-inches thick. These boards (there were now 18 of them) would form the bench top. I simply needed to laminate them together. It’s best to do this in small glue-ups rather than all at once. He suggests six boards at a time, so that’s what I did.

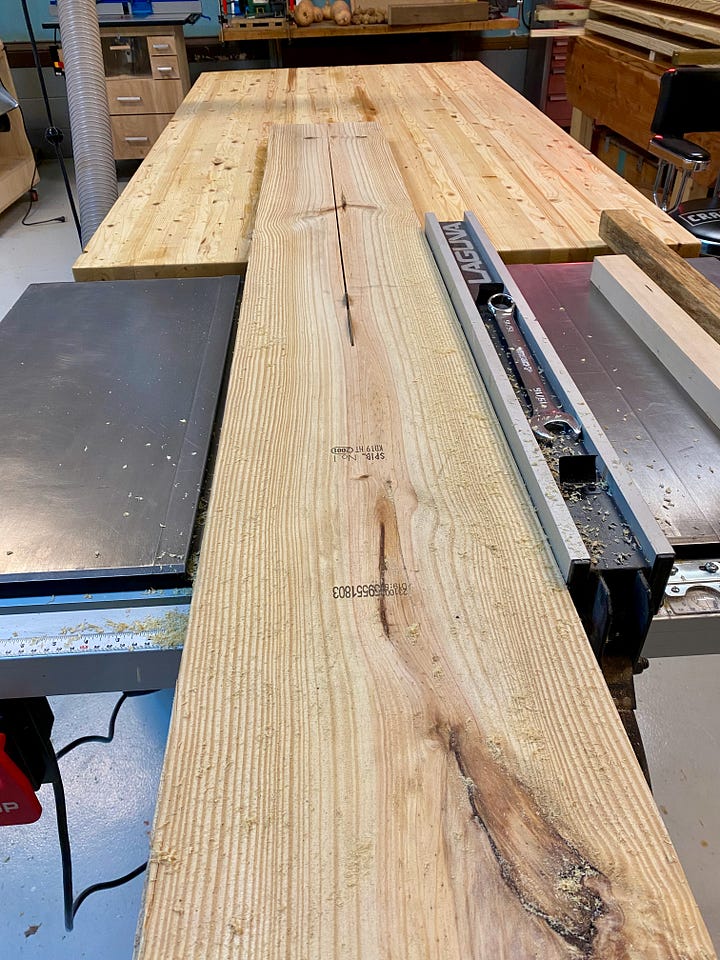


You’d like to think the boards would just easily lie flat against each other, but that’s not how wood works. Wood is a bit like a toddler. It likes to do its own thing and resents being told what to do or forced to behave. Each plank might look flat, but in reality, they curve and twist and cup and bow. Maybe just a little, but enough that they won’t just cuddle up tightly against each other. You have to force them to get close, like siblings in a family photo.
Woodchip Jesus recommends finding and buying and using vintage iron clamps in order to force the boards to snugly cozy up to each other. I looked for said clamps on Craigslist, in antique shops, and on Facebook Marketplace, but couldn’t find any available. So I had to rely on my existing clamp repertoire.
Schwarz also said that I need apply glue to only one surface — just enough to get it to wet the other board. I followed his guidelines and after dinner one evening, I clamped up the first six boards. I left the glue dry for a good 24 hours and then released the clamps. Immediately I heard cracks and pops, like a submarine that was beginning to collapse under the unrelenting pressure of the sea above it. I immediately saw several boards pull away from each other. Not good. I was not happy. I annoyingly anointed one gap “Grand Canyon.”
In an attempt to fix this problem, I squirted fresh glue into the gaps and used the strongest clamps I could find, hoping a second effort might be more successful than the first. The next night I released the clamps and the Canyon remained closed. For now.
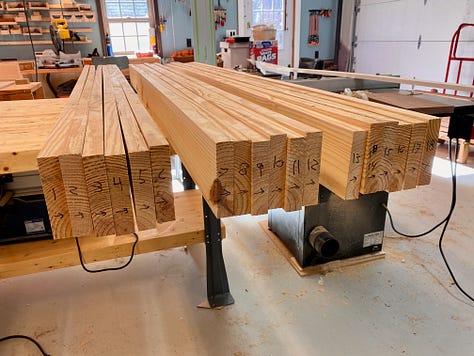
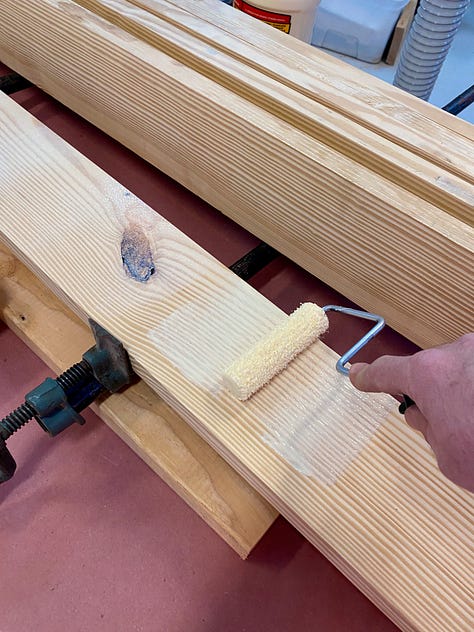


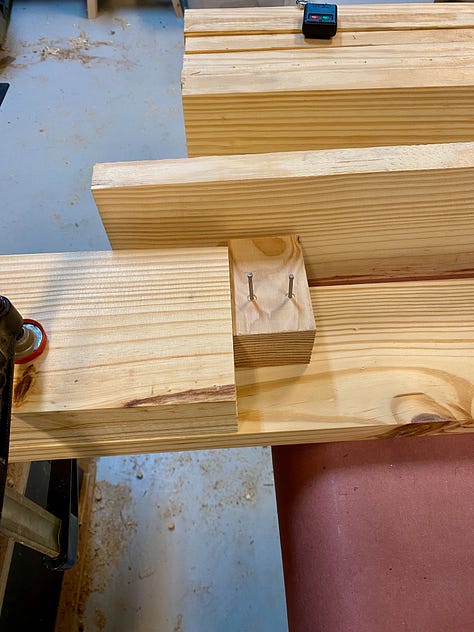
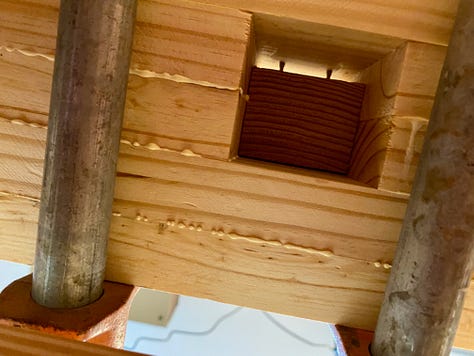


On each of the next two evenings, I proceeded with the other two glue-ups. Again, six boards each, only now I used more glue, liberally applied with a roller, and did my best to apply more clamping pressure. I also made sure to orient the boards so that they would be less likely to pull away from each other, as well as to try to keep knots away from what I expected to the be the top face as well as the outward edges. To keep everything organized, I numbered each board.
On the third glue-up, I dissected the two middle boards to create a gap into which I inserted a 2-½ block that would preserve an open space for later use as a “planing stop.” I lightly nailed the block in place and once the boards were clamped, I knocked it free. What remained was a perfectly square and clean 2-½-inch hole.
The three six-board sections now dried, I began hand-planing them to get them smooth and flat. I’ve since decided, however, to schlepp the laminated slabs to a woodworking studio in Fredericksburg, where I can do that on commercial machines more easily. It’ll cost about $100, but it’ll be worth it as I can be sure to get the three sections flat, of uniform thickness, and, critically, square to each other. It also allows me to turn my attention to the workbench’s base.
That’s next time.


Great little article. I’ve been reading through the pdf version of the Anarchists Workbench and glad to have found your post about actually building one!