Another Box-Joint Bench
Inspired by the original, with a couple fresh details
Before I begin, a question: Do you have a preference when these missives hit your inbox? Monday morning? Saturday afternoon? Thursday at 3? Let me know… even if it’s to say you don’t care when they come. I’m curious. Thanks!
When I shared pictures of the long box-joint walnut bench I made for some friends at the end of last year, another friend of mine said he wanted one too. Since Christmas was coming up, I agreed and made it a present we could work on together.
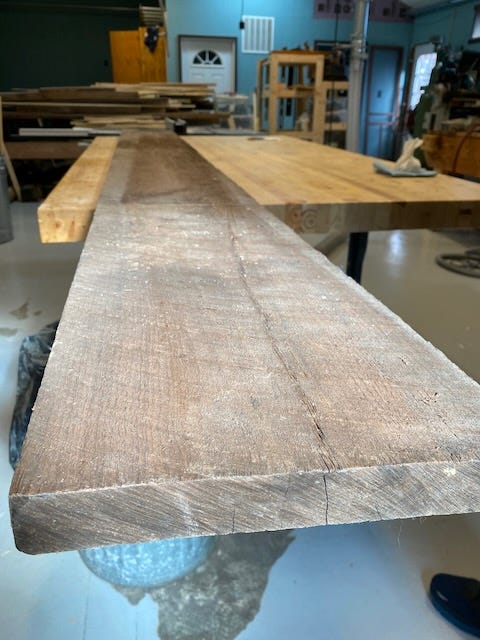
So one weekend day, my friend came over and we got started. As with the previous bench, it all begins with selecting the wood. We sorted through various boards I have on hand and found a nice piece of walnut that seemed like it would do the trick. It was long enough to generate all the pieces we’d need. It was thick enough for a strong, beefy bench. And it was wide enough that we wouldn’t need to edge-glue boards to get a bench of sufficient size.
It did have a few cracks in it, but nothing that I thought would be a problem. In fact, I thought the cracks might provide us with an opportunity for a little design flourish.
We cut the piece into three rough lengths — a four-foot section of the bench seat and two two-foot sections for the bench legs. Unlike the first bench, which started from a narrower piece of lumber and thus necessitated the boards to be jointed and edge-glued together, the wider plank we were using would deliver the bench’s full width.
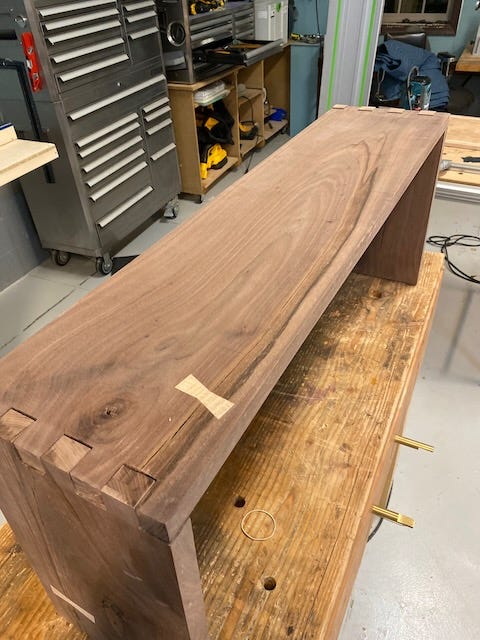
After we sent the pieces through the planer to clean up the faces, we set about inlaying some light maple bowties across the dark walnut’s cracks. This would provide strength by holding the two sides of the cracks together, sort of like the rope in a game of tug-of-war. And by using the light maple in contrast to the dark walnut, the bowties would also give the bench some decorative details.
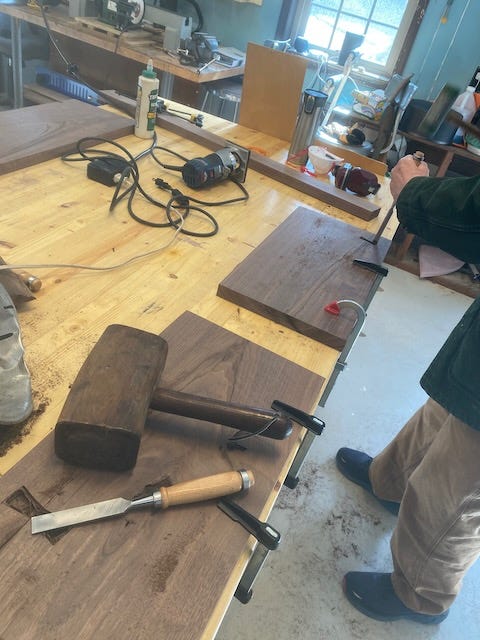
Using some scrap maple from an earlier project, I cut three bowtie-shaped pieces, each about ½-inch thick. Then we laid the bowties across the cracks on the walnut boards and marked the bowtie’s edges with a knife. Using a combination of a small router and a mallet and chisel, we then removed the walnut wood until the maple bowties fit in the recesses perfectly.

We added glue to the recesses and pounded the bowties into place. A little slurry of walnut sawdust and glue filled any gaps and a quick sanding smoothed the “patch” perfectly flat.
At this point, it was time to make the box (or finger) joints. If you know the little hand poem “this is the church, this is the steeple, open the doors and see all the people,” then you should have a pretty good idea of how finger joints work. (And if you don’t know the saying, you are missing out on some epic-level hand poetry and I shed a tear for you.) Essentially, box joints or finger joints are like gear cogs where one set of teeth rest snugly in the teeth of an adjoining board. This creates tons of surface area for glue as well as built-in structural support. Or to put it another way, they’re like dovetails without the angles.
To cut the joints, we made a jig and clamped it to the ends of the boards. We then used a router to trace the jig/template and cut out the teeth. Unfortunately, several times the jig shifted on us, resulting in incorrectly cut teeth. The only way to fix that was to cut the board back and re-rout along the jig.
Once the teeth were fully cut, we still had to square off their inside corners, since the router’s round bit can’t make 90-degree inside corners. (Think of using a spoon to get the last bit of brownie from the corners of a square pan.) To do this, I turned to a jig saw and made very careful passes to cut away the router-created rounded corners.

I test-fitted the pieces and saw that everything lined up nicely. Before gluing them together, I chamfered the bottoms of the legs to help keep them from splitting if and when the bench is moved.
My friend and I also had to decide if the two end legs would be sufficient to hold a person sitting on the bench. I was worried that someone sitting in the middle of the bench would cause the legs to splay and the entire bench to break. I thought it might be prudent to put a stretcher across the bench, from leg to leg. That would keep them from splaying when weight was added to the seat (i.e., someone sat down).
My friend, though, wanted to keep the simple design aesthetic and was confident that the beefy box joints would be plenty strong enough.
Since it was his bench we were building, he made the final call. No stretcher.
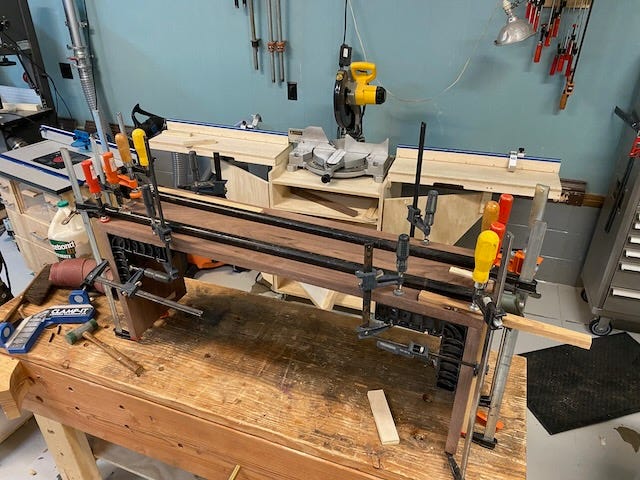
It was now time to glue everything together. I applied glue to all of the joints and got the clamps ready to tighten down on all of the joints. I used a square to ensure the legs were at 90 degrees to the top, tightened the clamps and left the glue to dry.

After the glue dried. I removed the clamps. Using more of the walnut-sawdust-and-glue slurry, I filled any gaps in the joinery and then, once that dried, sanded everything flat and smooth.
The last step was to apply a finish. For that, I turned to Tung oil. I like Tung oil, especially on walnut. Not only is Tung oil fun to say, but it gives the wood a nice rich color with a flat finish. It’s easy to apply and I’ve never been disappointed with the results.
Speaking of not being disappointed, my friend seemed very pleased with the end product. Does it have a flaw or two or five? Of course. But far be it from me to point them out.


Nice work!