The Other Built-In
With the desk pretty much done, it's time to turn to the family room entertainment center
My built-in office desk is mostly at a stopping point. It needs some finish trim, but that will have to wait until after I get drywall and flooring installed. Waiting is not my strength. Lucky for me, there’s more to my basement finishing project than just the office.
I’m also working on a revamped bathroom, a storage room, and a family room, where I’m planning a built-in entertainment center.
This built-in is similar to the desk, but there are some key differences. Among them: it will be open on the ends rather than butting up against side walls; it won’t have drawers or doors; and it must be built with various audio/visual components — television, speakers, electric fireplace — in mind.
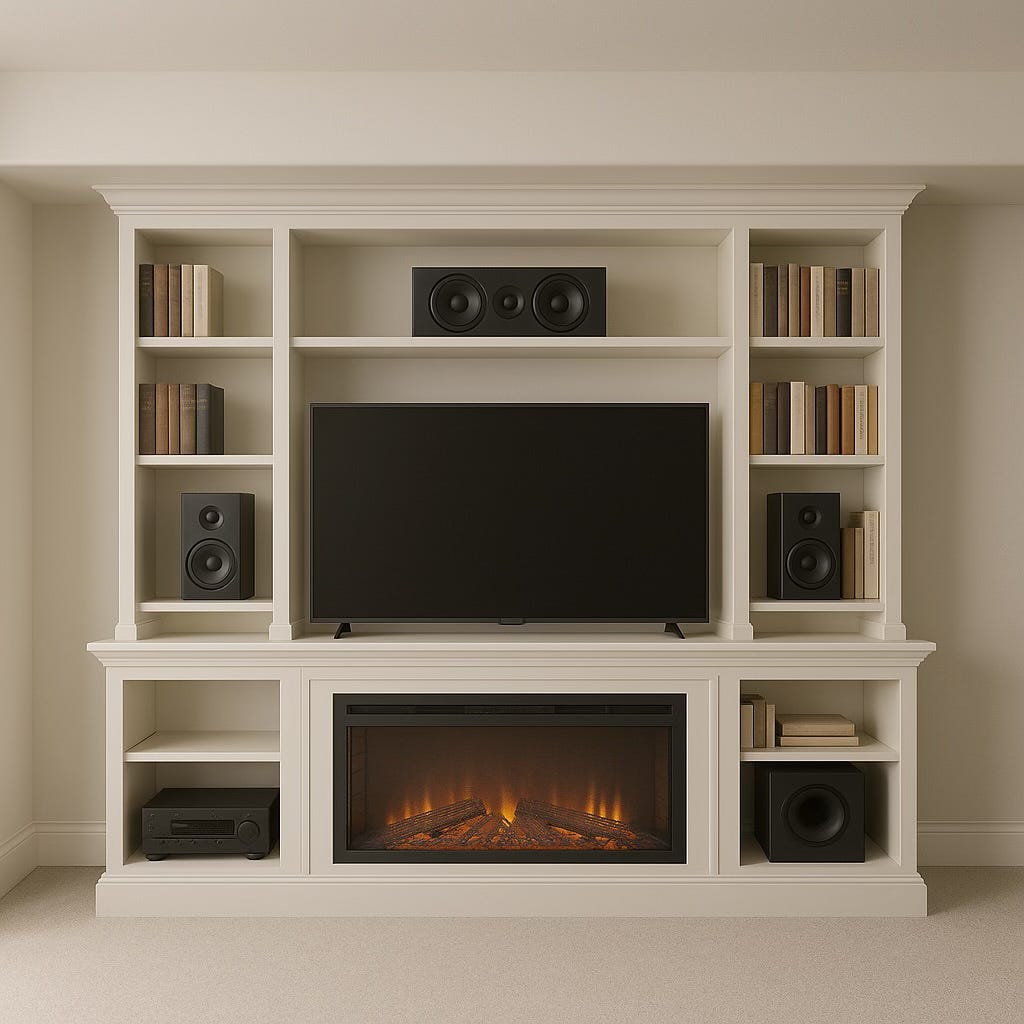
As I described earlier, I had already threaded various cables and hollow tubes in the wall framing. Now it is time to build the boxes that will compose the cabinet itself. The box-building process is basically the same as with the desk, so I won’t repeat it all here. I did, however, learn some lessons from my desk experience. Chief among them: I doubled the thickness of the outside walls so that they would match the thickness of the interior walls, where two boxes come together.
The bottom portion of the unit comprises three boxes: a 24-inch cube, a 60-inch center box, and a second 24-inch cube. The left-most cube will eventually hold the home theater receiver. The right-most cube will eventually hold a subwoofer. The middle box will eventually hold an electric fireplace.
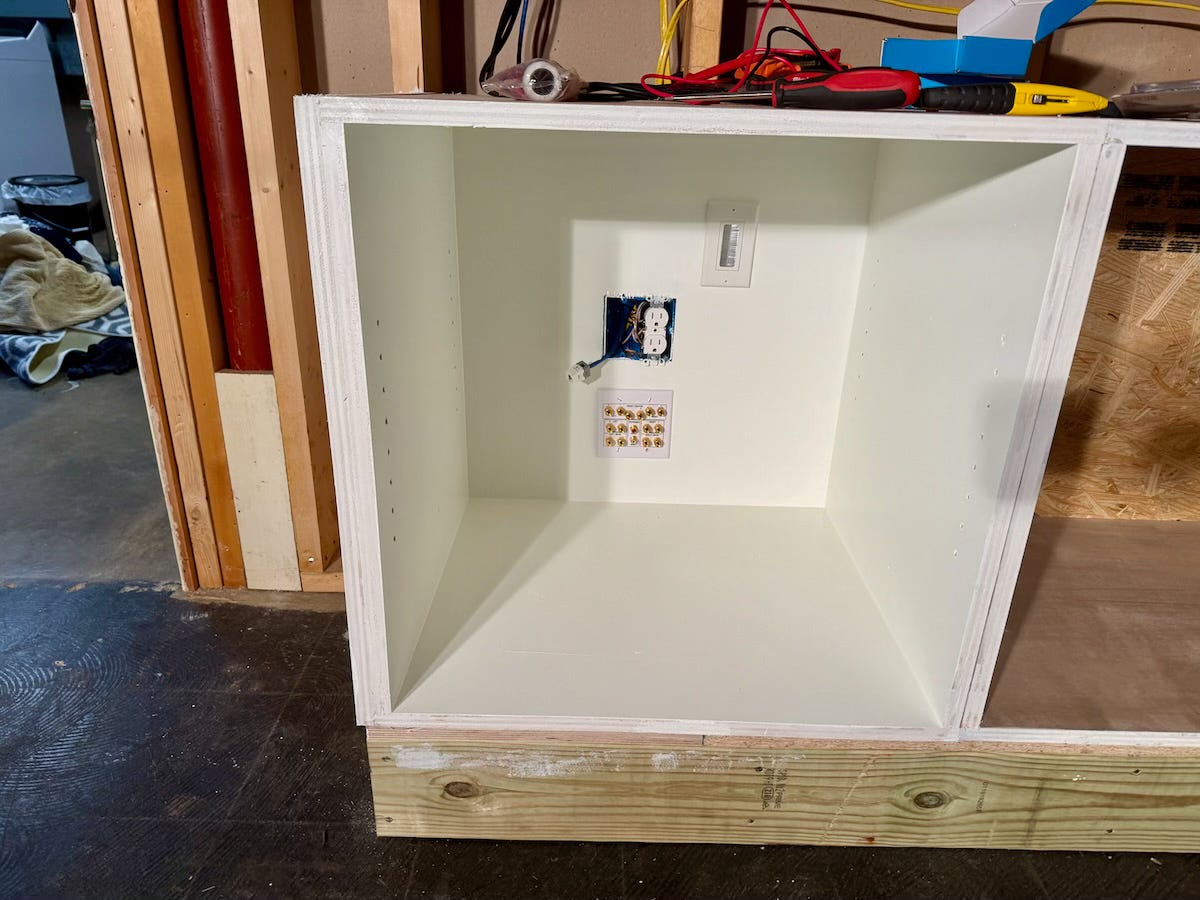
In order to secure the base units in place, I first had to cut out holes for electric and AV receptacles. Whereas with the desk, I made measurements that I transferred to the boxes — resulting in some close-but-not-quite-right cuts — this time I made templates to get the positions exactly right. (Except for one stupid mistake where I accidentally flipped my template upside down. Sigh.) Then I screwed the boxes to the wall studs, to each other, and to the risers before painting them.
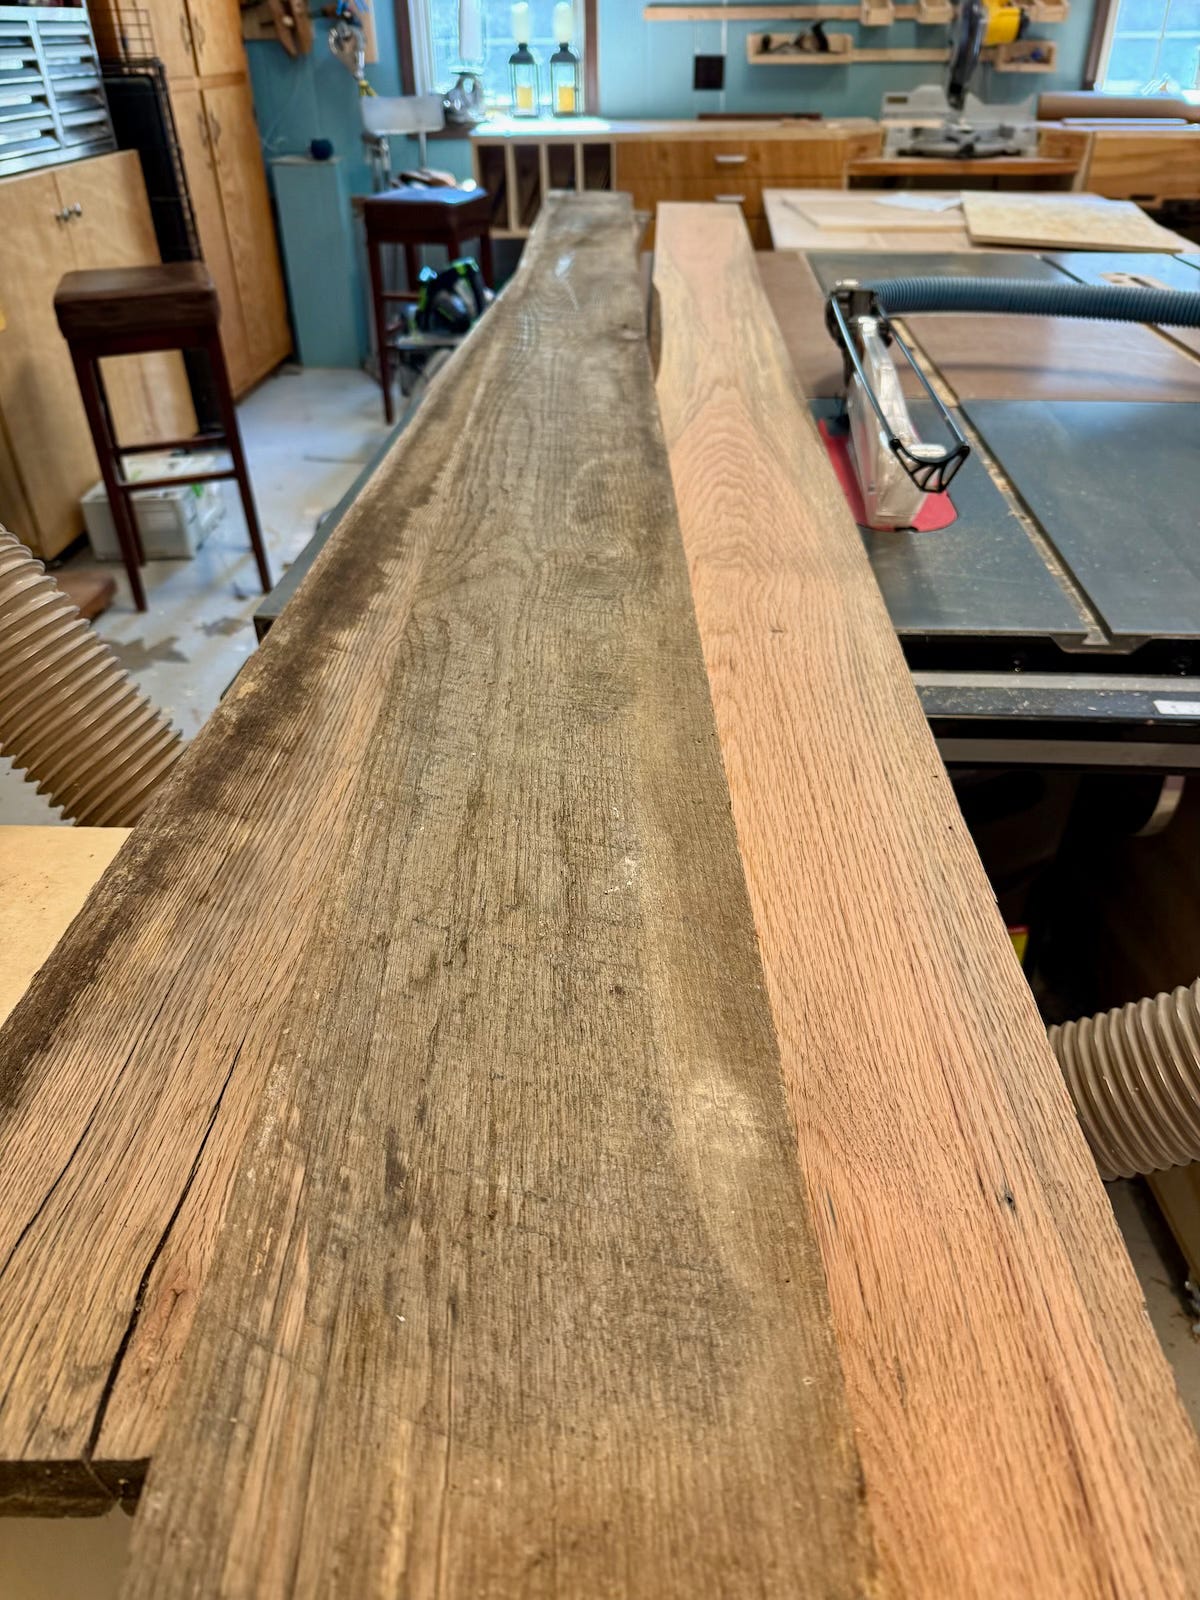
For the countertop, I used four red oak planks that had been stored under a tarp in the woods by my house’s previous owner. As I did with the walnut boards for the desk, I took the planks to a nearby commercial mill where they jointed the edges perfectly.
Back in the shop, I filled a few holes and knots with clear epoxy, sanded the boards smooth, and used a biscuit joiner to glue them together into a single, flat, nine-foot plank, just like I did with the walnut desktop. Once the glue dried, I screwed the resulting plank to the base cabinets and then applied a coat of General Finishes’ hard wax oil as a final finish.
For the upper cabinets, I was very concerned about ensuring the shelves and the center area would be sized correctly to hold whatever speakers and TV I’d eventually buy.
Ideally, I’d have those AV components on hand, but I’m not in a position to buy them yet. So, I pulled the specs on what I planned to buy and measured everything out multiple times. I also decided to tweak my design so that instead of building a shallow shelf above the TV to house a center speaker, it would instead sit on the countertop in front of the TV. That seemed simpler and safer.
But that change required me to adjust some of the in-wall wiring and receptacles. Annoying, yes, but also exactly why I was trying to think it all through now. Changing it later would have been a nightmare.
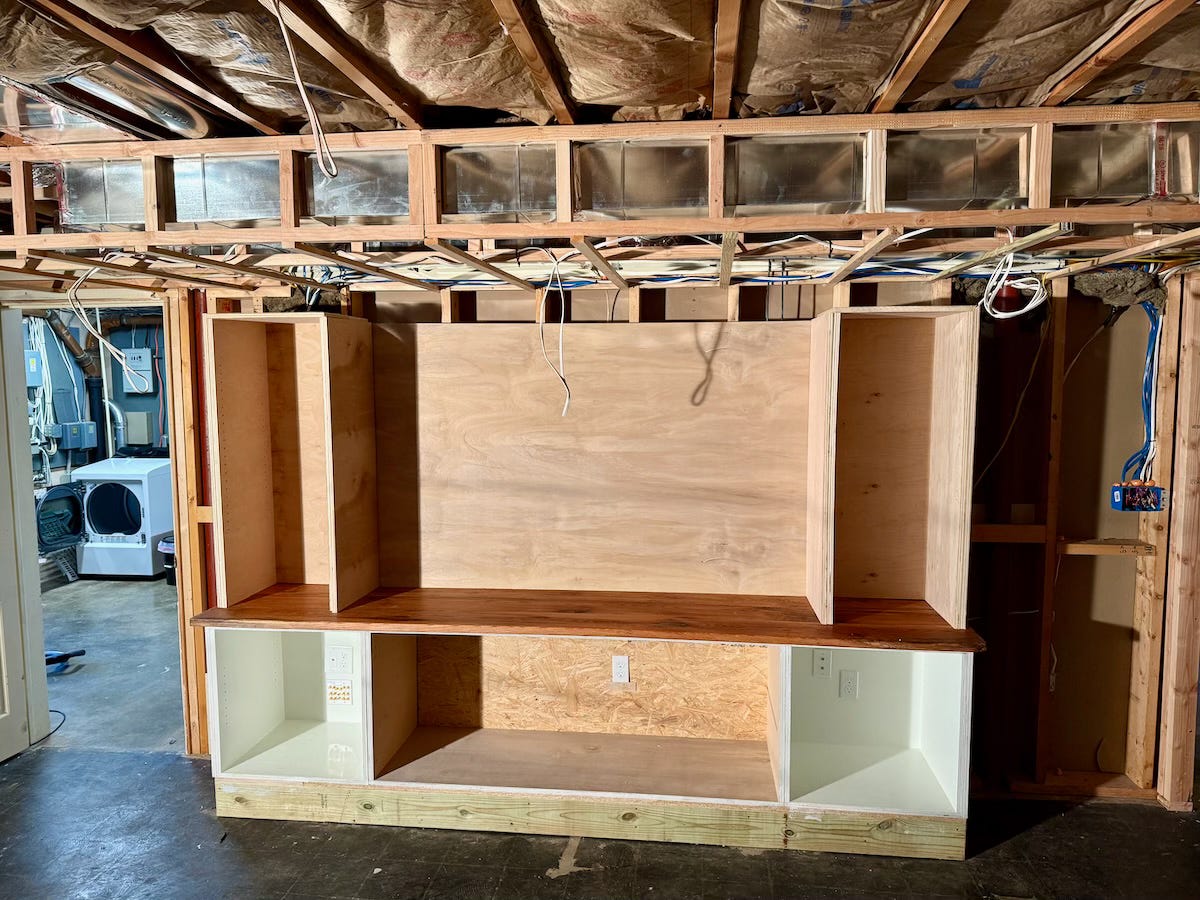
As a result, the three upper boxes are slightly different dimensions than the bottom boxes: They are shallower (16 inches instead of 24 inches); taller, of course; and the left and right boxes are thinner, at 16 inches, allowing the center box to be wider to make room for an absurd 75-inch TV.
As with the bottom boxes, I used a template to mark the locations of wiring receptacles and then painted the boxes before screwing them to the wall studs. The left and right boxes are the same off white as the base cabinets, but because the center box is where the TV will go, I decided I didn’t want a white background behind the TV. Instead, I painted that one surface a flat, non-reflective, dark blue.
With all of the cabinets in place, I built double-thick shelves, just like I did with the desk. Then I temporarily placed a relatively small TV in the middle section and added a temporary AV receiver, speakers, and subwoofer to their respective locations. That allowed me to verify my wiring. It’s also nice that for the rest of my basement renovation project, I’ll have music to accompany my work.
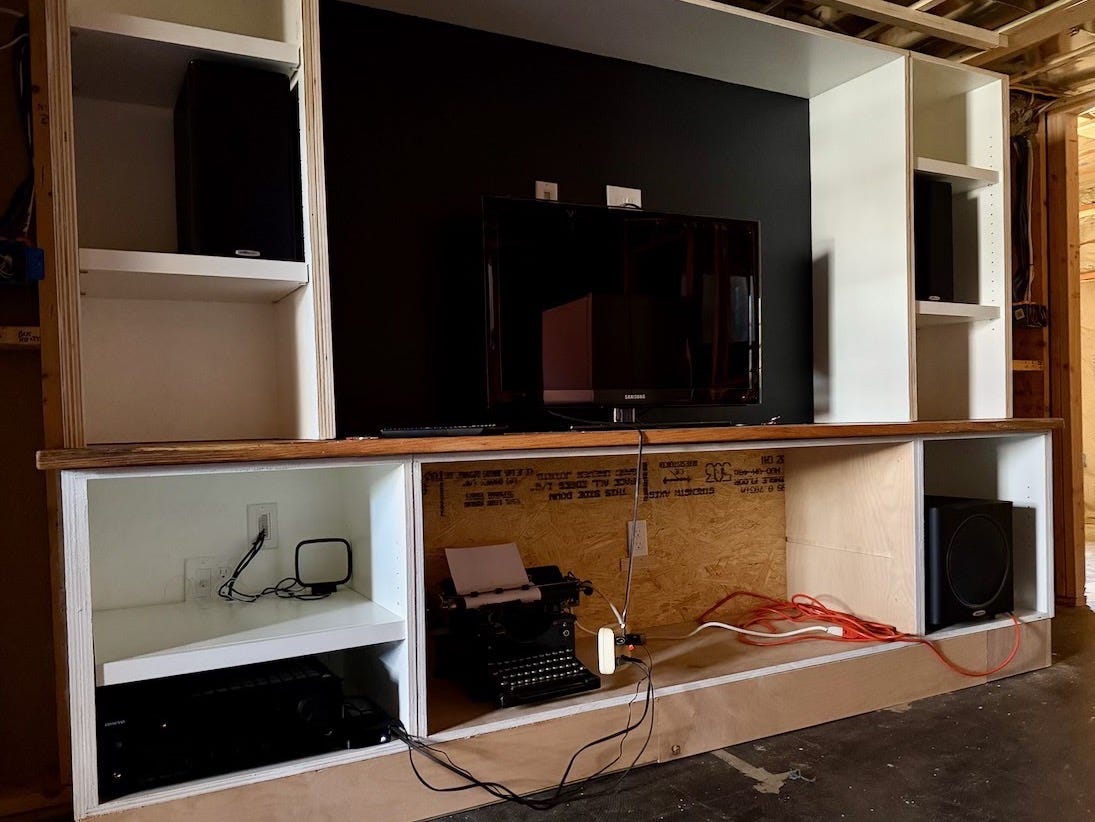
As with the desk, I’d love to do more of the finish and trim work now, but I really can’t until drywall and flooring is installed. So, for the time-being, the entertainment unit is as far as I can take it.
I feel really good about my progress, but somehow my to-do list keeps getting longer: drywall, finish electric, paint, flooring, trim, maybe a window replacement, maybe a staircase replacement, the heating system and fixtures, doors, the bathroom, the AV system, the electric fireplace, furniture. Oy vey. Maybe I’ll finish by 2027?
Next up: drywall. Even though I’m undertaking a lot of this work myself, drywall is not something I have any interest in. I’ll be happily contracting out that job. Soon, I hope.

