The Basement is Looking Up
Taking advantage of an open ceiling to help heat the house
Over the holiday break, I’ve been working on one of the more ambitious aspects of my basement renovation. And I have Richard Trethewey to blame.
Richard Trethewey, if you don’t know, is the personable plumber on “This Old House,” the home renovation show on PBS that is sublimely designed to maximize my lizard-brain FOMO. (Or maybe that’s a Limbic system, I don’t know; I’m not a neuroscientist.)
For a couple of decades, Richard has been singing the praises of in-floor hydronic radiant heat. That’s fancy talk for tubes of hot water under the floor. This warms the floor, which not only feels great on your feetsies and toesies, but it also warms the room in the most comfortable way. There’s no blowing air or noisy condensers. Just soul-soothing warmth.
And I want it.
Funnily enough, my basement actually has radiant heat in the concrete slab. When I’ve turned it on, the warmth it generates is truly marvelous. However, that radiant heat is generated by electric wires embedded in the concrete. This form of radiant, in which the heat is created by electrical resistance — similar to how an old-fashioned incandescent light bulb works — is wildly inefficient and expensive. When I’ve turned it on, my electric meter nearly spins off its mount and my bill skyrockets to five or six times normal. Safe to say, I don’t turn it on any more.
Hydronic radiant, however, works differently. As the name suggests, a heated liquid (usually just water) is pumped through coils of tubing. This is the system Richard hawks and that I’m now implementing.
Path to DIY
Embedding tubes in my basement concrete wasn’t really an option. Doing this would require building up the basement floor by several inches, including pouring new concrete. That was neither desirable nor feasible. However, since the ceiling in the basement was open, it should be relatively easy to install the tubing under the first floor, which would make that space (and the floor above) nice and toasty. Then I could add baseboards or radiators in the basement to help heat that space.
I called several plumbers and HVAC companies and most didn’t install hydronic radiant. But eventually I found two that did. They came out and gave me estimates: $26,000 from one and $34,000 from the other.
Talk about a nonstarter.
But really, how hard could this be? I’ve been watching Richard Trethewey install these systems for years. I watched YouTube videos. I found a company that supports do-it0-yourselfers. That company, Radiantec, out of Vermont, promised it could be done by any competent DIYer. It was time to find out.
I sent Radiantec my floor plan and talked to a rep. He assured me that it was all quite doable and all of the materials would cost about $4,000 to $6,000. That seemed promising.
After several back-and-forths, I placed an order. A couple of days later, several boxes of PEX tubing and other materials landed at my doorstep. It was time to get started.
Oh What Tangled Webs We Weave
Even though I had the boxes of materials sitting in my basement, I was slow to open them and begin the installation. A kind interpretation would be to say I was being cautious. A more judgmental way of looking at it would be to say I was afraid. At the very least, I was a bit anxious. Despite the assurances from Radiantec, I was worried about screwing things up. To buck my my courage, I watched and re-watched a bevy of YouTube videos, including ones from Radiantec that walked through the process:
They certainly make it look easy, but that’s because their joist bays are empty and they have five experienced guys doing the work. Neither of those benefits existed for me.
Still, I eventually mustered up the courage to get started. To do so, I had to first determine the placement of the distribution manifold, which is an array of piping that serves the various circuits of tubing that will be coursing through the basement ceiling. You can’t just use one long tube because by the time the hot water reaches the end, it won’t be hot anymore. Instead, you need to have several shorter circuits that each terminate at and are fed by a central distribution manifold.
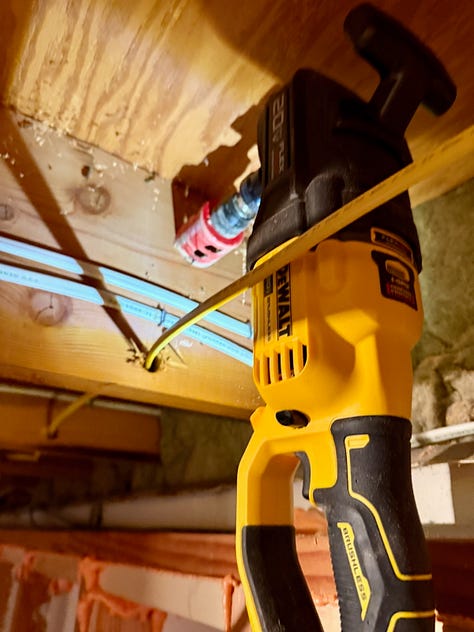
Once I determined the manifold’s location, it was time to drill holes in the joists. For this, I bought a right-angle drill and a hole saw. Once I made the necessary holes, it was time to feed the plastic PEX tubing through the joist bays. While the PEX tubing is flexible, it’s not what I would call pliable. It’s more like al dente spaghetti; You can manipulate it, but only to a point.
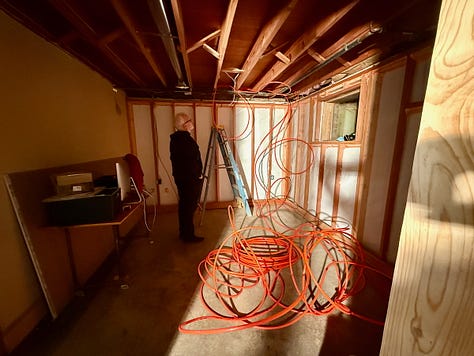
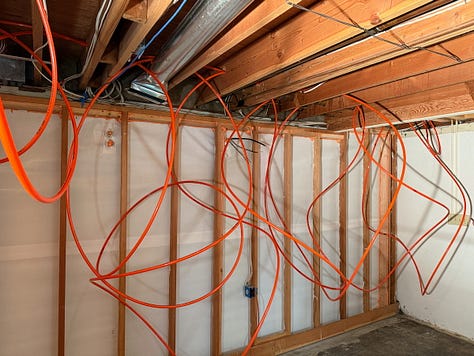
Meanwhile, the tubing comes in coils and the PEX really, really wants to maintain the coil twist. So, when you’re pulling it through the joists, you have to unspool the tubing rather than letting it uncoil. If you’ve ever struggled with a garden hose that is twisted, you get the idea. Only unlike a garden hose, the PEX tubing is 300 feet long and stiffer.
The key to making this all work, in addition to properly unspooling the PEX tubing, is routing it through your joists correctly. Another YouTube video demonstrates this:
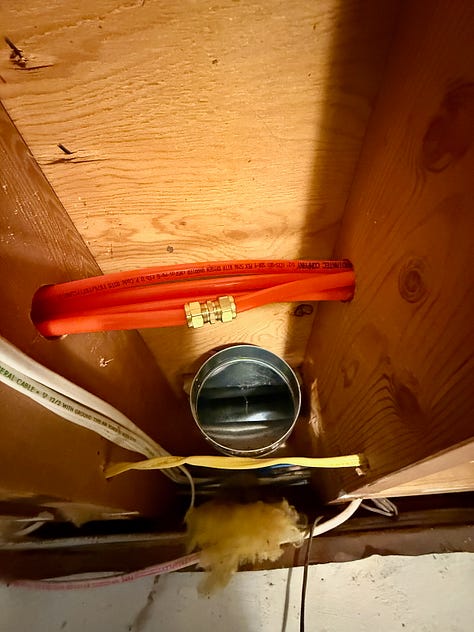
Despite these excellent tutorials, my dad and I ran into problems. First, unlike in the videos above, many of my joist bays already had wires and pipes and ducts running through them. And some bays were narrower than the typical 16 inches on center due to various supporting joists. This made it difficult or even impossible to get all of the holes in a line, making it more difficult to thread the PEX through the holes.
And that became even more difficult when we had to thread the PEX back through the very same holes to complete the circuit. (And more so again when we had a second circuit running through some of those same holes!)
Plus, it’s not enough to run the PEX down and back. We had to keep pulling more PEX through the holes in order to have enough tubing to run down each joist bay. And keep in mind that A) you can’t let the PEX twist or else you’ll be in all sorts of trouble; B) you can’t let the PEX kink or else you might create a hole that water can escape from and flood your house; and C) you’re looking up over your head the entire time, which might be find for an orangutan, but it hell on an old human body.
The entire time we were sweating and swearing and bickering, I just kept reminding myself: this beats paying $26,000 or $34,000.
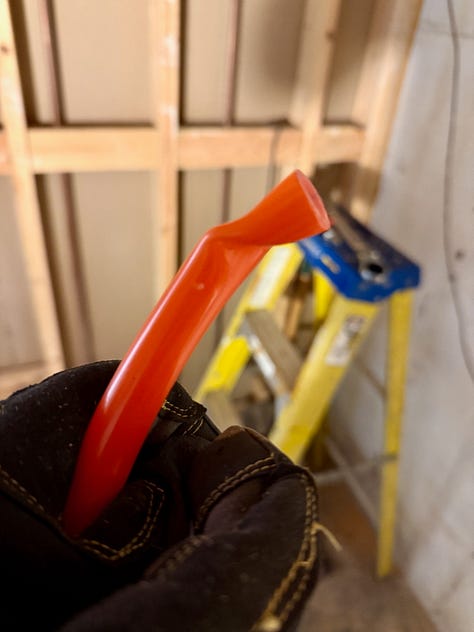
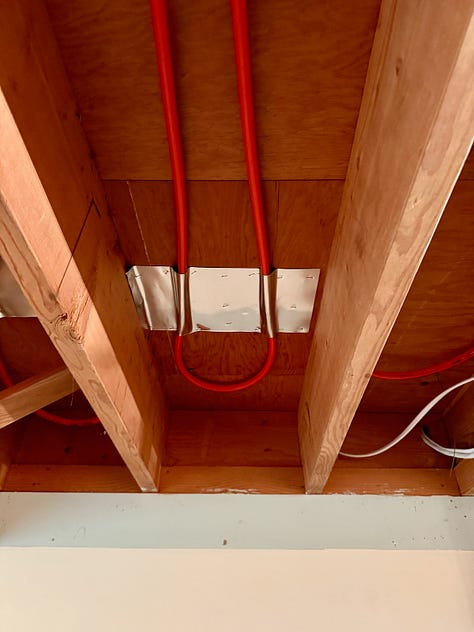
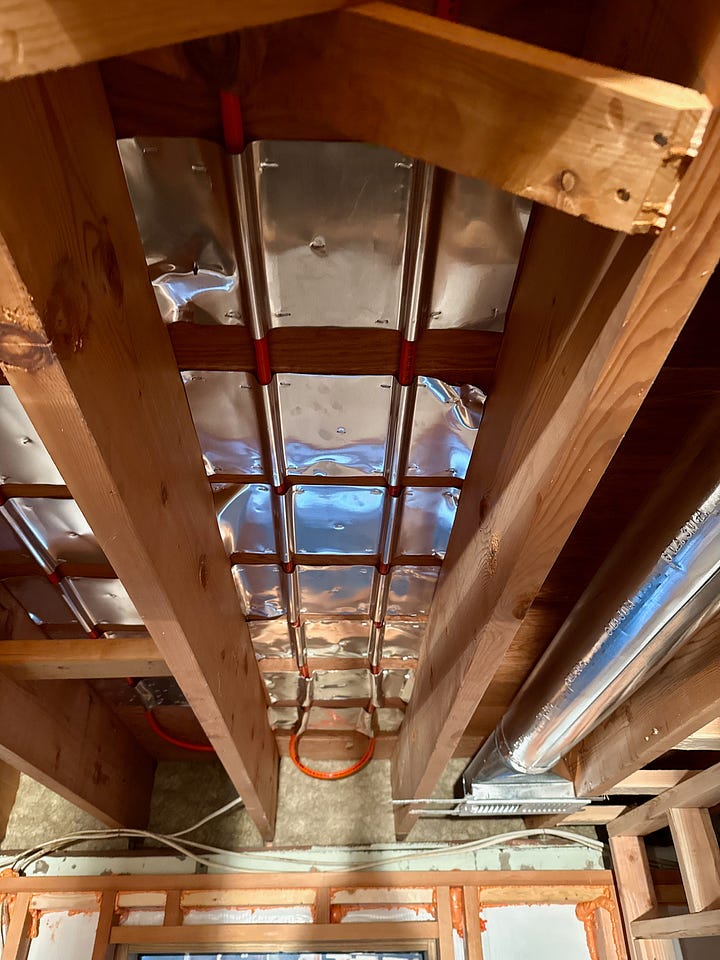
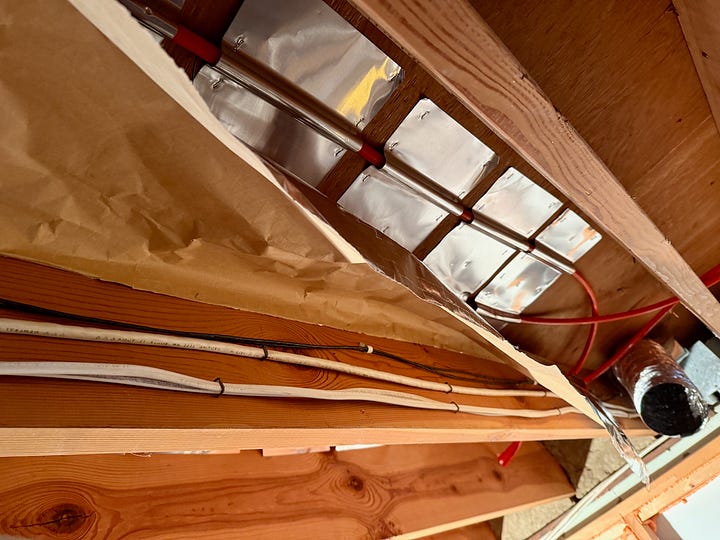
Once we finally pulled the PEX down the joist bays, it was time to staple it to the ceiling. To do this, Radiantec provides sheets of aluminum pre-bent to go around the tubes. Sometimes called Omega plates because their shape, these plates not only keep the tubes in place, they also transfer heat from the tubes to the floor.
Unfortunately, some of our PEX unwinding and threading did not work as planned. In a few spots, we got irreversibly tangled. Or the line kinked completely. In these cases, I reluctantly cut the PEX, removing the kink or the twist, and then spliced it back together. Whenever I did this, I felt like I had failed a test. More importantly, I worried it could be the source of a future leak.
Finally, after a full day of struggling, we got our first circuit in place. I looked at my dad, who clearly was reconsidering his life’s choices, and cheerfully said, “only four more to go!”
Under Pressure
The other four circuits were (mostly) easier to deal with, in part because we now had some experience. I was able to drill straighter holes. We altered our approach to ensure unspooling of the PEX rather than uncoiling. We had simpler and shorter runs. I temporarily removed some HVAC ducts and bought extension rods for my drill in order to cut some of the more challenging joist holes. And we also eliminated one of the five planned circuits. As a result, two days later, all of the tubing was in place.*
*One of the four circuits we ran is actually an attempt at being a friend to my future self. It doesn’t actually go to heat any of the floor above, but rather runs to the ducting for our heat pump. One of the HVAC estimators suggested putting a copper coil in our duct that would be served by the hydronic system. That way, as the air blew over the hot coil, it would augment or super-charge that system. I needn’t put the copper coil in now, but by bringing over the hot water, I would set myself up to do that later. So I did.
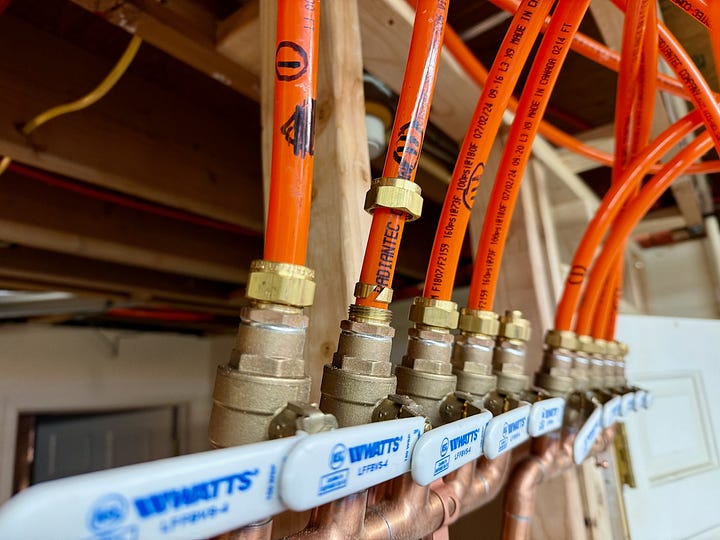
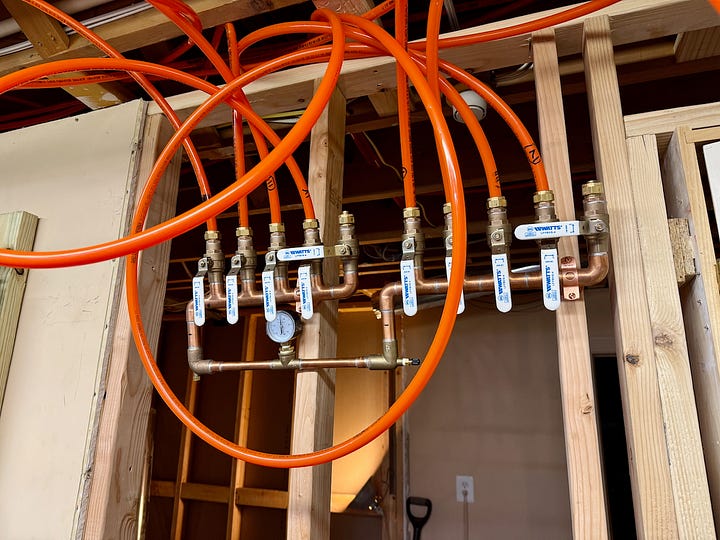
With the tubing in place, it was time to hook up the manifold. I temporarily mounted it in the utility room — temporarily because I still need to add drywall before I can permanently mount it — and attached the tubes. As supplied by Radiantec, the manifold is ready for my to pressurize the system to ensure there are no leaks. After the pressure test, I’m supposed to cut away the bottom half of the manifold in order to connect it to the hot water supply.
I nervously connected my air compressor to the manifold. I watched as the pressure gauge slowly rose. Once it got to 50 psi, I stopped and watched. For five minutes, the needle stayed put. All seemed well.
The next day, I looked again. The needle still hadn’t budged. No leaks. All was well! I felt a surge of relief.* I depressurized the system out of a sense of not wanting to ask for trouble.
*Later I found out that in order to pass inspection, I need to pressurize the system to 100 psi. Now I’m nervous all over again. I’ll test it before the inspection, but not without heart palpitations.
With the system tested, it was time for me to go back and add more aluminum plates. For two days, I stapled the plates in place, straining to reach tight spots.
All was going well until I sent a staple through the PEX. $&#@! I yelled. My wife thought I had stapled my thumb to the ceiling. I wish! But, the fix wasn’t too difficult. I cut out the section with the staple and spliced the two ends together.
Then I did it again. Again I swore. Again I fixed it. And eventually I was done.
I pressurized the system again and was relieved to see it still didn’t leak.
With the system fully in place, the next step is to staple an aluminum-backed paper barrier over each joist bay to help trap the heat and aim it upwards. Once I’m done with that, it’ll be time to light fixtures and insulation before closing up the ceiling with drywall.
Meanwhile, I still need to run tubing to the planned basement radiators and hook up the hot water supply. But that work will come later. For now, it’s time to stretch my neck and shoulders. Looking up turns out to be pretty hard work.


Amazing physical and mental work, again. Does TOH know about you?
This is my favorite installment yet!