Putting It All Together
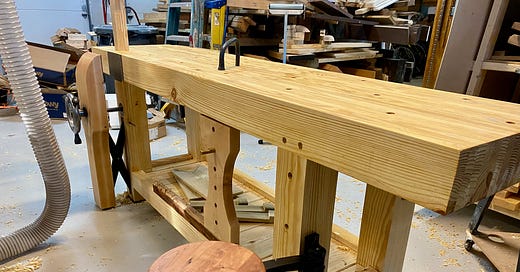
With the arrival of the bench hardware, assembly could commence and the workbench finished
The Anarchist’s Workbench isn’t the first Christopher Schwarz-designed bench I’ve built. A few years ago, I built another of his designs — a Nicholson knockdown bench. The “Nicholson” refers to the style and the “knockdown” refers to the fact that it can be taken apart for easy moving.
It’s been a useful bench (in fact, I recently refurbished its top), but one thing it lacked, which I very much desired, was a vice. In his writeup on the knockdown bench, the Viceroy of Vices claimed a vice isn’t strictly necessary — workholding can still be accomplished with holdfasts and other implements. But, as his Anarchist’s Workbench design makes clear, he does think vices have value. And in fact, he specifically designed this beast to feature a leg vice, even suggesting a model from the American hardware manufacturer Benchcrafted.
In addition to the leg vice, Schwarz also suggests a Benchcrafted swing-away seat and an iron plane stop. So, I ordered the full set. Despite a snafu with the company initially sending me the wrong items, I eventually received a hefty box of the correct hardware and last weekend I set about getting it all installed.
With the bench still in pieces, I screwed two metal plates into the recessed mortises I had cut into the leg and chop, which is the part of the vice that moves. These plates serve to slightly pitch or toe-in the top of the chop towards the leg so that the vice “pinches” at the top when closed.
It was good that I hadn’t yet assembled the bench because when I went to add the plates, I discovered my mortises were slightly too small. Fixing that with a chisel was easy when the bench was still in pieces, but would have been dreadfully difficult if it had been assembled.
Now that the fit was verified, it was time to actually assemble the entire bench for real. With the top still upside down on my assembly table, I started by reassembling the legs and stretchers, adding liquid hide glue, and lightly tapping the leg/stretcher drawbore pegs until they pulled things together. I spread more glue all over the top’s mortises and the leg’s tenons and then sunk the legs into the table top. I then tapped the leg/top drawbore pegs until they tightened things up. Then I pounded every drawbore peg until they were either flush or could be driven in no further. I wiped away any glue drips.
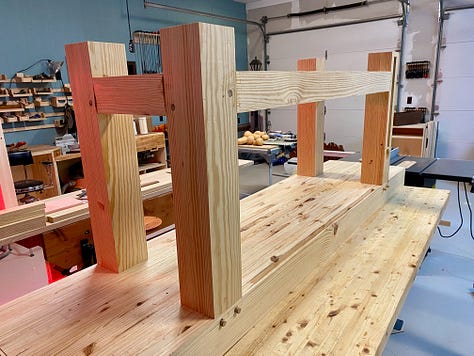
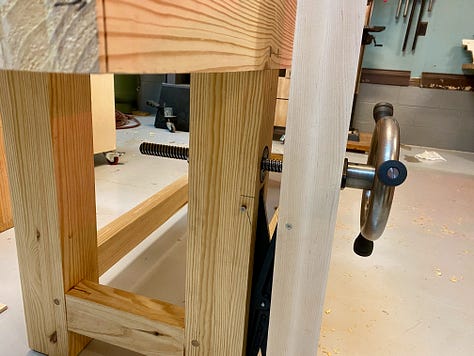
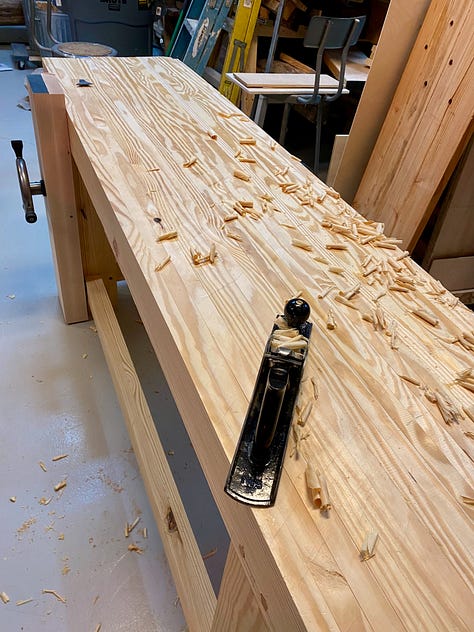
Table Flipping
With the bench fully assembled and weighing more than 300 pounds, I carefully slid the bench toward the edge of the table it was on and swung the legs down toward the floor. Gingerly, I lowered the bench until it pivoted down and slipped off the table with a thud. It landed on all four legs and I managed to stay on my two without injury.
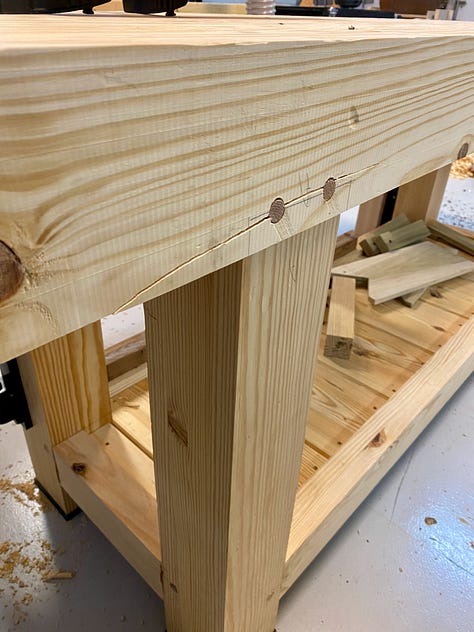
Now that the table was upright and on the floor, I used my Japanese pull saw to trim the protruding pegs flush. It was then I noticed a large crack in the table top near one of the rear legs. After a thorough inspection, I decided that while the split wood was, as they say, unideal, it didn’t appear to be fatal to the bench. Everything still seemed sturdy and tight. With a sigh of relief (and perhaps an embrace of my ignorance about the full extent of the damage), I turned my attention to the vice.
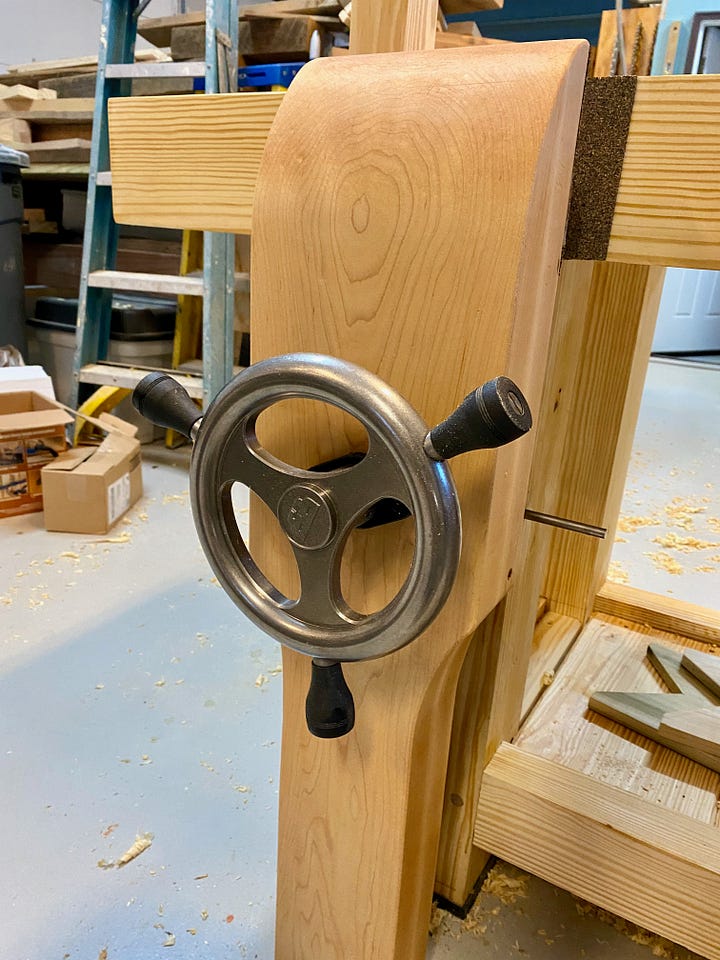
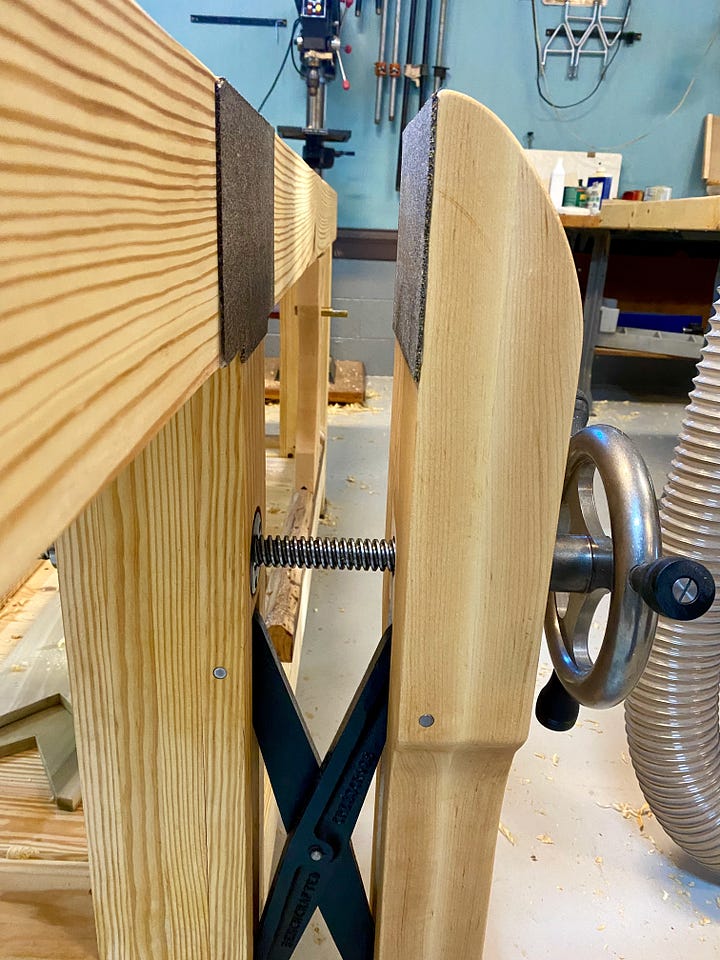
Following Benchcrafted’s directions, I centered the vice’s long, heavy screw on the leg and chop holes and screwed bushings in place. The vice also features a criss-cross mechanism below the long screw in order to support the chop and keep it from racking. This mechanism rides on the aforementioned metal plates and is held in place with pins that run through the sides of the leg and chop. I inserted them and the criss-cross mechanism, trying valiantly (but perhaps not completely successfully) to keep everything perfectly aligned for butter-smooth vice operation. I ended up slightly less than butter-smooth. More like yogurt-smooth.
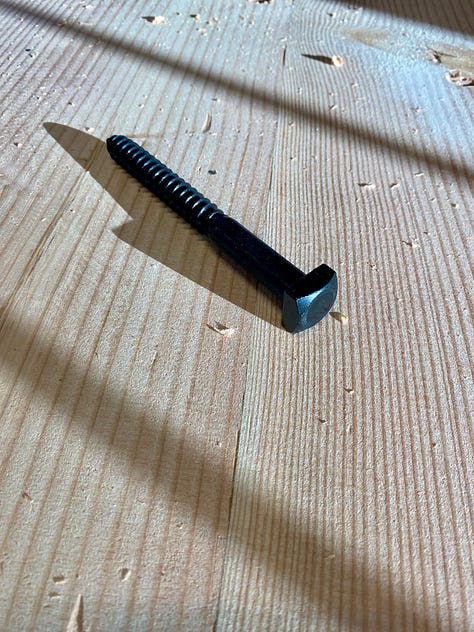
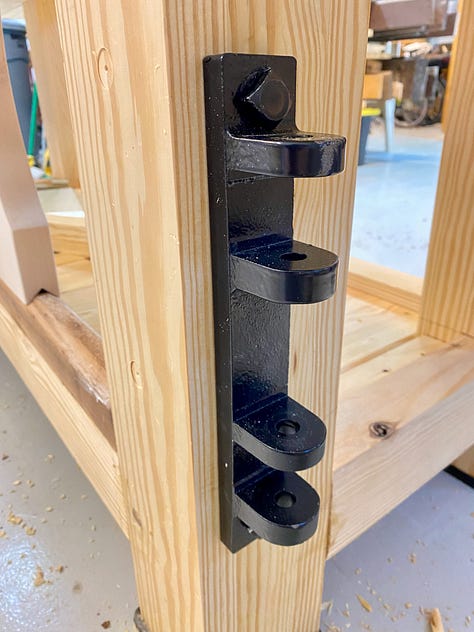
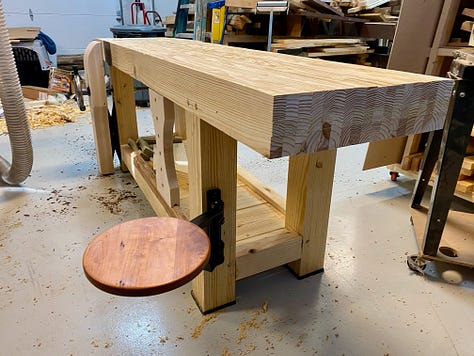
For the seat, I retrieved the three-panel plank I had previously glued up and cut it into a perfect circle using my router and a template. After sanding it and rounding over the edges, I stained it and then attached it to the Benchcrafted hardware with three screws. To attach the entire unit to the bench, I bought some beautiful five-inch-long black iron square-headed ½-inch lag bolts from Blacksmith Bolt. I drilled two pilot holes into the side of one of the legs and then screwed the seat in place.
The sliding deadman was next on the agenda. I had already cut a mortise into the underside of the bench. Now I needed a rail for the deadman to sit and slide on. I grabbed a piece of salvaged wood (oak, maybe?) and cut it to size. I then twice ripped it on the table saw with the blade tilted to 45 degrees to create an A shape. One more rip, back at 90 degrees, flatted the top sort of like a Pizza Hut roof. Then I glued the rail in place.
I purposely cut the rail about a foot short and glued it in place so that there was a gap next to the vice before the rail started. I did this so that it would be easy to insert and remove the deadman if I wanted.
I then marked where the deadman would need to sit on the rail when its tenon was inserted into the mortise, and then cut a V into the bottom of it. The V of the deadman rides on the A of the rail, see? It’s all very clever.
Adding Style
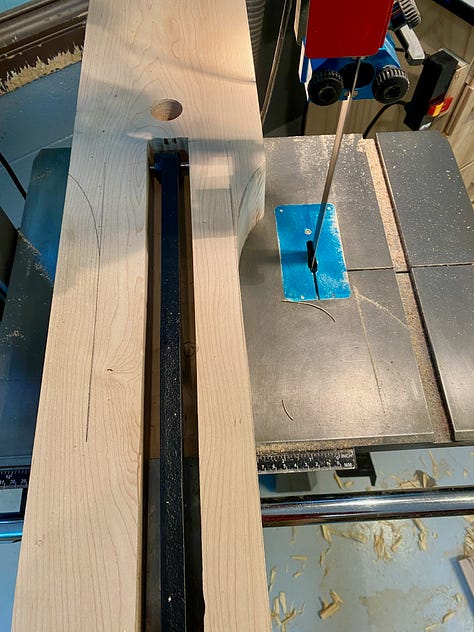
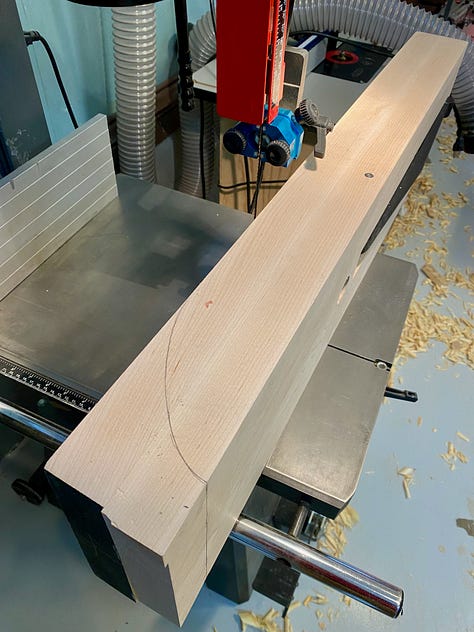
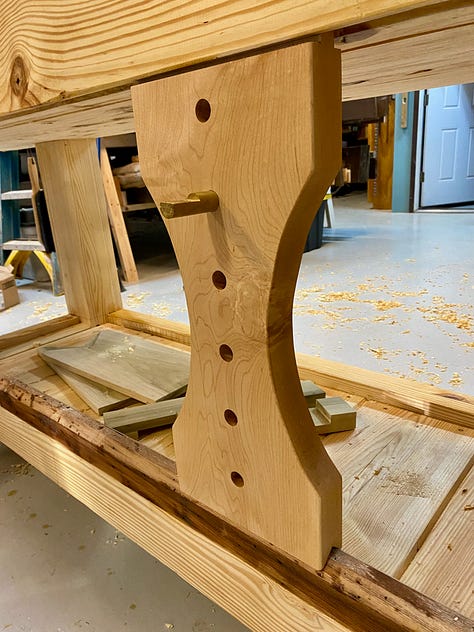
I was getting close to the end now. To pretty up the vice, I marked where it overlapped with the leg and then removed it from the bench and made some cuts on the bandsaw to give it a more pleasing shape and to even its top with the bench. Similarly, I cut handsome hourglass curves into the sliding deadman. I rounded over the edges on both pieces and sanded them smooth and then reinstalled them.
The jaws of the vice could be left as plain wood, I suppose, but better is a liner that will prevent marking on whatever is being clamped. Plus, a good liner can add more grip to the jaws. Benchcrafted includes just such a liner in the form of two sheets of rubberized cork it calls “crubber,” which I think is also a Saturday Night Live fake product. To adhere the crubber to the vice jaws, I mixed up some epoxy, spread it all over the crubber and then tightened the vice down with a wax paper-lined board sandwiched between. The vice served as its own clamp until the epoxy dried. Then I trimmed the crubber flush with the edges.
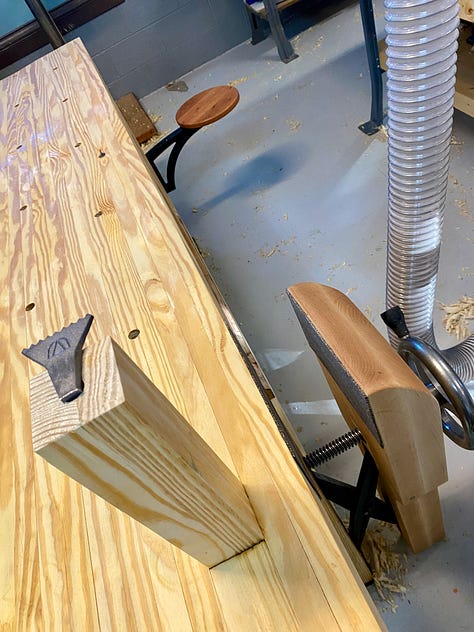
Next, I cut a handful of accessories — a doe’s foot, which is basically a plank with a V cut into one end; a tool rack that I glued to the backside of the bench; and some bench hooks made from scrap wood.
Under the bench, attached to the stretchers, is a shelf made from narrow cleats and 9-inch-wide planks. I glued and nailed the cleats in place and then cut the planks to size, adding a chamfered edge to each as a pretty detail. Then I screwed them into place. The shelf provides a handy storage spot for the accessories I just made, in addition to adding another 50 pounds or so to the bench’s weight. The more weight, the more stable the bench is.
I also needed to square off the ends of the top. When the bench was still inverted on my assembly table, I had used my track saw to cut partway through the top, but the blade was nowhere big enough to slice entirely through. Now with the table the right-side up, I lined up my track saw to cut through on the topside. Even then, the blade couldn’t get deep enough to meet up with the first cut. So then I took out my hand saw to finish the job. Whatever unevenness remained, I sanded away with a belt sander.
The Finish Line
I was almost ready to apply finish, but before I did, I needed to ensure the bench top was flat (or as close to flat as I could get) and drill a series of dog holes into it. To flatten the top, I reached for my hand planes and got busy. It’s a good workout, hand planing, and I definitely felt it in my shoulders the next day. When the planing got tough, I stopped and sharpened the blades and then got back to work. Shavings littered the floor.
After a while, I felt like I got the top about as flat as I could. Then it was time to drill a series of holes. My holdfasts are ¾” in diameter, so that’s the hole size I needed to drill. It took a moment to get over the mental block of drilling holes into this top I had worked so hard on, but once I did, I plowed through the work. Ideally, you want each hole to be perfectly perpendicular to the top. That’s hard to do, though, so I built a jig with ¾” metal spacers to help maintain the perfect angle. But that proved too difficult to make work, so instead I used a forstener bit to start each hole, since that makes such a clean cut in the top, and then I switched to a long auger bit to drill the rest of the way through. I also added holes to the sliding deadman and to the front right leg, in order to handle long pieces and to store my holdfasts.

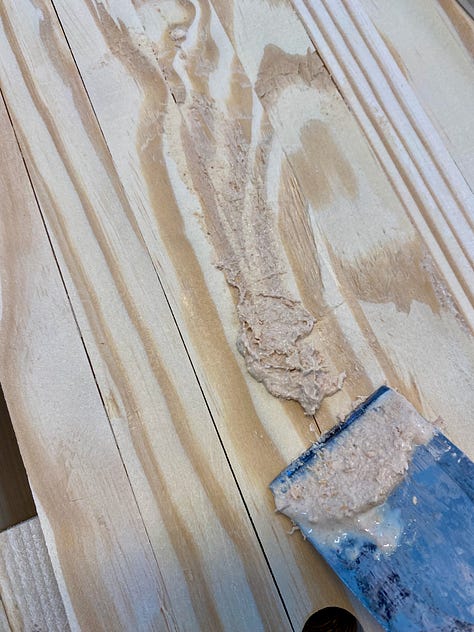
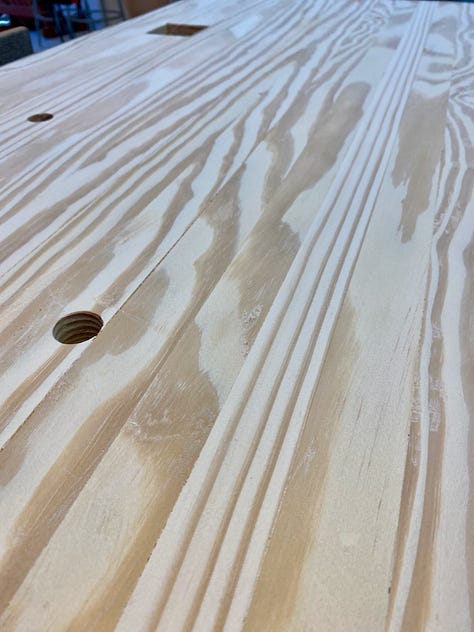
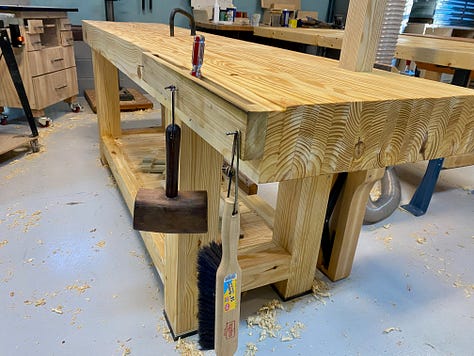
With the holes in place, I was ready to apply finish. Except, as I surveyed the top, I decided there were too many large, unsightly gaps between the laminations. I was embarrassed and could envision the Lord of Lamination, Chris Schwarz himself, scolding me for my insufficiently clamped glue ups. So, I mixed up some wood glue and sawdust and went about filling all of the gaps. Once that dried, I sanded it down to restore smooth flatness to the top. It wasn’t perfect, but I felt it was good enough to proceed, shame notwithstanding. Finally, I sanded all of the bench’s edges to ease their sharpness.
Friar Finish suggests a homemade concoction of ⅓ paint thinner, ⅓ spar urethane, and ⅓ boiled linseed oil as the perfect bench ointment. I did just that and liberally spread it all over the bench top, the vice chop, sliding deadman (but not the rail, which I waxed to enable smooth motion), and even the bench legs, even though Schwarz says that’s not necessary.
Finally, I pounded the plane stop into a square column that itself rests inside the square planing hole I made in the top during the very first glue-ups. Then I took a step back and realized I was done.
Unlike, say, a bookshelf, which isn’t really done until it’s moved into place and loaded with books, the workbench is complete almost suddenly. It feels anticlimactic and abrupt. And, if I’m being honest, my feeling is perhaps less of accomplishment than it is of regret. Oh, how I wish the laminated top didn’t have any gaps at all. Argh, the vice action is smooth, but it’s not smooth. I intended the edges to be knot-free, but I mixed up my boards. Hrmph.
Maybe I could do better if I made it again. Certainly I’d do better. I’d learn from my mistakes and (hopefully) not repeat them. Maybe I’d even make the entire bench out of hard maple instead of southern yellow pine. Sure, it’d triple the cost of the wood — from about $350 to close to $1,100, but damn, that’d be a fine workbench.
It does raise a question, though, about what this bench is worth. Adding time and materials and other costs, I’d say at least $3,000? That’s probably low, actually, and yet I can’t imagine someone paying that much for it. Then again, Benchcrafted itself sells completed benches starting near $3,000, delivered, and up to $5,700 for different models. But those are made from hard maple and are perfectly machined. Mine is neither.
Maybe I will make one in hard maple some day, just because that seems like a fun thing to do. For now, though, I need to move on to other things. Luckily for me, I have a brand new workbench to make those things on.
So what’s next? I have some notion, but maybe you should tell me. Have an idea, a suggestion, or a request? Let me know.

