Mudroom, Chapter 1: Big Boxes
My favorite projects are those where I get to work with friends and learn new skills. This project had both.

As much as I enjoy working on projects in the shop, there's one thing I enjoy much more: working on projects in the shop wth friends. So I was delighted when one of my long-time friends texted me to see if I'd help him build a set of built-in cabinetry for his mudroom.
"Absolutely," I wrote back. "It's not something I've done much of, but I'm sure we can figure it out," I added. If he was game, I was game. And to my joy, he was game.
My friend is a designer/illustrator, so he had drawn up some plans in Adobe Illustrator and sent them over. We talked through some of the issues — among them, a plumbing stack in one corner of the room meant there was a six-inch chase in one corner where the cabinetry was meant to go.


After much discussion, we settled on a plan: build the main cabinet boxes first. Then we'd build a platform for them to sit on. We'd then build face frames for the front of the cabinets. And finally we'd build doors and other parts. We'd build the pieces in my shop and then haul them to his place for installation.
With this plan in place, it was time to start on the cabinet boxes.
We figured the boxes would use up three sheets of ¾" plywood and one sheet of ½". At first we intended to build six boxes — two tall boxes for each side, with two smaller boxes that would sit on them, plus two boxes for the center section. However, after thinking it through a bit, we realized we should make the two end boxes the full height so that the sides would be unbroken.


Furthermore, due to the plumbing stack in one corner, we needed to make the left box shallower than the others, but with the right side extending the full depth. In other words, it would need to wrap around the plumbing stack, which would be hidden behind the case.
We made our measurements and got cutting. The track saw makes quick work of cutting down plywood and every time I use it, I'm grateful for it.


Once we cut the plywood down, it was time to make dadoes and rabbets for the backsides of the boxes as well as the spots on the side cabinets that would separate the upper section from the lower section. We also cut pocket screw holes in the tops and bottoms.
With everything cut, we moved to assembly, applying glue and screwing pieces together. Only then did we realize we screwed up one of the panels — essentially cutting the dado into the bottom section rather than the top. This despite my friend previously saying, "you sure we're cutting that dado in the right spot?" D'oh! (or, Da-d'oh!)


Luckily, we had some spare plywood and remade the side and re-cut the dado correctly.
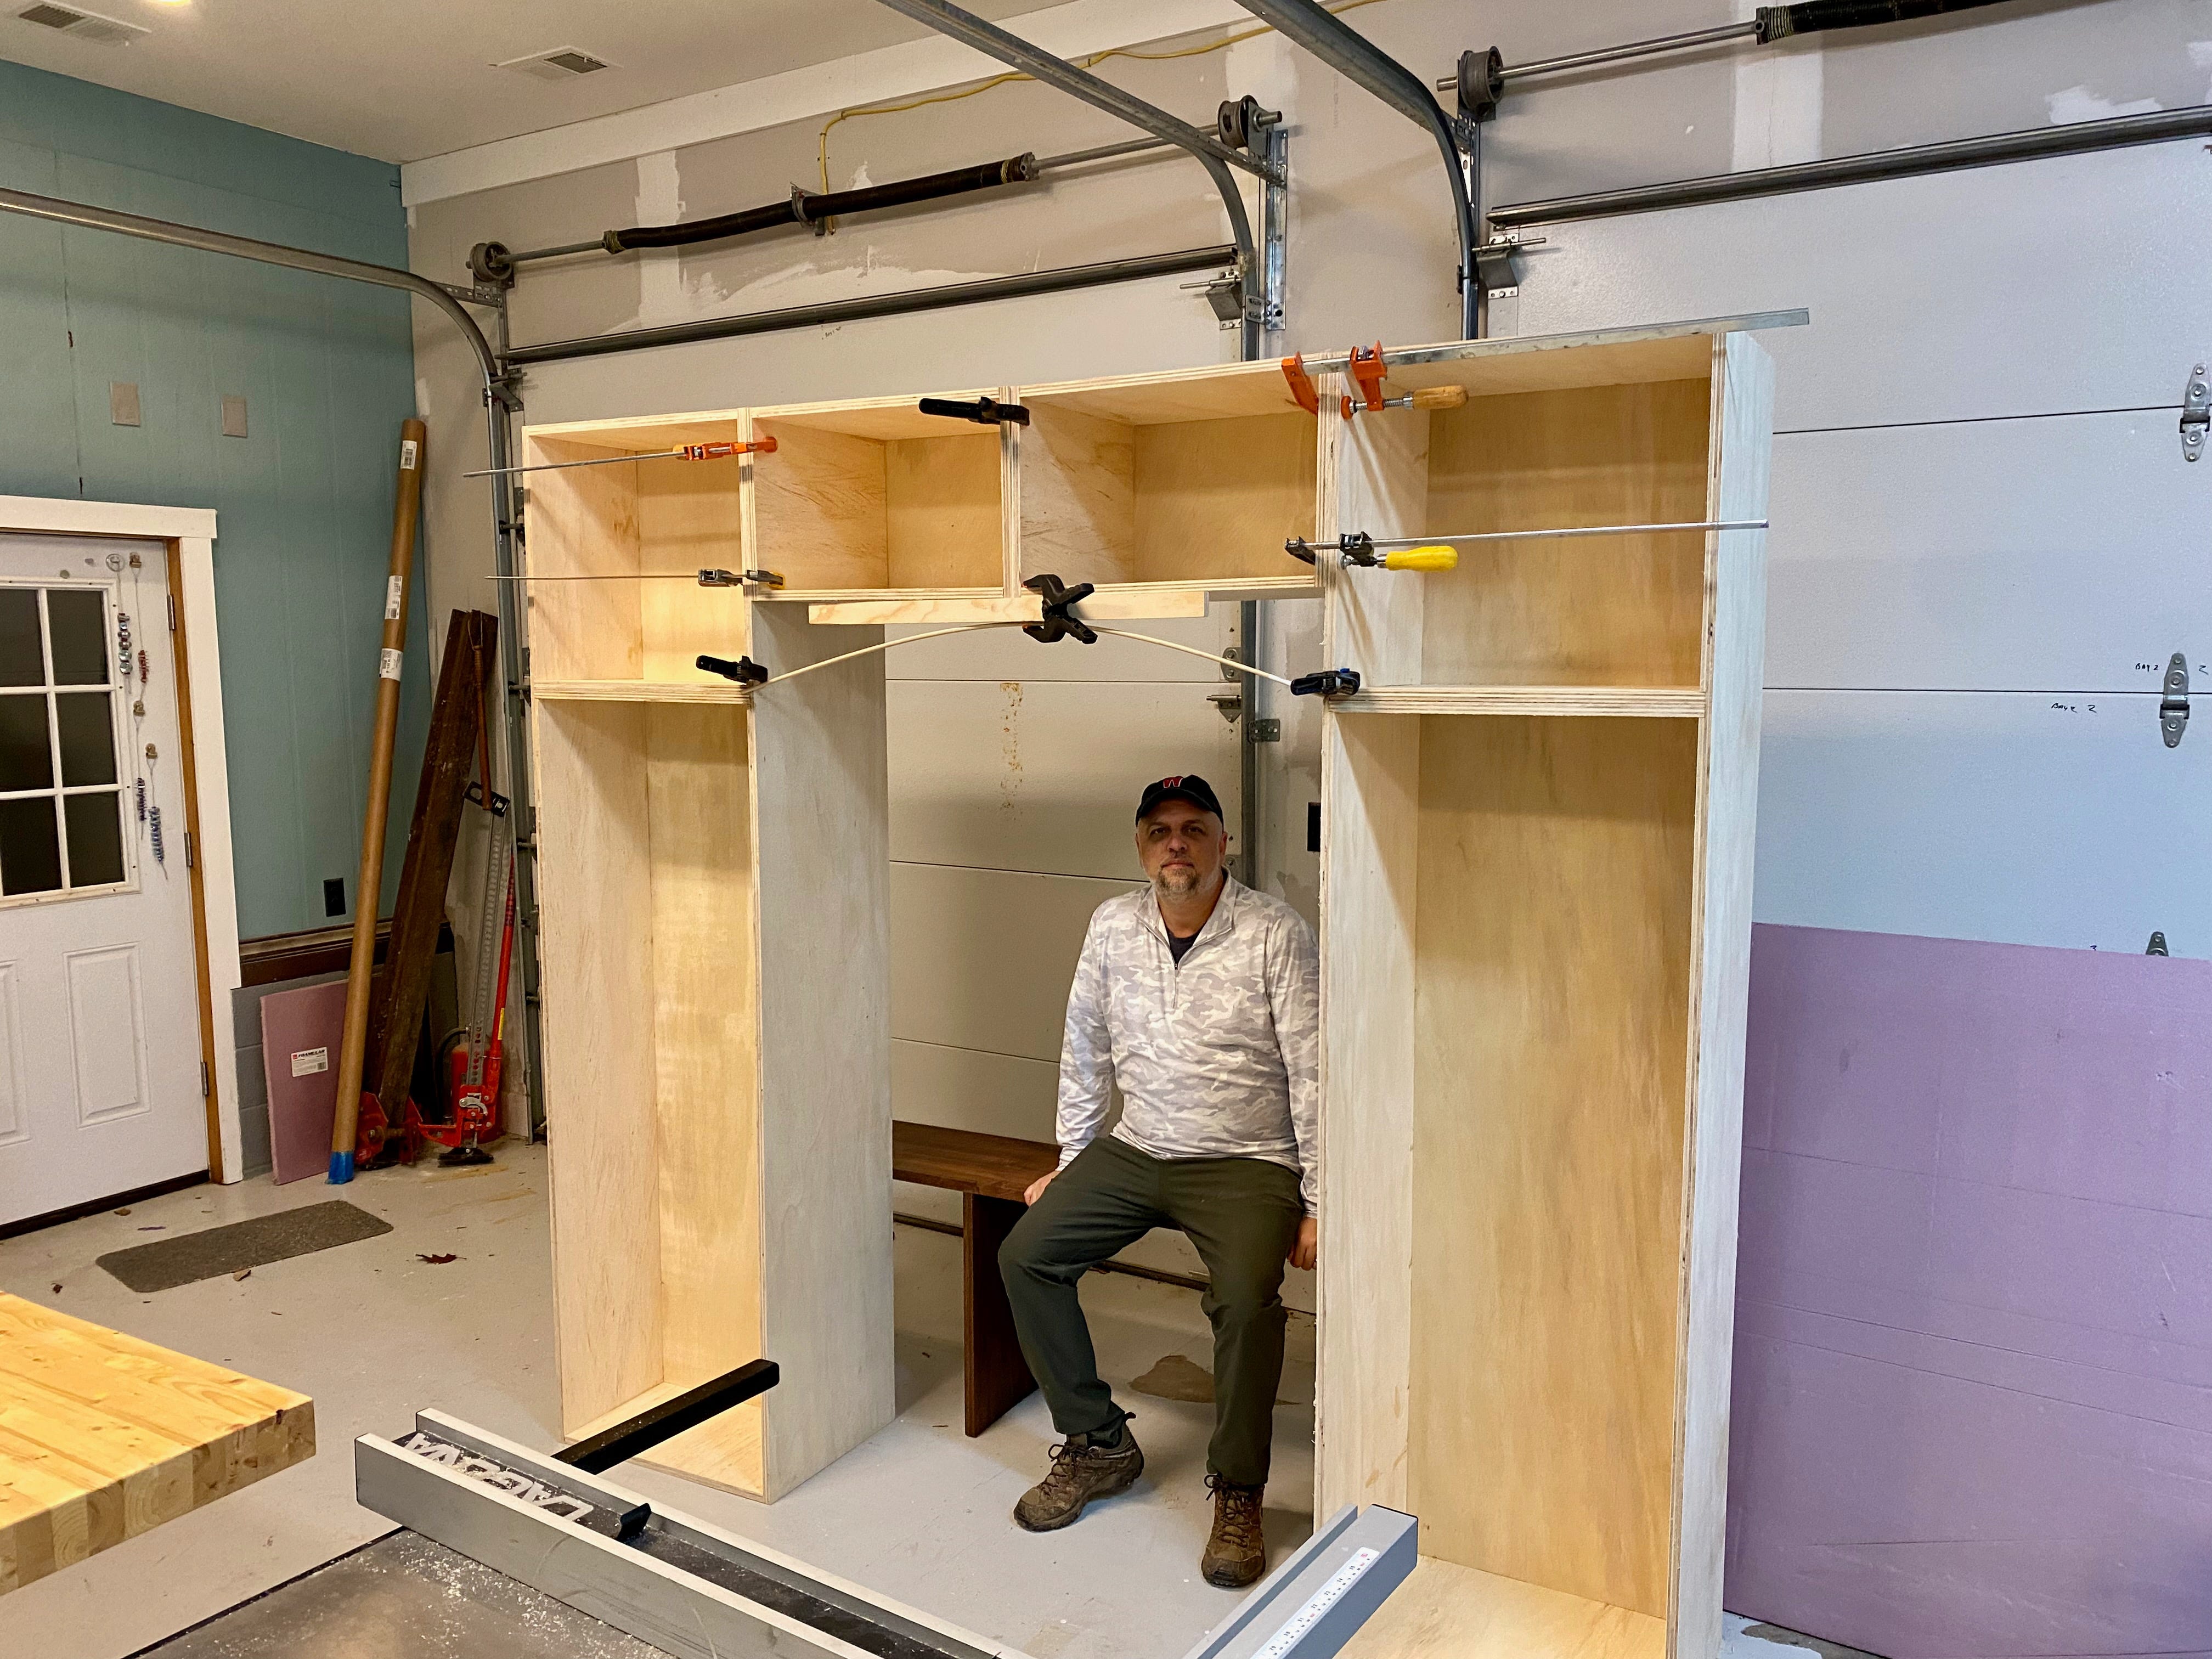
With the boxes built, we clamped them together to see how they all held together. They looked great.
Then I realized we made another mistake. My friend wanted to add pin holes for shelves, which is easy enough to do. In fact, I have a jig for it. But, the jig is intended to be used before the back is added. Argh. A problem for another day, I guess.
Meanwhile, with the cases built and clamped together, I pulled out a dowel that I clamped in to mimic the arch my friend wanted as a detail. It was easy to see how this would all come together. But actually getting it to come together would be a chaallenge for another day. And another blog post.