Cleats and Clamps and More
My attempt to bring some order to the workshop
There’s a certain kind of woodworker out there who seems, from what I can tell, to have built a shop in order to build shop furniture to put in their shop so that they can properly store all of the tools they need to build their shop furniture. It has a rather ouroboros quality to it, if you ask me.
Now look, shop furniture is important. You need a place to store your stuff. Organization matters and high-quality work nearly always proves its value. But I’m also not going to spend my time stressing about beautiful shop furniture when what I really want to do is make other stuff like benches, trays, bookcases, and more.
Or, as a friend put it to me when I defended my “get-r-done” shop furniture mentality, "Yeah. Everyone has a different aesthetic.” He didn’t mean it as a compliment.
Nevertheless, at some point — perhaps it was when I was tripping over clamps or failing to find the right drill bits — I realized I needed to take a moment and work on my shop organization. My clamp caddy, which served me well in a smaller shop, always seemed to be in the way. My drill bits were spread out all over the place. And my hand planes were piled up on some rolling shelf always out of reach.
To address these problems, I decided on a three-pronged approach: new clamp racks mounted to the shop walls; French cleats to hold my planes; and a big new rolling cabinet with giant drawers to hold more stuff.
Lots of Clamps, but Never Too Many
The clamp racks were first on the list, and not just because they were the easiest to build. I have a ton of clamps (but not too many; you can never have too many clamps) and they were often in the way. So I looked at some clamp rack examples online and found more than a few that were, in my opinion, severely over-engineered. Beautiful, yes, but way too fussy for me.

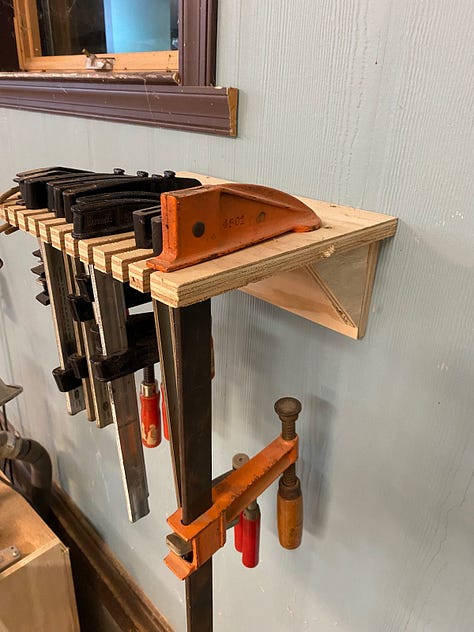
For my purposes, all I really needed was two pieces of plywood connected at a 90-degree angle. One piece would be flush against the wall (and screwed into the wall) and the other would extend from the top of it. That top piece would have slots cut into it for the clamps to nestle into and hang from. For additional support and strength, I’d add two right triangle blocks to each end of the shelf. Simple.
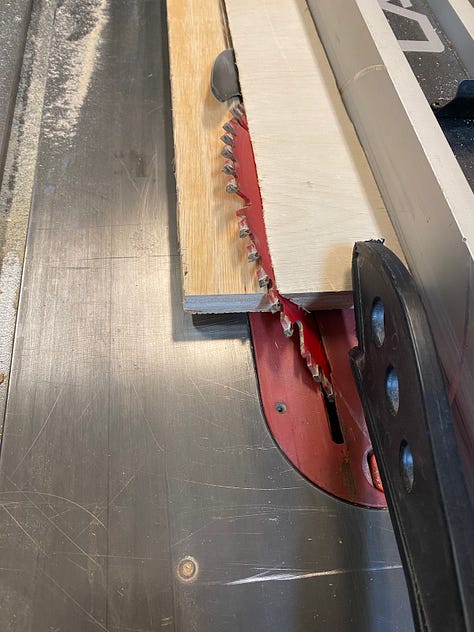
To get started, I sorted through my pile of scrap wood and found plenty of suitable candidates. Then I cut slots into each “shelf” with my dado stack on the table saw. After adding the backing plate and end supports, I screwed each shelf to the wall, aiming to drive screws into studs. Once I was done, I started hanging clamps. It worked beautifully.
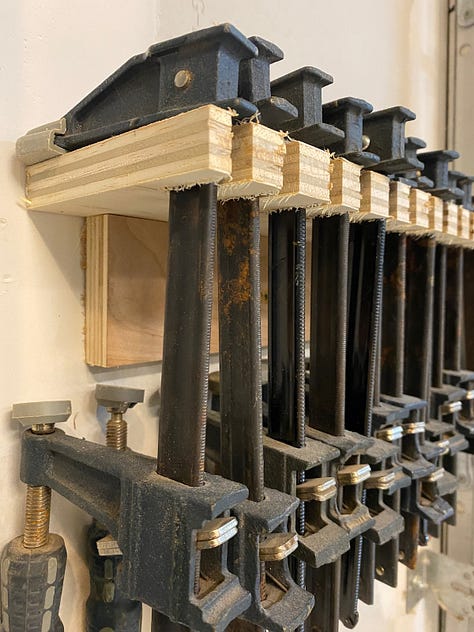
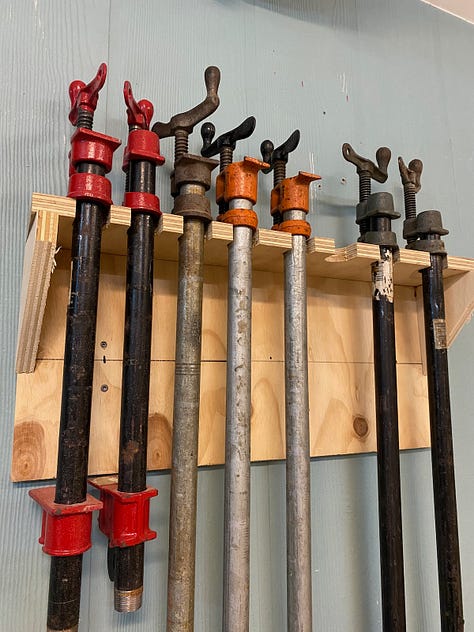
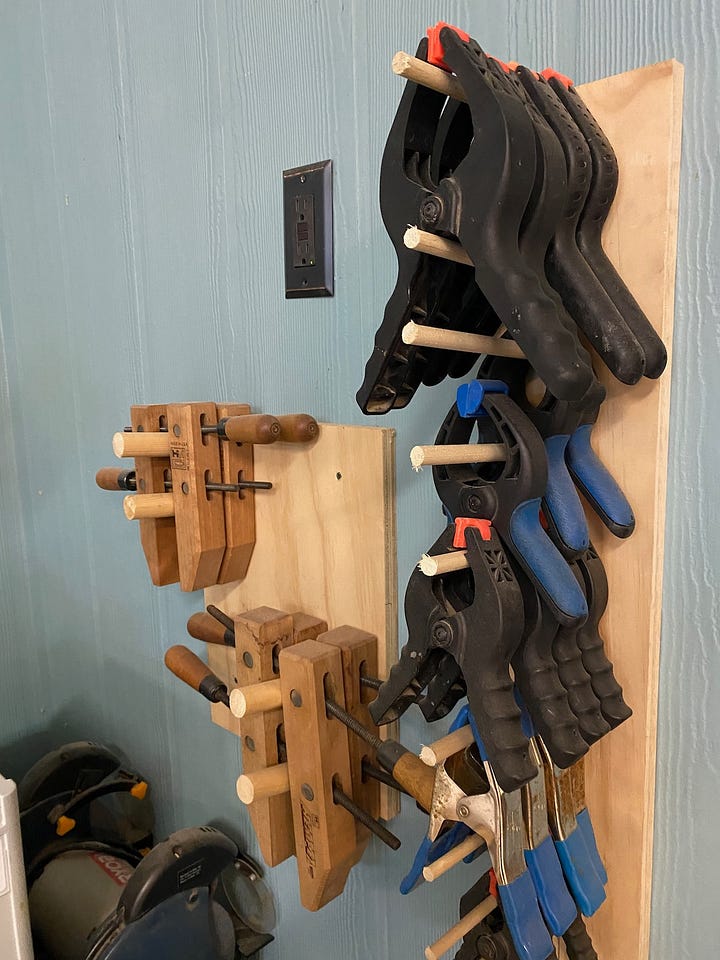
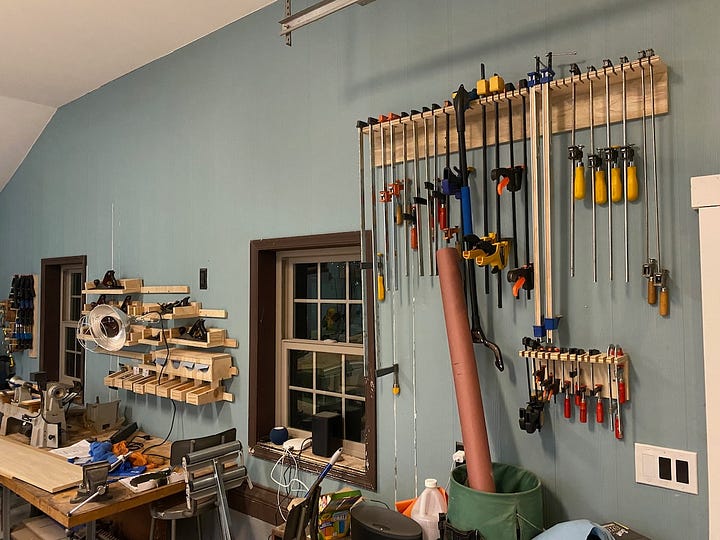
Some clamps, like pipe clamps or spring clamps, couldn’t work with this design, so I made special versions for them. The pipe clamps had semi-circle cutouts instead of slots. The spring clamps sat on dowels embedded into the backing boards. Other oddball clamps would have to go in a drawer, but at least most of them were now neatly hung and out of my way.
A Place to Park Planes
I’ve written before about my time cleaning up old planes — something I wouldn’t mind doing again — but for now, what I really needed was a good place to put my planes. And in this case, I probably did take a little inspiration from all those YouTubers who show off their shops and tools. I mean, let’s face it, planes are kind of beautiful. And more importantly, I wanted to make sure they’d be in a place where I’d be inclined to use them. If they were hidden in some drawer, there’s a good chance I’d forget they were there.
For this project, I decided to employ the “French cleat,” which is a method of mounting things to walls using interlocking 45-degree angles.Here’s how it works: take a strip of plywood and rip it at a 45-degree angle. Take one of the strips and screw it into the wall (at the studs) so that the angle is on the top edge of the strip and the slope of the angle goes down into the wall. That is, the high point of the angle is out toward the room and the low point is against the wall.
The second strip of plywood, then, becomes the backing plate for whatever you want to hang. Attach the item — in this case, a little shelf made for each plane — to the plywood strip so that the angle is on the bottom of the strip. You want the high part of the angle against your workpiece and the low point on the outside.
With this configuration, you can then set your “shelf” on the cleat attached to the wall and the two angled pieces will interlock, holding your item.


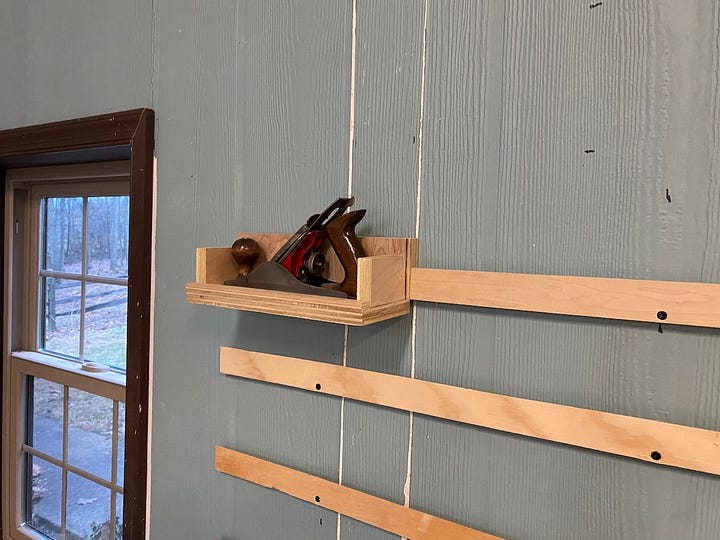
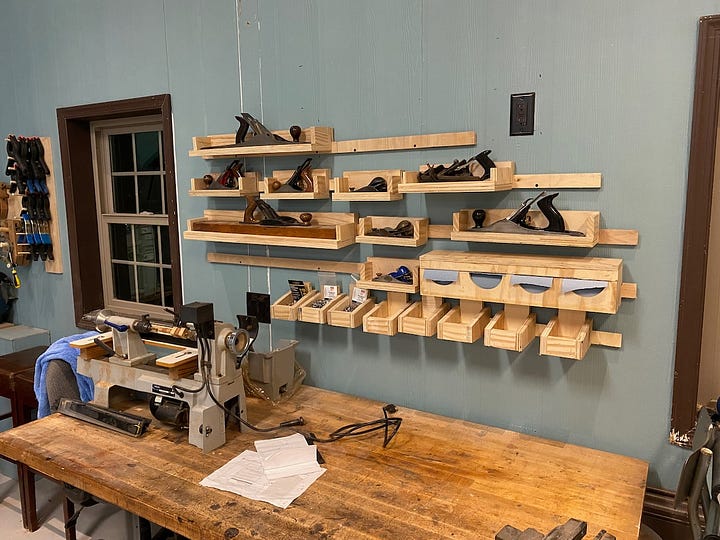
Not only that, but if you have several cleats and several “shelves,” you can easily move them around. It’s really quite clever.
With this method, I was able to quickly put together shelves for every plane, plus several little boxes to hold screws and other knickknacks. I could easily see putting French cleats everywhere to hold all kinds of items.
Then I turned my attention to a new big-ass rolling cabinet. But that’s for another day.

