
Basement Break for Porch Swing
A friend's request gave me a good reason to get out of the basement for the weekend.

Recently, a friend asked me if I could build her a porch bench swing to replace one that had broken. I happily agreed and started looking at different designs online. In my search, I found three general designs that I called the chunky DIY “farmhouse,” modern “roll back,” and English garden.


I asked my friend what she preferred, and she picked the more elegant “English” style with vertical slats.
The only problem was that I couldn’t find any plans for such a bench. Could I figure it out from the photo? It was worth a shot.
I started with two “requirements.” First, since it was replacing an existing bench, I knew it needed to be four feet wide. Second, she wanted to keep the cost down, so I’d make it out of pine, which she could later stain or paint as she wished.
To figure out how much wood I’d need, I estimated the height and depth of the bench and calculated that I’d need a single 8-foot 2x6 for the side pieces and eight 8-foot 1x4s for the seat, back, and arms. I also needed some waterproof glue, a box of screws, and some eye bolts.
The first challenge came in cutting the seat supports — the two side (and one middle) pieces on which the long horizontal slats would sit. These pieces needed to have just the right curve to make it a comfortable seat. Lucky for me, I had a seat template from some Adirondack chairs that I could use to draw out a comfortable curve.
I also needed to consider the angle of the seat to the backrest. I searched online for guidance and learned that 105 degrees is considered comfortable. Since I planned to have the seat support butt up to the backrest support, I figured I’d halve that angle for both pieces so that together they’d make 105 degrees.
With that, I cut the seat supports on the bandsaw and sanded them to be identical. Then I set them on the ground and sat on them to see if they were indeed comfortable. They were!
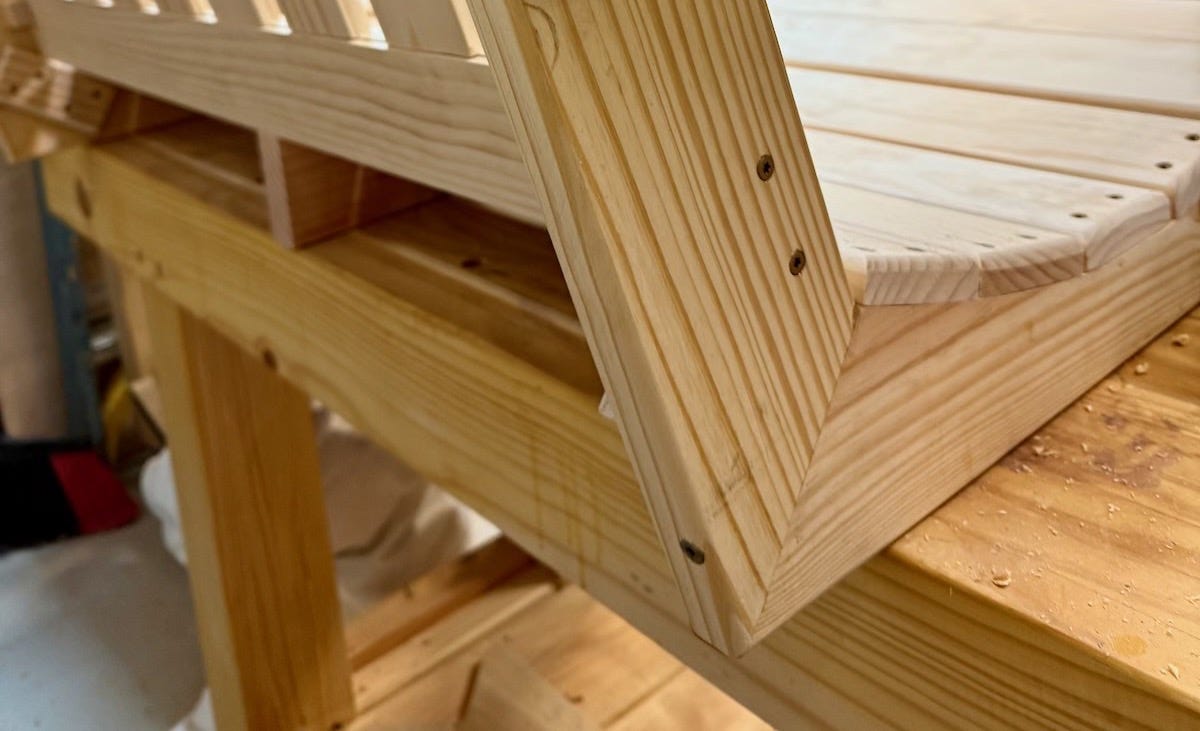
Next, I added the two vertical pieces that would hold the backrest. I cut them to match the angle of the seat supports (giving me that 105-degree angle). I also added a block on the inside of the angle to provide much-needed additional structural support.
Then I cut the slats that would screw into the seat supports and form the bottom of the bench. When it came time to screw them into the supports, I drilled pilot holes with countersinks so the screws would sit nice and flush.

Time to make the backrest. For this, I wanted the vertical slats to fit in the horizontal upper and lower pieces via mortise and tenon. However, I didn’t want to cut 18 mortises in the side of the two thin upper and lower boards. So instead, I decided to cut a long groove into each rail for the vertical slats to sit in.
However, doing this could leave a gap in the groove between each slat. To address that, I cut small, thin pieces to push into those open recesses. I also wanted the vertical slats to be slightly thinner than the upper and lower rails, so I planed them down from ¾-inch thick to ½-inch thick.
I dry-fit all the pieces, making sure to keep the slats evenly spaced. I marked everything in pencil and then got out the glue bottle to put it all together. I was pleasantly surprised that it worked out just as I planned. Was it perfect? No, of course not. But did it do what I was aiming for? Absolutely.

With the backrest built, I set it between the vertical supports and realized I had a problem: the backrest was taller than the vertical supports, which looked really silly. After swearing at myself for a few minutes, I came up with a rather ingenious solution: I’d cut curves into the top of the backrest. For this, I grabbed a set of French curve templates and drew cut lines. I made the cuts on the band saw, sanded and rounded over the edges, and then set the backrest back into position. It absolutely solved my problem.

I glued and screwed the backrest into position, adding some braces behind it to help give it additional structural support. Now the only thing left was to build the arm rests.

For these, I again turned to my Adirondack templates. Using them, I drew out the shape of each arm rest from a 2x6. I also cut support pieces. After sanding and rounding over the sharp edges, I test fit everything. I also decided to copy a design feature I’d seen on various swings, which was to drill a 1-½-inch hole through the arm rest for the support rope/chain to thread through. I rounded over the edges of that hole and then glued and screwed everything into place. Then I added the final elements: eye bolts that the support rope/chain would attach to.

And that was it. No plans. Just reference photos. I sat in the bench and verified its comfort. I was pleased. Two days of work and just $170 in materials. Not bad.
All that’s left is to deliver and install it. My friend will stain or paint it herself.
 porch swing bench.")
The bench is quite beautiful. I wish I was more profound since I went thru the tech security to write this. :-)
That’ll be my memoir title: “Glued and Screwed”
I appreciate you reading!